
I love how braided styles can work for every curl pattern, and I’ll walk you through choosing the right braid, prepping your hair, and keeping your scalp happy without drama.
Expect practical tips on tension, size, and upkeep, plus easy tricks for nighttime care and gentle take-downs that actually protect your edges—stay with me and you’ll have a go-to braid plan that fits your texture and lifestyle.
Choosing the Right Braid Type for Your Curl Pattern

When I pick a braid for my curls, I start by looking at how tight or loose the pattern is—because a chunky three-strand sits and shows off big coils differently than micro box braids that thrive on smaller, tighter curls.
I ask: do I want volume, definition, or longevity? Then I match braid size and tension to curl density, keeping technique gentle to avoid stress. I also consider protective styling methods and how different braids can enhance natural texture while reducing manipulation.
Preparing Natural Hair for Braiding: Cleansing and Conditioning

Before I start braiding, I always give my scalp a thorough cleanse so product buildup doesn’t sabotage my style.
Then I use a deep conditioning method—steam, a hot towel, or a rich mask—to restore moisture and slip for smoother sections.
Believe me, spending time on this prep makes the braids last longer and feel way better.
Protective styles help retain length and reduce manipulation, so I often choose them when I want to promote length retention.
Pre-Braid Cleansing Routine
Although it might seem like a chore, I always treat pre-braid cleansing as the most important step—clean hair makes for neater, longer-lasting braids and happier scalp days ahead.
I shampoo gently, focus on the scalp, rinse thoroughly, and follow with a lightweight, detangling conditioner.
I detangle with fingers or a wide-tooth comb, towel-blot, and let hair reach damp before sectioning for braids.
Natural hairstyles celebrate texture and versatility, so I often choose styles that highlight my hair’s natural beauty.
Deep Conditioning Methods
Giving your hair a serious drink of moisture is the secret sauce for braids that look fresh and feel comfortable, so I reach for a rich deep conditioner or mask after shampooing.
I detangle gently, apply heat with a cap or steamer for 20–30 minutes, rinse with cool water, then seal with a lightweight oil. My braids last longer and feel kinder to my scalp. I often choose styles inspired by classic cornrow updo techniques to keep my look polished and secure.
Sectioning and Parting Techniques for Neat Braids

When I start a braid, I treat sectioning like establishing the rules—crisp parts mean tidy braids that last. I use a rat-tail comb for precise lines, clip away stray hair, and dampen sections for grip.
I work from clean parting to consistent width, labeling tricky areas mentally. Neat sections save time, reduce frizz, and make styling predictable and stress-free. I also like to keep things simple by choosing charming braided hairstyles that suit my daily routine.
Classic Cornrows: Styles and Face Shapes

If you want a go-to protective style that’s both timeless and surprisingly versatile, I reach for classic cornrows—I love how they frame the face and flex to suit any mood.
I suggest straight, curved, or diagonal parts to complement round, oval, or square faces. Small, neat rows slim; wider rows soften. Play with placement near the hairline to highlight cheekbones or elongate the face.
Box Braids: Size, Length, and Maintenance
Because box braids come in so many sizes and lengths, I always start by asking what you want—bold statement hair, low-maintenance daily wear, or something in between.
I recommend thicker braids for quick installs and longevity, smaller ones for versatility. Consider length for weight and upkeep.
I tell clients how often to moisturize, sleep with a silk scarf, and schedule touch-ups to keep edges healthy.
Feed-In Braids for a Natural, Seamless Look

Though they look intricate, I’ll walk you through feed-in braids so you can get that seamless, natural finish without the headache—this technique builds hair gradually, letting extensions blend at the root for a soft, scalp-friendly start.
I’ll show you tension control, hair placement, and how to stagger added strands so your parting looks real, stays light, and feels comfortable for weeks.
Goddess Braids and Elevated Protective Styling

When I want hair that reads fierce and polished without constant fuss, I reach for goddess braids—those chunky, sculpted plaits that make a statement and protect your strands at the same time.
I love how they elevate any look. Quick tips I follow:
- Moisturize before braiding
- Use edge control for sleekness
- Protect at night with silk
- Refresh with lightweight oil
Fulani Braids and Tribal-Inspired Designs

If you want a look that blends tradition with bold detail, Fulani braids are my go-to for days I want pattern and personality without fuss.
I love mixing thin side braids, center parts, and bead accents to personalize the look.
They’re low-maintenance, protect edges, and shift easily from casual to dressy.
Quick tips: prep with oil, keep scalp clean, and refresh edges as needed.
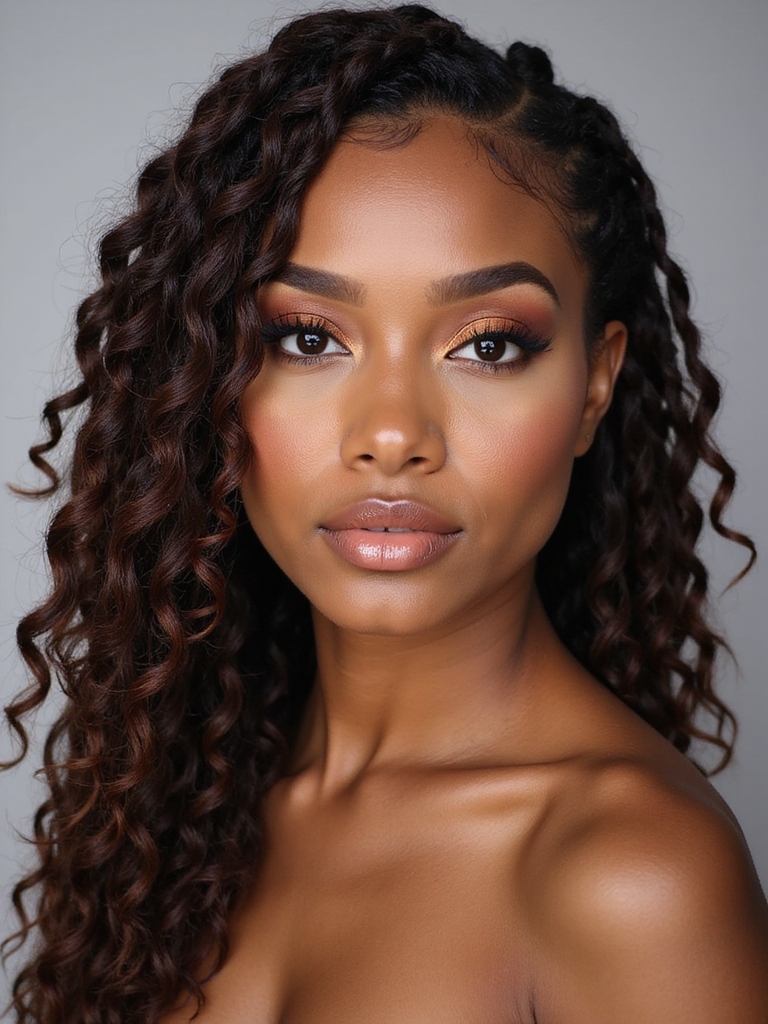
Two-Strand Twists and Senegalese Twist Alternatives

I love how two-strand twists are quick to master and so versatile for natural hair, so I’ll walk you through the simple basics and product picks that keep them neat.
If you want that sleek Senegalese look without the bulk, I’ll show a few lighter alternatives and when to choose them.
Then we’ll cover easy styling tricks and low-effort maintenance to help your twists last and look fresh.
Two-Strand Twist Basics
Let’s jump into two-strand twists — one of my go-to styles for quick, low-manipulation looks that still feel chic. I’ll walk you through basics so you can twist confidently, protect ends, and vary size for texture.
- Start with detangled, slightly damp hair.
- Use a slip-friendly cream or butter.
- Twist away from the scalp tightly but gently.
- Seal ends to lock moisture.
Senegalese Twist Alternatives
Thinking beyond the classic rope twist, I’ll show you easy alternatives to Senegalese twists that give the same sleek, long-lasting look without the heavy tension or long install time.
I love two-strand twists, flat twists, and Havana twists for lighter installs. They’re quicker, gentler on edges, and still super chic — perfect when you want braid vibes minus hours in the chair.
Styling and Maintenance Tips
Because you want your twists to look fresh for weeks, I’ll share simple styling and maintenance tips that keep two-strand and Senegalese-alternative styles sleek without killing your edges or your schedule.
- Sleep with a satin scarf or bonnet nightly.
- Refresh roots with a lightweight oil and gentle mist.
- Re-twist loose pieces, don’t rip them out.
- Low-manipulation styles preserve edges and length.
Knotless Braids for Reduced Tension and Damage

Try knotless braids if you want protective style without the scalp tension — I love how they start with your natural hair and feed in extensions smoothly so there’s no bulky knot pulling at the roots.
They feel lighter, reduce breakage, and let edges breathe.
I recommend looser tension, regular moisturizing, and a pro stylist for first-time attempts to keep things neat and healthy.
Micro Braids and Long-Term Styling Considerations

When you’re ready to commit to micro braids, know that they’re a beautiful, low-manipulation option that demands patience and care — I’ve learned they can last months but also require a plan for scalp health, weight management, and gentle styling to avoid breakage.
- Cleanse scalp lightly, always.
- Moisturize ends weekly.
- Avoid heavy styles that tug.
- Remove by signs of thinning promptly.
Braided Updos and Protective Nighttime Routines

If you want your braided updo to look fresh and last, I’ll show you a few simple nighttime habits that make all the difference: I wrap with a silk scarf, tuck stray ends gently, and sleep on a silk pillowcase when scarves slip.
I also mist lightly with a leave-in moisturizer and avoid heavy products that flatten the style. Quick, easy, protective.
Caring for Scalp Health While Wearing Braids

I keep my scalp happy with a simple, gentle cleanse that doesn’t strip oils and a lightweight moisturizer to stop flakes and itch.
I also watch braid tension and loosen styles that tug, because preventing breakage beats fixing it later.
Stick with these basics and your scalp — and your edges — will thank you.
Gentle Cleansing Routine
Let’s plunge into a gentle cleansing routine that keeps your scalp happy while your braids stay intact—I’ll walk you through simple steps that won’t frizz or loosen them.
I’m practical, playful, and here’s what I do:
- Pre-rinse with warm water to loosen buildup.
- Dilute a mild shampoo and apply at roots.
- Massage gently with fingertips.
- Rinse thoroughly, then air-dry.
Scalp Moisturizing Techniques
After rinsing and freshening the scalp, I keep things hydrated without weighing down my braids—here’s how I do it simply and reliably.
I spritz with a diluted leave-in mix, massage lightweight oil into roots with my fingertips, spot-treat dry patches with aloe gel, and sleep with a satin scarf to lock moisture.
Quick, gentle, and braid-friendly—no buildup, just happy scalp.
Tension and Breakage Prevention
Because too-tight braids are sneakily damaging, I always check tension the moment my stylist finishes a section and again over the first week—if it tugs or throbs, we loosen it.
I also:
- Sleep on a silk scarf to reduce friction.
- Ask for softer parts near the hairline.
- Moisturize edges gently.
- Take breaks between long-term installs to let my scalp recover.
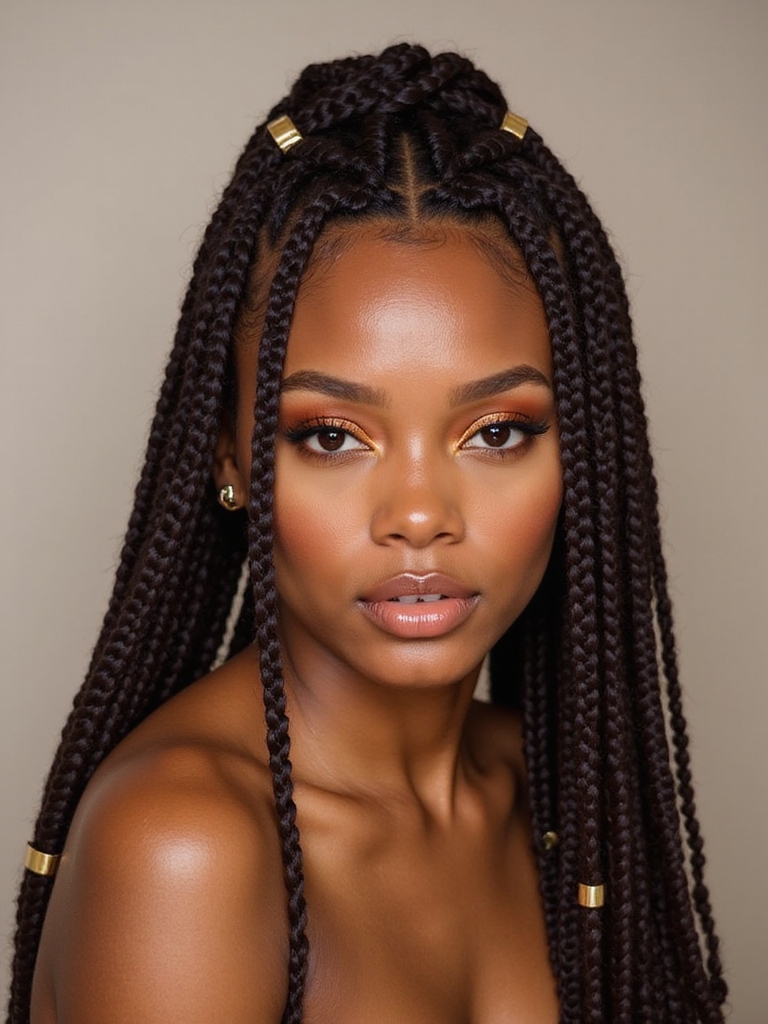
Styling Accessories: Beads, Cuffs, and Wraps

When I want to give braids instant personality, I reach for beads, cuffs, and wraps — tiny details that pack a big punch.
I mix metallic cuffs for edge, wooden beads for warmth, and colorful thread wraps for flair. They’re easy to add or remove, protect ends, and refresh styles between washes.
Try coordinating colors with outfits for a polished, playful look.
Transitioning Out of Braids Without Causing Breakage
If you’re ready to take your braids down, I’ll show you how to do it without turning your hair into a snarl of broken strands — and yes, it’s easier than you think.
I walk you through slow, gentle steps and realistic tips:
- Detangle ends first with conditioner
- Undo braids section by section
- Finger-comb before brushing
- Deep-condition and seal with oil afterward
I hope this guide makes braiding feel doable and fun — regardless you’ve got tight coils or loose curls. Pick styles that match your curl pattern, prep with care, and protect your edges with gentle parting and nightly satin wraps.
Play with beads or cuffs, keep your scalp moisturized, and plan a slow, detangling exit when it’s time to take things down. Treat your hair kindly and your braids will reward you.


