
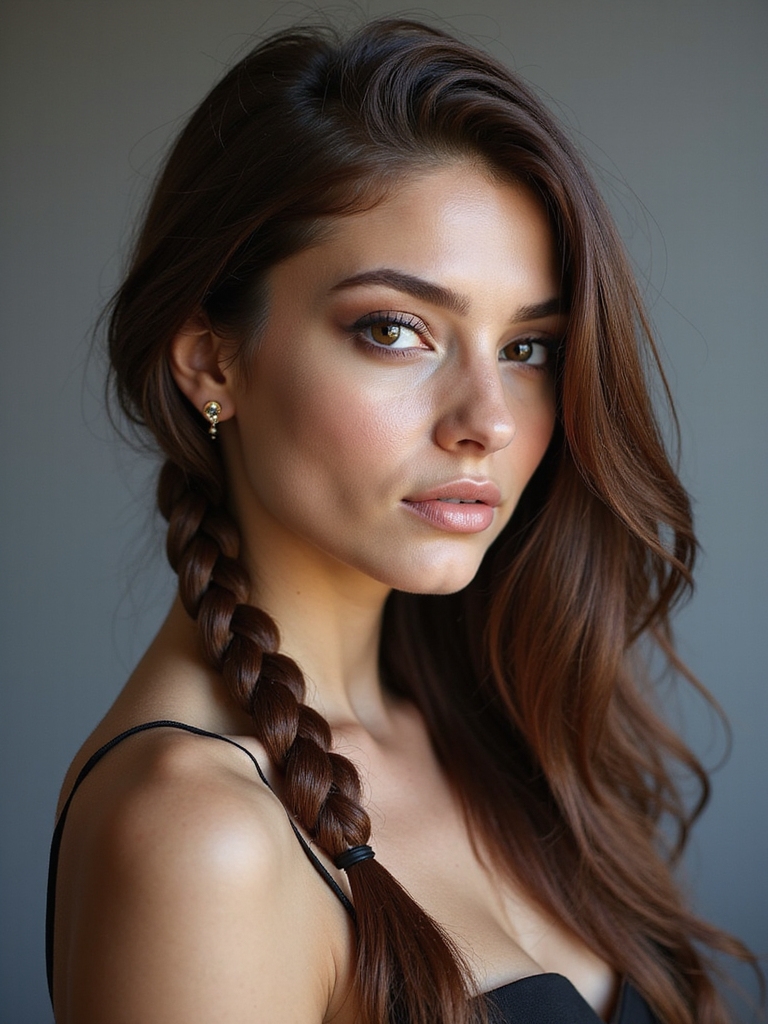
I love how a single braid can turn a plain day into something a bit more stylish, so I’m always reaching for side-braid tricks when I want quick polish with minimal fuss.
I’ll walk you through easy classics—think messy, sleek, fishtail and rope options—plus hacks for shorter hair and ways to accessorize, so you can pick a look that feels effortless and a little luxe, and then make it your own.
Classic Side Braid for Everyday Wear
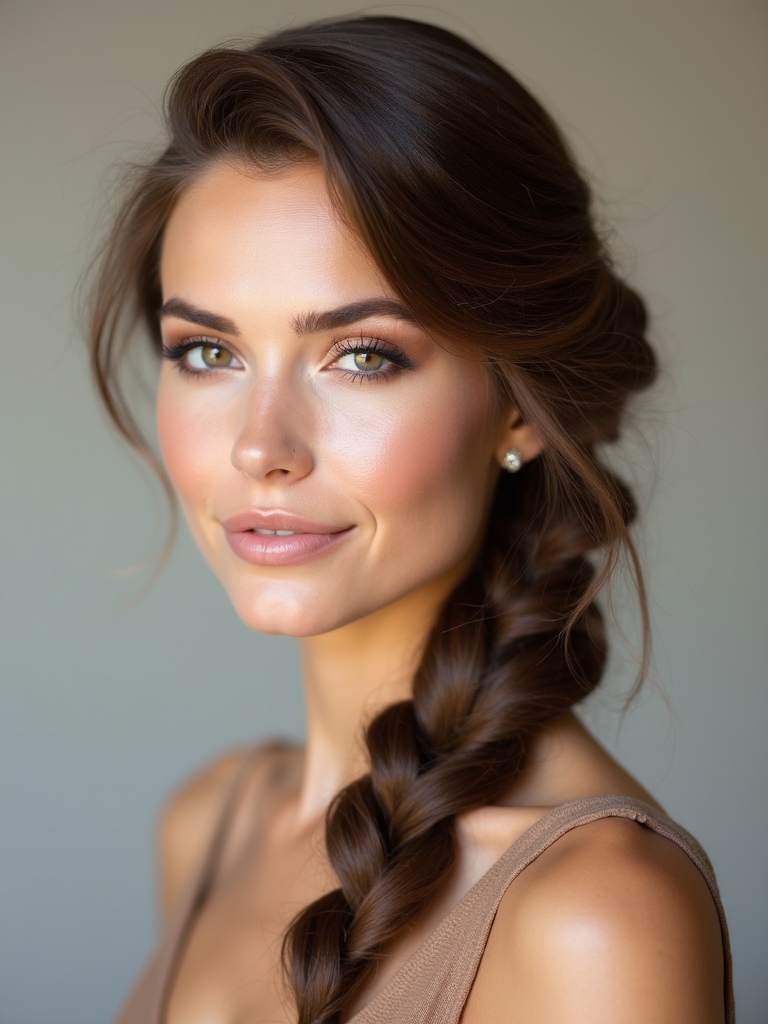
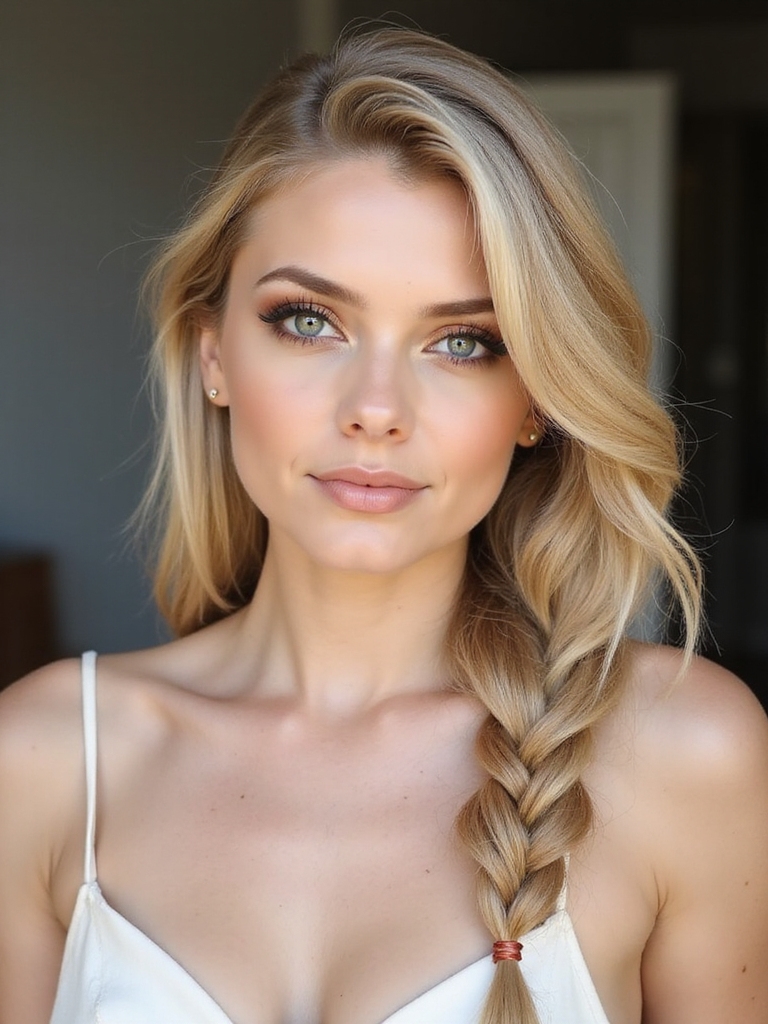
Tucking your hair over one shoulder into a neat side braid is my go-to when I want to look put-together without fuss.
I braid tight, secure with a clear elastic, and loosen a few stitches for softness.
It stays neat through errands, meetings, or coffee dates.
Quick, polished, and comfy—this classic side braid feels intentional without drama, perfect for everyday wear.
Braids are a timeless choice that can be adapted into many elegant braided looks for different occasions.
Messy Side Braid With Face-Framing Pieces
I love how soft face-framing layers can instantly warm up a messy side braid and make it feel effortless.
I’ll show you how to tease a tousled braid texture and pull a few loose pieces for that undone, wearable finish.
Stick with me and you’ll get a look that’s playful, practical, and surprisingly quick.
Many easy braided hairstyles start with simple techniques like a basic three-strand braid to build texture and volume for everyday wear, making them ideal for effortless styling.
Soft Face-Framing Layers
Confidence comes from small details, and I love how soft face-framing layers turn a messy side braid into something effortlessly modern.
I’ll show you how a few wispy pieces soften your profile, hide a stubborn cowlick, and keep things casual yet polished.
Use lightweight texturizer, pull a few strands loose, and tuck or pin as needed for a flattering, wearable finish.
Braided styles can be adapted for every look, from casual to formal, by varying the braid type and placement, making them adorable braided hairstyles that suit any occasion.
Tousled Braid Texture
Soft face-framing layers set the stage, so now let me show you how to mess things up—in the best way—with a tousled braid texture.
I loosen strands as I braid to keep movement, pull tiny pieces out for flirtatious framing, and use a texturizing spray to add grit.
It’s forgiving, quick, and perfect when you want effortless edge without fuss.
For added dimension, incorporate messy braids techniques from effortless messy braids for everyday style to enhance texture and hold.
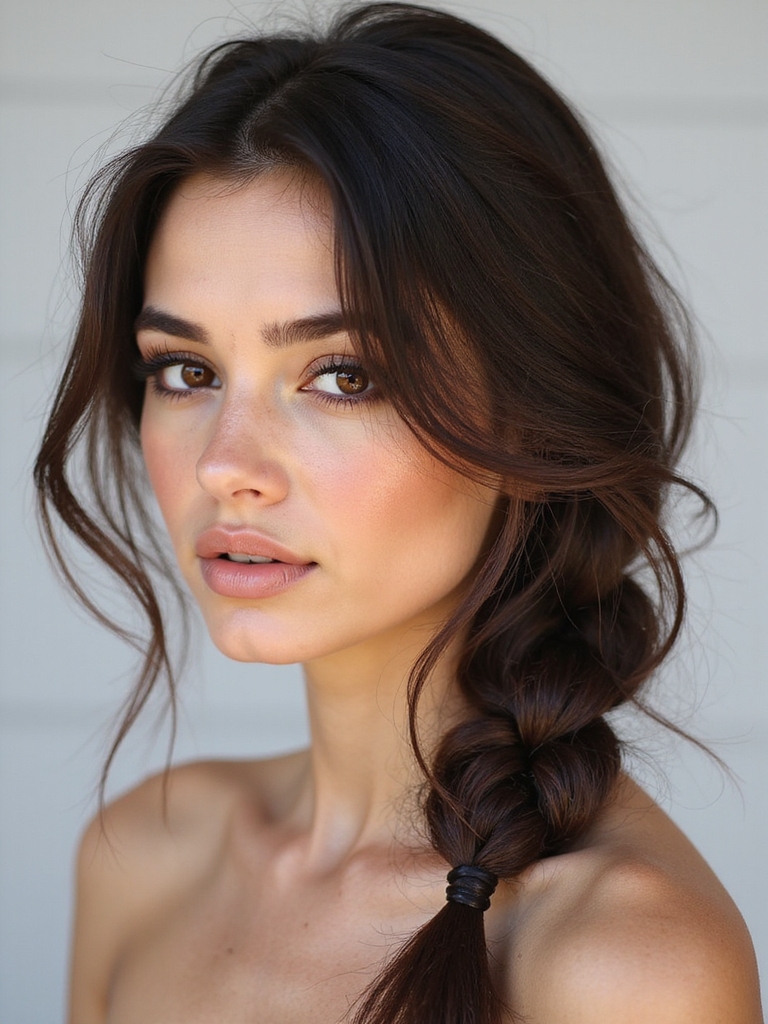
Loose, Undone Finish
Often I go for a deliberately loose, undone side braid when I’m aiming for that just-rolled-out-of-bed chic—it’s messy but not careless.
I pull soft face-framing pieces free, tug sections for volume, and secure with a clear elastic.
It’s forgiving: imperfect knots and flyaways add charm.
Quick hairspray and a light texturizer keep shape without stiffness, perfect for casual days.
This style is versatile and easy to achieve with simple half braided hairstyles that add everyday glamour.
Sleek Side French Braid
When I want a polished look without fuss, I reach for the sleek side French braid — it tucks every stray hair into a smooth, sculpted line that flatters most face shapes.
I braid close to the scalp, add hair as I go, and secure with an invisible elastic.
It’s quick, neat, and stays put for meetings, dates, or errands.
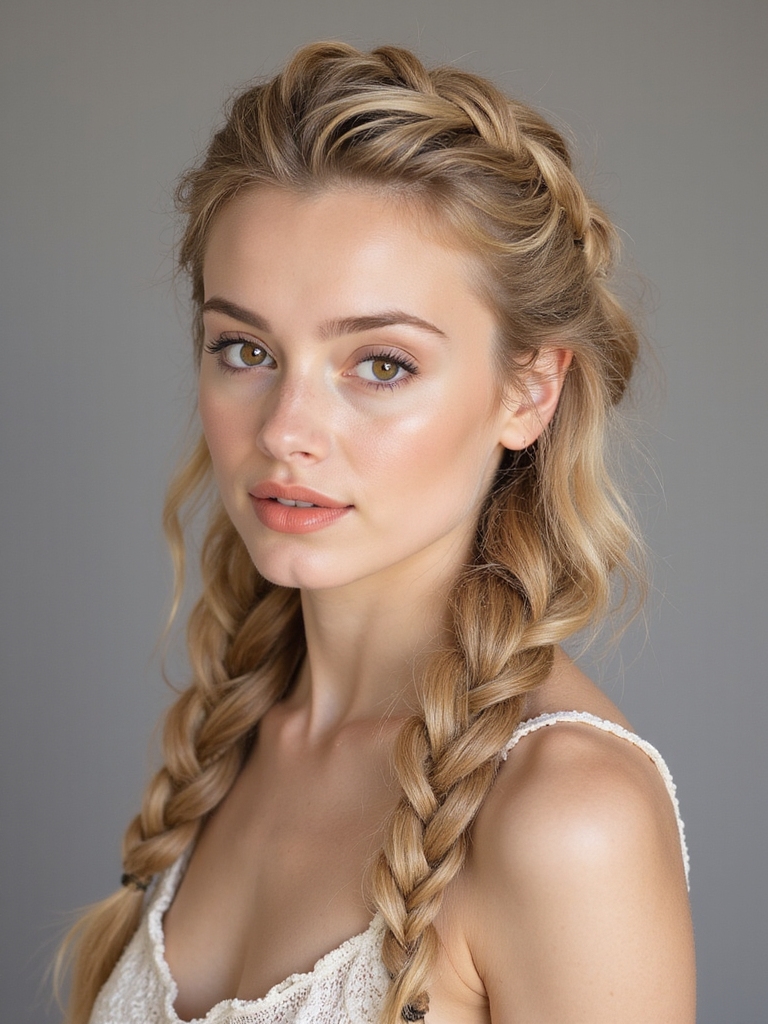
Romantic Side Fishtail Braid
A fishtail tossed over one shoulder feels effortlessly romantic, and I love how it makes even a simple tee look date-night ready.
I’ll show you a quick way: loosen hair, pick a side, and start small sections for that signature weave.
Tug gently for softness, secure with a tiny elastic, and spritz light-hold spray.
It’s flirty, comfy, and surprisingly fast.
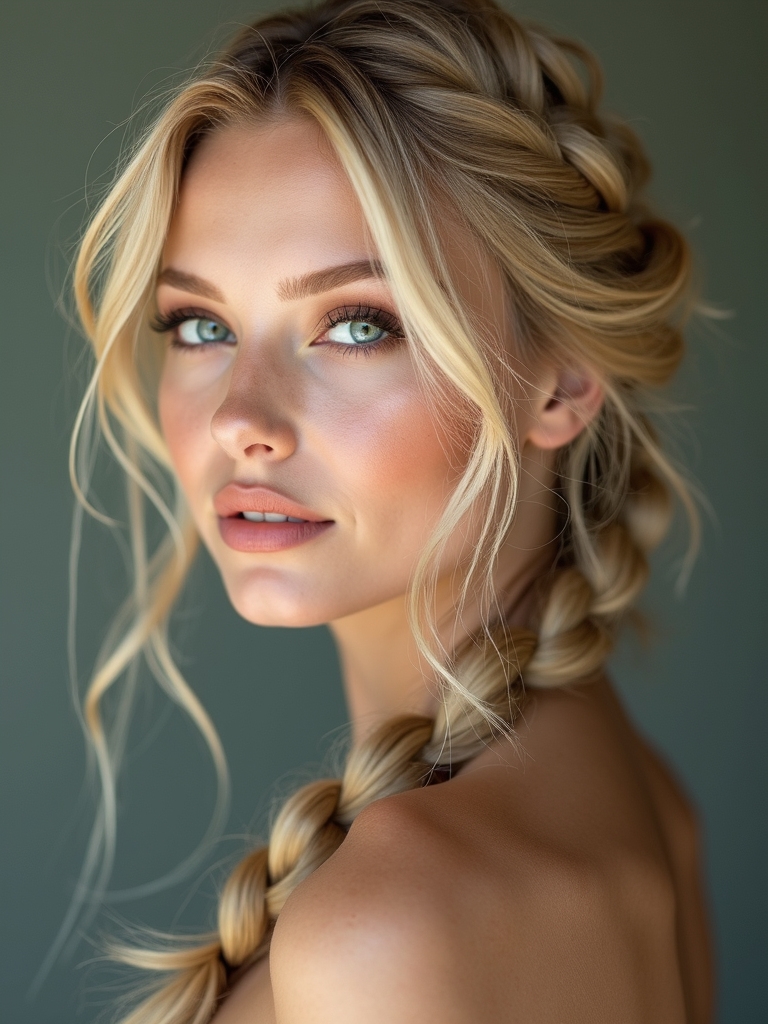
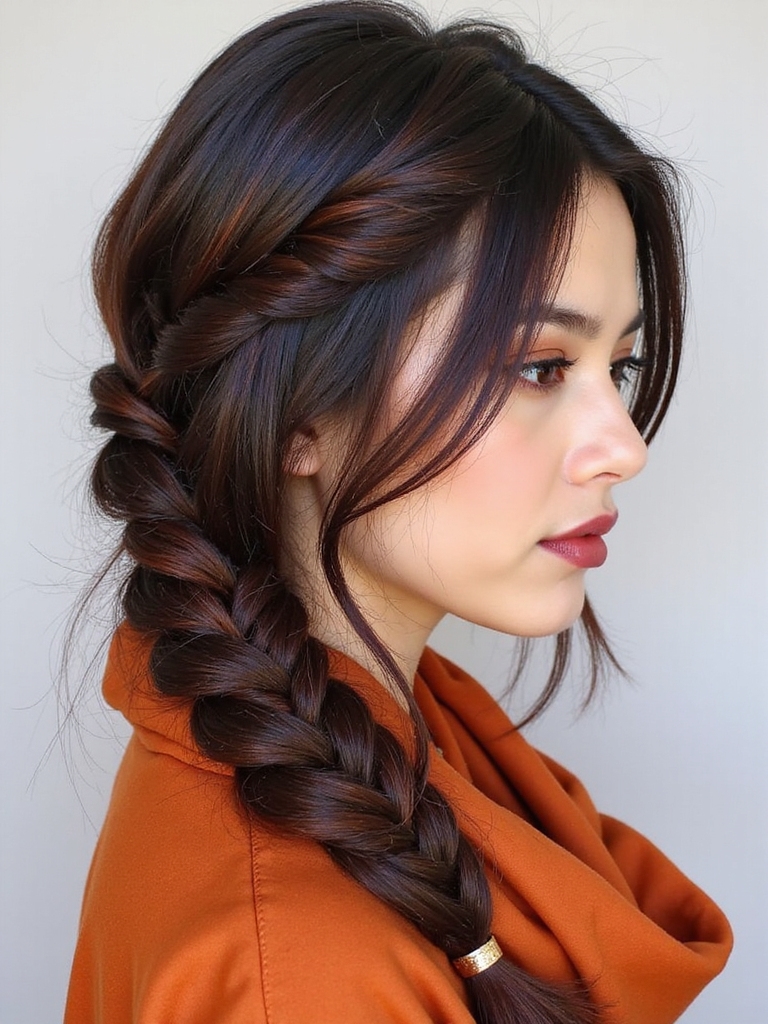
Boho Side Dutch Braid
I love how a boho side Dutch braid lets a few face-framing tendrils soften the look while keeping the braid bold.
I’ll show you how to pull it loose and textured for that effortless finish without it falling apart.
Then we’ll play with tiny flowers or a single bloom tucked in for instant festival vibes.
Face-Framing Tendrils
With a few loose tendrils left out around your face, I love how a boho side Dutch braid instantly softens your look while keeping things effortless and chic.
I usually pull tiny pieces free—around the temples and jawline—to highlight cheekbones and balance the braid.
Quick tip: mist them lightly, scrunch for natural movement, and tuck or pin any that feel too stubborn.
Loose Textured Finish
Texturizing your boho side Dutch braid gives it that casually undone vibe I love—I’m talking airy loops, soft flyaways, and a lived-in finish that still looks intentional.
I loosen sections gently, tug on loops for volume, and mist with salt spray for grip.
Finish with a light-hold spray so movement stays soft.
It’s effortless, wearable, and perfect when you want relaxed polish.
Accessorizing With Flowers
A handful of tiny blooms can turn my casual side Dutch braid into a full-on boho moment—think baby’s breath tucked through loops or a single garden rose pinned near the ear.
I tuck stems into braid gaps, secure with discreet pins, and mist hairspray for hold.
It’s effortless, romantic, and perfect for festivals or weddings—just avoid heavy flowers that weigh the braid down.
Side Braided Ponytail
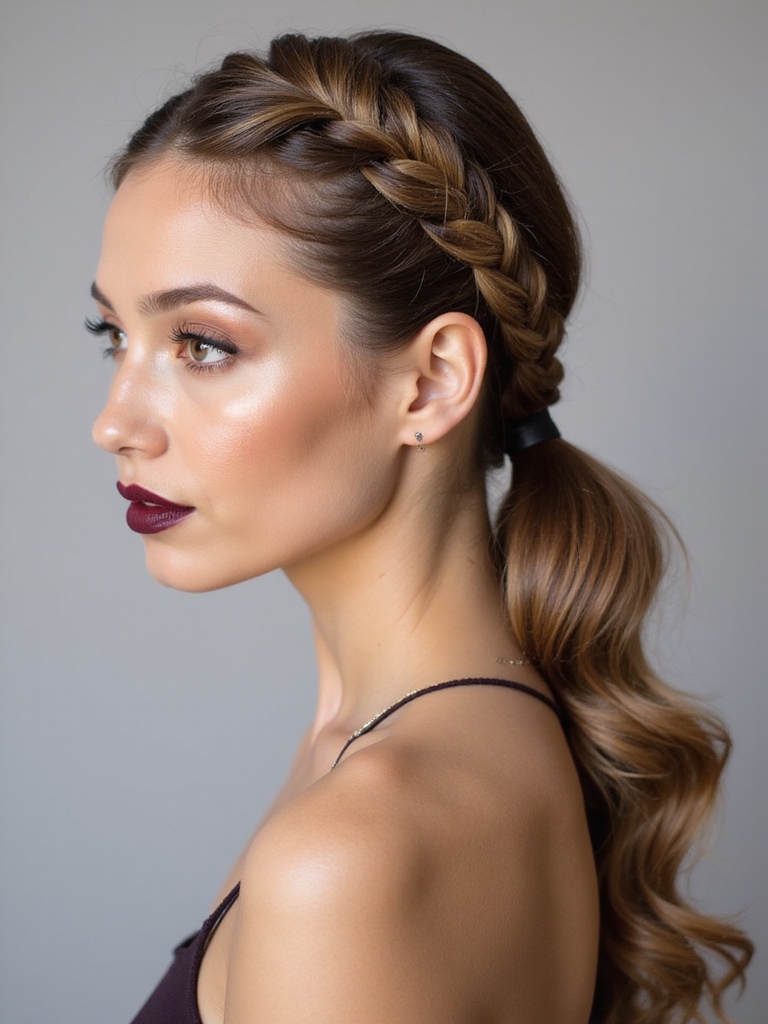
Perched to one side, the side braided ponytail feels like the easiest way to look polished without trying too hard — and I’ll show you how to pull it off fast.
I grab a side section, braid tightly toward the nape, then secure into a low ponytail. It stays neat all day, works with any length, and takes minutes—perfect for rushed mornings.
Half-Up Side Braid With Loose Waves
With a few quick twists and a braid tucked to one side, I get the best of both worlds—face-framing softness up front and loose, beachy waves down back.
I love this easy half-up side braid; it’s flirty and practical. Try it when you want effortless polish.
- Prep: texture spray
- Braid: loose, secure with pin
- Finish: light hairspray
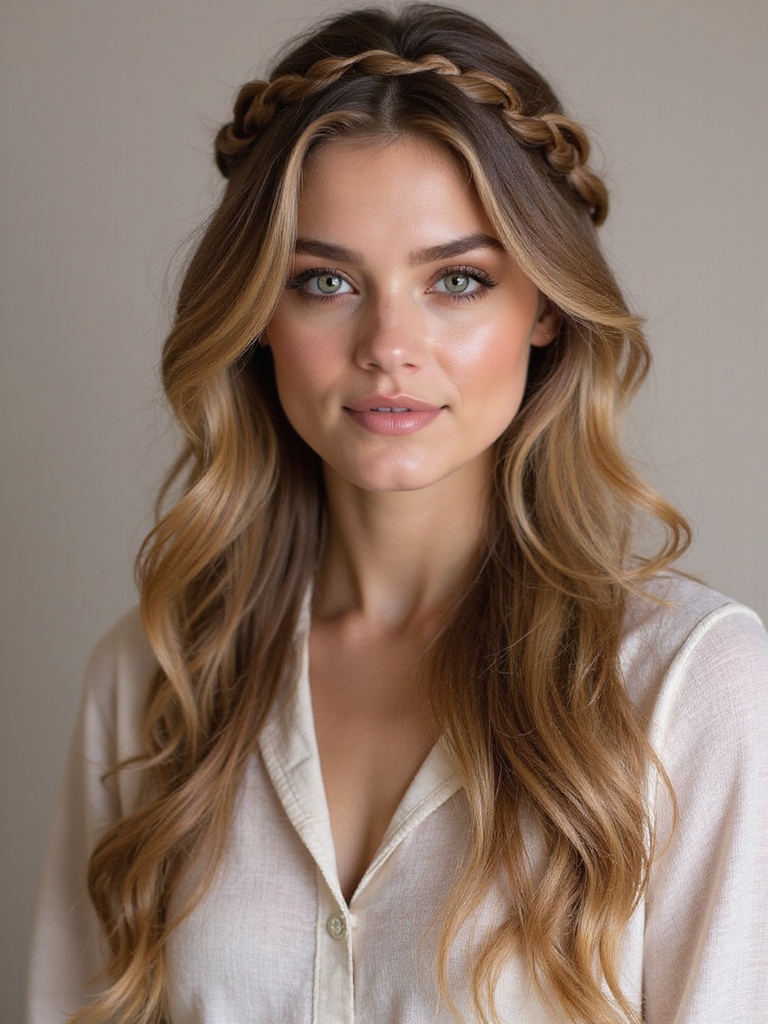
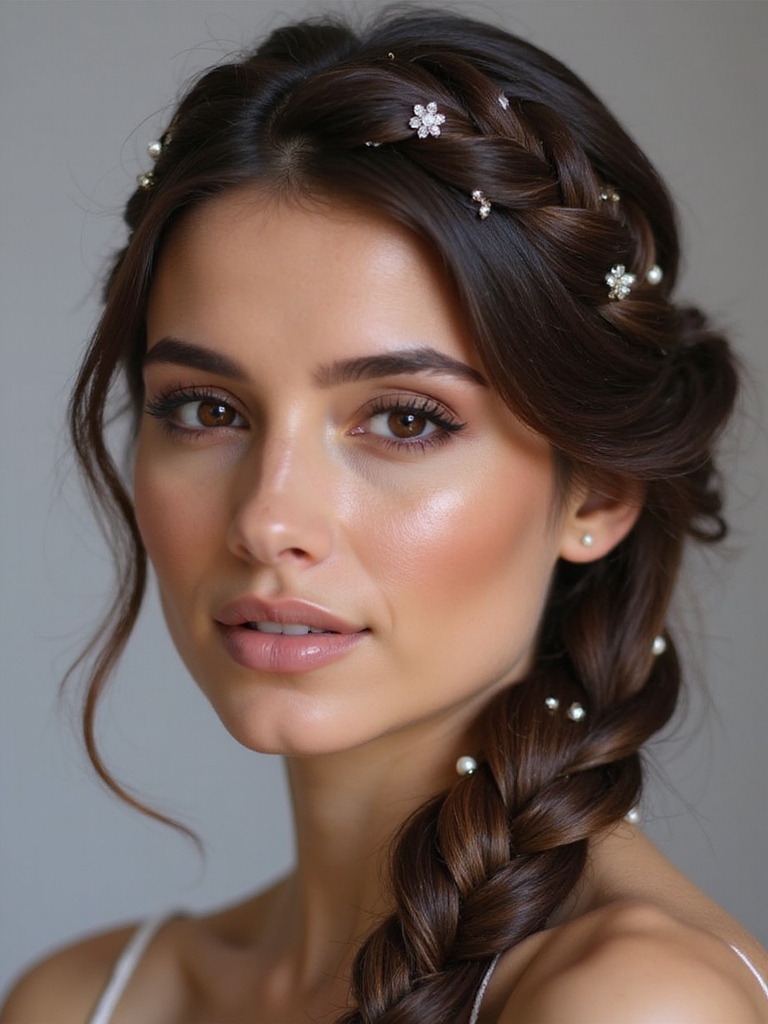
Side Crown Braid for Special Occasions
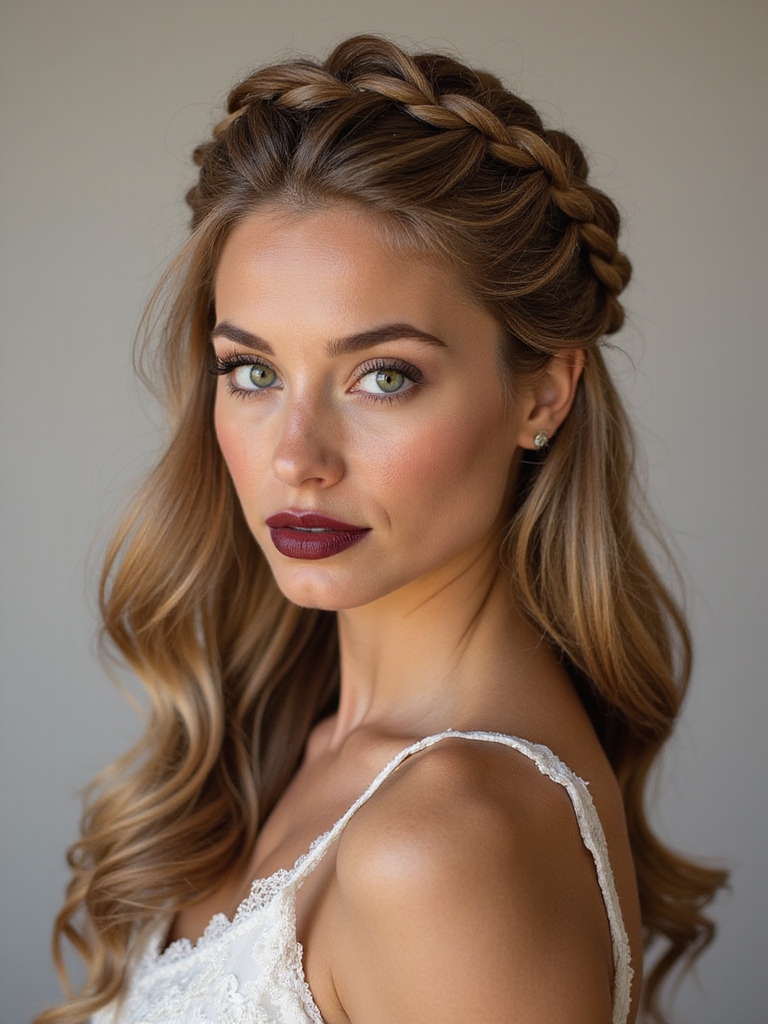
When I want an elegant vibe that still feels approachable, I reach for a side crown braid—it’s regal without being stiff and stays put through dances, toasts, and dinner.
I braid along my hairline, pinning as I go for secure hold, then tug gently for softness. It frames the face, hides uneven layers, and pairs perfectly with earrings or a simple updo finish.
Side Waterfall Braid
I’ll show you how I section hair for a tidy side waterfall braid so strands fall just where I want them.
I’ll share styling tricks—like adding a little texture spray—and the best ways I secure the cascade so it stays put without looking stiff.
Stick with me and you’ll get a gorgeous, effortless look that lasts through the day.
How to Section
Start by parting your hair where it naturally falls and decide which side you want the waterfall to sit on — I usually pick the side that frames my face best.
I section neatly for control:
- Clip the far side away.
- Take a 2–3-inch top section for the braid.
- Keep remaining hair loose for the cascade.
Easy, clean, ready to braid.
Styling and Hold Tips
Because a waterfall braid needs both grip and softness, I prep my hair so the style lasts without looking stiff.
I roughen roots with dry shampoo, mist lengths with lightweight texturizer, and secure sections with clear elastics. I pin dropped strands loosely for movement, finish with flexible-hold spray, and touch up flyaways with a dab of balm so the braid stays chic all day.
Twisted Side Braid With Accessories
Play around with a twisted side braid and you’ll see how a few accessories can take a simple look from casual to show-stopping in minutes.
I love tweaking mine—here’s what I reach for:
- Decorative pins for sparkle.
- A silk ribbon for softness.
- Tiny flowers for boho charm.
I clip, wrap, and adjust until it feels effortless and ready for anything.
Side Milkmaid Braid Variation
Okay, let’s play with a side milkmaid braid: I’ll show you how I prep and section hair so the braid sits neat and swept to one side without slipping.
Then I’ll walk you through the styling steps and how I secure the braid discreetly for all-day wear.
Prep and Sectioning
I like to start with clean, dry hair so the braid sits neat and lasts—if your hair’s freshly washed, add a little texturizing spray or dry shampoo for grip.
Then I part and section quickly:
- Create a deep side part.
- Clip the heavier side aside.
- Divide remaining hair into three even sections for the milkmaid wrap.
Quick, simple, ready to braid.
Styling and Securing
Now that the sections are clipped and ready, I’ll start the side milkmaid braid by braiding the three sections across the crown toward the tucked-under side, keeping the strands snug but not tight so the wrap looks soft.
I pin the braid near the ear with discreet bobby pins, tuck ends under, mist with flexible-hold spray, then gently pancake loops for a relaxed, secure finish.
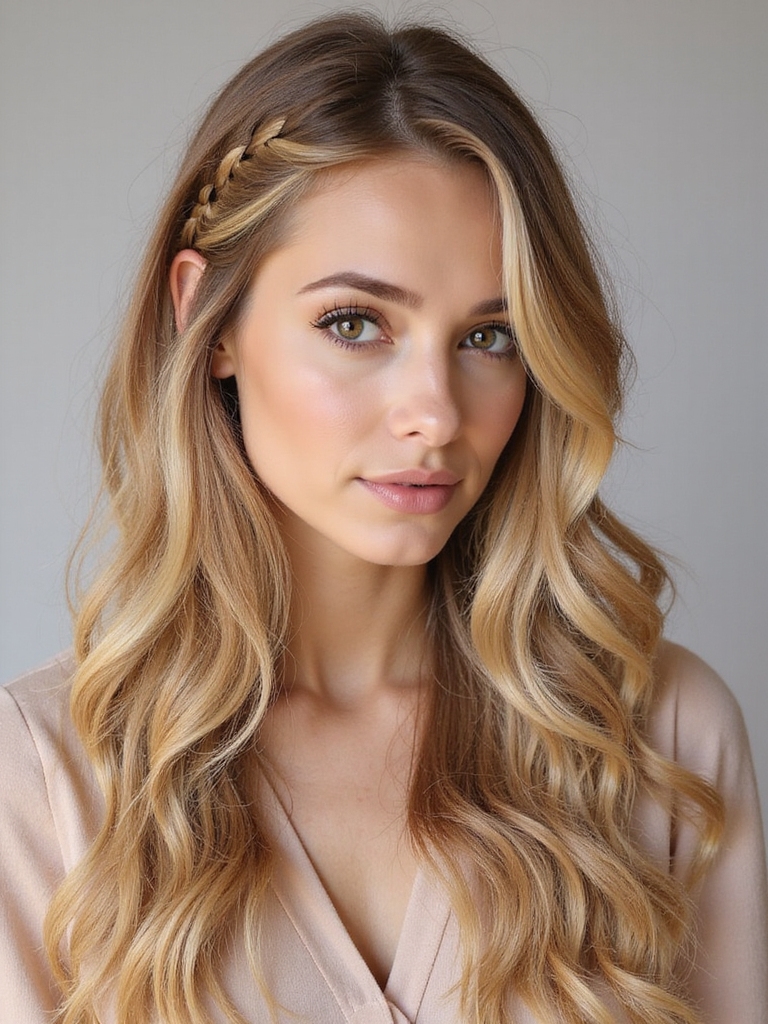
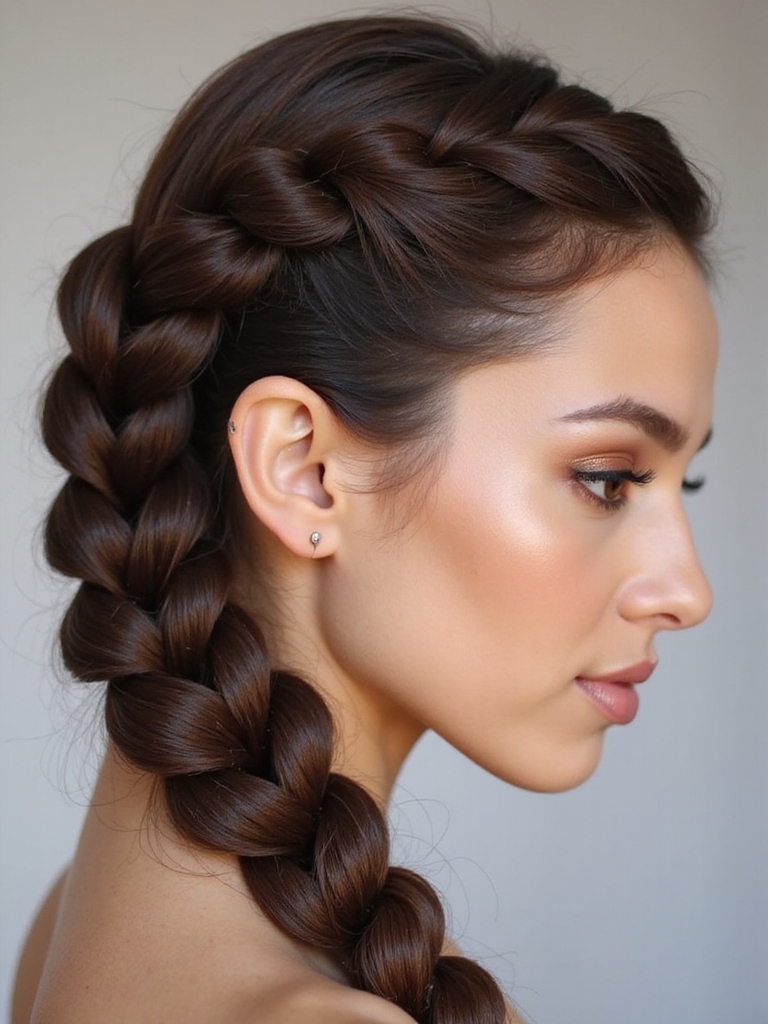
Side Rope Braid for Shorter Hair
When I’m working with shorter lengths, a side rope braid becomes my go-to because it looks intricate without needing miles of hair.
I’ll show you quick steps I use, simple tools, and tiny tricks that keep it neat all day.
- Twist small sections, cross tightly.
- Secure with clear elastic, pin flyaways.
- Tug gently for softness and balance.
Side Boxer Braid-Inspired Look
If you like the compact drama of a side rope braid, you’ll love bumping the intensity up with a side boxer braid–inspired look that borrows that tight, athletic vibe but reads a bit edgier.
I’ll show you how to section close to the scalp, braid firmly toward the nape, and secure neatly. It stays sporty, sleek, and surprisingly chic for everyday wear.
Low Side Braid With a Hair Scarf
With a soft scarf tied around the nape, I twist a low side braid that feels equal parts romantic and effortless; the fabric instantly upgrades the look and keeps stray hairs in check.
I love how easy it’s to style and tuck. Try these quick tips:
- Choose a light silk scarf.
- Braid loosely for texture.
- Secure with a clear elastic.
Side Bubble Braid
I always reach for a side bubble braid when I want something fun that still feels put-together; it’s basically a regular braid’s bouncy, voluminous cousin.
I clip hair to one side, secure sections with tiny elastics, then gently pancake each bubble for fullness.
It’s fast, forgiving, and works on any length.
Perfect for weekends, dates, or instantly upgrading a messy day.
I hope you’re feeling inspired to try a one-sided braid—there’s a playful, polished vibe for every mood and length. Pick a style, prep with texture spray, secure with a clear elastic, and gently pancake for softness; add a ribbon or tiny flowers if you’re feeling fancy.
These looks are quick, forgiving, and totally wearable from errands to date night—so grab a comb, pick a braid, and have fun experimenting!


