
I love a braid that looks like it took no effort but still turns heads, and I’ll show you how to get that vibe. Think loose side plaits with face-framing pieces, undone low buns and a softened crown braid that feels romantic, not contrived.
I’ll share quick tricks — tugging, hidden elastics, a touch of texture — so your hair reads effortless every time, and you’ll actually want to try them yourself.
Loose Side Braid With Face-Framing Pieces

If you want an easy look that still reads effortlessly chic, I love a loose side braid with face-framing pieces — it softens your features and takes five minutes once you get the hang of it.
I pull a few strands free, braid loosely, and tug edges for volume. It’s casual but polished, great for meetings or coffee dates when you want to look put-together without trying. Try pairing it with chic braided hairstyles for everyday style to mix variety into your routine.
Messy Low Braided Bun

You can keep that loose-side-braid vibe but anchor it for dressier days with a messy low braided bun I reach for when I want effortlessness with a touch of polish.
I twist the braid into a loose bun at the nape, tug pieces for softness, and secure with pins.
It’s undone but intentional—great for dates, meetings, or when you want chic without the fuss.
This versatile look draws on classic Braided Bun Hairstyles to suit everything from casual outings to formal events.
Dutch Crown Braid

When I want a hairstyle that feels regal without trying too hard, I reach for a Dutch crown braid — it wraps hair around your head in an inverted braid that sits proud and polished.
I love how it keeps hair neat, feels secure for busy days, and looks intentionally effortless. It’s a quick confidence booster, works on many lengths, and pairs with simple accessories.
Formal braided hairstyles like crown braids are especially suited to events where you want a polished look with lasting hold, and they can be adapted for different hair types and textures by using braided updos and the right styling products.
Boho Half-Up Braids

I love how boho half-up braids let you tuck soft face-framing braids around your features for an effortless look.
Pairing a textured crown braid with loose, beachy waves gives that undone, romantic vibe without a ton of fuss.
Stick with gentle pulling and a bit of texture spray and you’ll have a carefree style that actually stays put.
Effortless braided hairstyles like simple crown braids can be great for everyday wear and create an easy braided look you can do quickly.
Soft Face-Framing Braids
While I’m all for dramatic braids, soft face-framing braids bring that perfectly undone, boho half-up vibe that actually makes people ask how you look so effortlessly put together.
I show you quick steps I actually use:
- Loosen small front braids.
- Tug gently for softness.
- Secure with a discreet clip.
They’re cute, casual, and foolproof — believe me. Learn how these half braided hairstyles give everyday glam with minimal effort.
Textured Crown Braid
Want something a bit more polished but still relaxed? I love the textured crown braid — a boho half-up that lifts hair off your face while keeping things undone and romantic.
I braid loosely along my hairline, tugging sections for that lived-in texture. It’s perfect for festivals, brunch, or when you want effortless polish without looking overstyled. Simple, charming, wearable.
Loose Bohemian Waves
For relaxed days when I still want some shape, I twist my hair into loose Bohemian waves and pull back small face-framing braids for that effortless half-up look.
I love how it feels undone but intentional. Try these quick tips:
- Add texture spray.
- Braid loosely, tug gently.
- Secure with a tiny elastic and hide it with hair for a soft finish.
Fishtail Ponytail
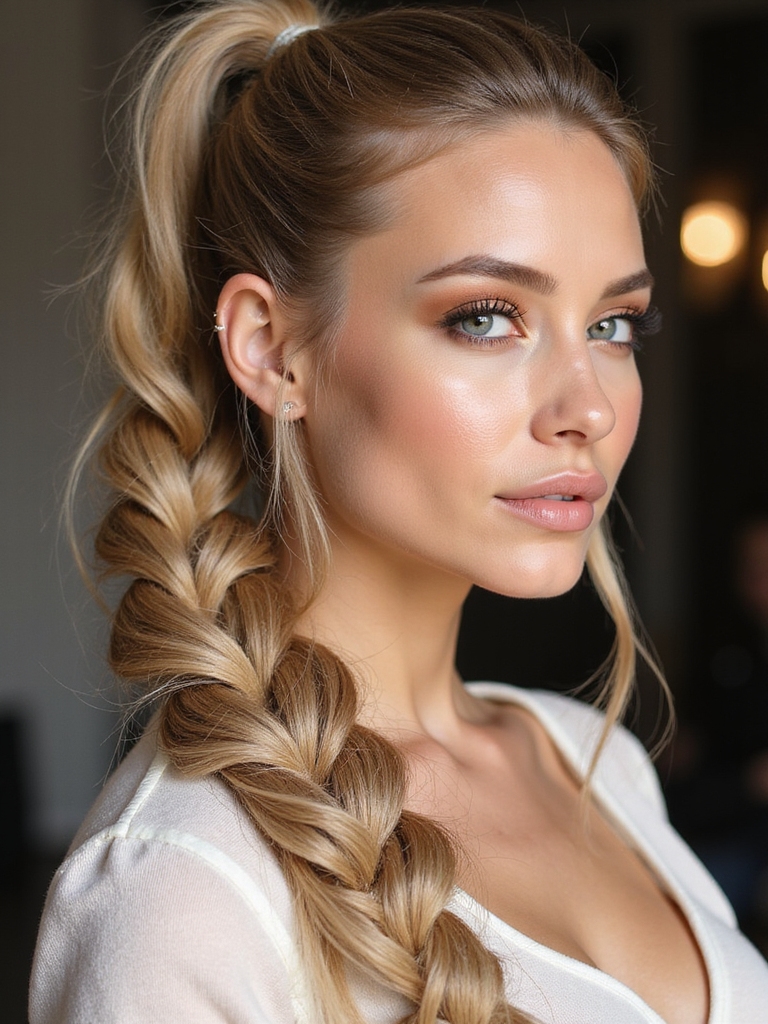
Alright, let’s tackle the fishtail ponytail: I’ll walk you through how to prep and section your hair, the step-by-step braiding moves that actually make it look intricate, and the styling and finishing touches that keep it neat (or intentionally messy).
You’ll see how small prep choices change the final look, and I’ll give quick tips to speed up the technique without sacrificing polish. Ready to make a simple ponytail look way more chic?
Prep and Sectioning
Before I jump into the fishtail ponytail itself, I’ll get you set up with the right prep and sectioning so the braid actually looks like something you’d want to wear out. I’ll keep it quick:
- Smooth hair with light serum.
- Gather into a mid ponytail, secure gently.
- Split ponytail into two even sections before braiding.
Ready? Then we’ll move on.
Braiding Technique Steps
Once you’ve got your ponytail split, I’ll show you the simple handwork that makes a fishtail look so fancy: take a thin strand from the outside of the left section, cross it over and add it to the inside of the right, then mirror that on the other side—repeat, keeping the sections snug but not tight, and you’ll see the signature fishbone pattern emerge.
I braid slowly, tugging tiny bits for texture.
Styling and Finishing Touches
Usually I finish a fishtail ponytail by focusing on texture and balance—I’ll loosen a few outer strands for a lived-in vibe, smooth flyaways with a light mist or serum, then gently pancake the braid to amplify that fishbone pattern without making it bulky.
- Tug gently for softness.
- Secure with an elastic, hide it with hair.
- Finish with flexible hairspray for movement.
Twisted Halo Braid

I often reach for the twisted halo braid when I want a look that’s elegant without trying too hard—it’s a soft crown made by twisting sections around your head, not a tightly braided circle, so it feels relaxed and wearable.
I love how it lifts my face, hides a messy hair day, and still looks intentional—pin, tug, and you’re out the door, effortlessly polished.
Simple Three-Strand Braided Pony

Alright, let’s move from halo vibes to something fuss-free: I start by prepping hair—detangling, adding a touch of product, and sectioning a clean ponytail to keep things neat.
Then I braid a classic three-strand, keeping tension even so the braid looks polished from top to tip.
To finish, I secure the end tightly and smooth flyaways for a tidy, long-lasting look.
Prep and Sectioning
Before you plunge into braiding, I like to make sure the hair’s clean, detangled, and slightly damp so the strands grip and the braid looks neat.
I then section with purpose:
- Part to your preferred height for the pony.
- Clip away side pieces for tidy braiding.
- Smooth the main section into a low ponytail and prep to braid.
Secure and Finish Touches
Now we’ll lock this braid down so it actually survives a day out—no loose ends flapping around.
I wrap a clear elastic tight at the base, then hide it by looping a small hair section around and pinning with a bobby pin.
I spritz light-hold spray, smooth flyaways with a dab of serum, and tug gently for relaxed volume.
Done—polished, comfy, and totally wearable.
Milkmaid Braids

If you want a look that’s equal parts romantic and fuss-free, I swear by milkmaid braids for days when I want to feel put-together without trying too hard; they loop two braids over the crown and make even messy hair look intentionally styled.
I love how quick they are:
- Braid two sides.
- Wrap and pin.
- Tug for softness.
They’re playful and polished.
Textured Rope Braid

Okay, so for a textured rope braid I’ll walk you through prepping the hair for max grip, the clean twisting technique that keeps strands neat, and how to secure and finish it so it lasts all day.
I’ll show quick tips for adding texture—think sea-salt spray and a little teasing—then demonstrate the twist-and-wrap motion that makes a rope braid pop.
Finally, we’ll cover elastics, pins, and a few finishing touches to keep frizz in check without weighing the style down.
Prep and Texture
Before I pick up my first strand, I take a few minutes to build texture—it’s the secret that keeps a rope braid from looking flat or fakey.
I prep like this:
- Sea salt spray for gritty grip.
- Light mousse at roots for volume.
- Tiny backcombing where needed, then smooth the surface.
Simple prep makes a messy, chic rope braid actually stay put.
Twisting Technique Tips
Twisting the strands is where a rope braid earns its personality, and I like to think of it as controlled rebellion — twist each subsection away from you, then wrap them toward each other so the braid coils tight and textured.
I tug gently as I twist to reveal dimension, keep tension even, and use small sections for cleaner twists that hold shape without looking stiff.
Securing and Finishing
Secure the ends with intention: I finish my textured rope braid by smoothing stray hairs, coiling the tail, and choosing a closure that suits the look — elastic for casual wear, a small clear band for invisibility, or a decorative tie for impact.
- Tuck and wrap for neatness.
- Mist with flexible hold spray.
- Pin any flyaways discreetly; admire.
Braided Topknot

I often reach for a braided topknot when I want hair that looks put-together without trying too hard; it’s the perfect mix of polished and playful.
I braid a section, twist it into a high bun, and secure with pins — instant lift and texture.
It hides second-day oil, works for casual or dressy plans, and always feels surprisingly effortless.
Waterfall Braid Along the Hairline

When I want a look that’s delicate but definitely not boring, I braid a waterfall along my hairline — it frames the face, keeps flyaways in check, and looks like you spent way more time on it than you did.
I love how easy it’s to switch up. Try these quick tweaks:
- Add soft waves.
- Clip one side back.
- Loosen for texture.
Braided Accent on a Sleek Low Bun

If you like the delicate feel of a waterfall braid but want something with more polish, I turn that same girly energy into a sleek low bun with a braided accent — it keeps things neat but still interesting.
I sweep hair smooth, wrap a thin braid around the base, and secure it cleanly. It’s office-ready, date-night pretty, and honestly feels like a tiny secret twist.
Double Dutch Braids Into a Low Knot

Because I love a braid that feels both tidy and a little rebellious, I start double Dutch braids at the temples and work them down into a low knot that’s equal parts structured and undone.
I walk you through:
- Prep: smooth roots, texture spray.
- Braid: pick up outer sections for lift.
- Knot: wrap ends loosely, pin for movement.
Side Fishtail With Soft Waves

Want a softer counterpoint to that structured double Dutch knot? I love sweeping hair to one side, teasing gentle waves, then weaving a loose fishtail that looks effortless, not fussy.
It feels romantic, keeps hair out of my face, and works for brunch or date night. I secure it with a discreet pin and let a few tendrils frame my cheek for softness.
Micro Braids Tucked Into a Chignon

I tuck tiny micro braids into a low chignon when I want texture and staying power without fuss—those little plaits give the bun a braided halo that looks intricate but actually takes just a few focused minutes.
I love how it’s polished yet playful.
- Secure braids low.
- Wrap loosely for volume.
- Pin stray ends discreetly.
So there you have it — a little braid inspiration for every mood, from messy-chic buns to boho side fishtails. Try a face-framing loose plait when you want soft and simple, or tuck micro braids into a chignon for something clever and polished.
Play with tugging, hidden elastics, and a bit of texture spray, and you’ll have looks that feel effortless but totally put-together. Ready to braid your way through the week?


