
I’m all about knotless tribal braids for a fresh, protective switch-up that still feels modern and wearable. I’ll walk you through picking sizes that flatter your face, mapping out striking geometric or spiral parts, and choosing extensions and accents that pop — plus how to prep, maintain, and remove them without drama.
Stick around and I’ll show the key tricks that keep your edges safe and the look lasting longer.
Choosing the Right Knotless Tribal Braid Size for Your Face Shape

When I pick a knotless tribal braid size, I think about my face first — its shape tells me if slimmer, daintier braids will elongate or chunky, bold braids will balance.
For round faces I favor longer, finer braids to add height; for heart shapes I choose medium, softer braids to soften the forehead; square jaws call for curved, chunkier pieces to soften angles.
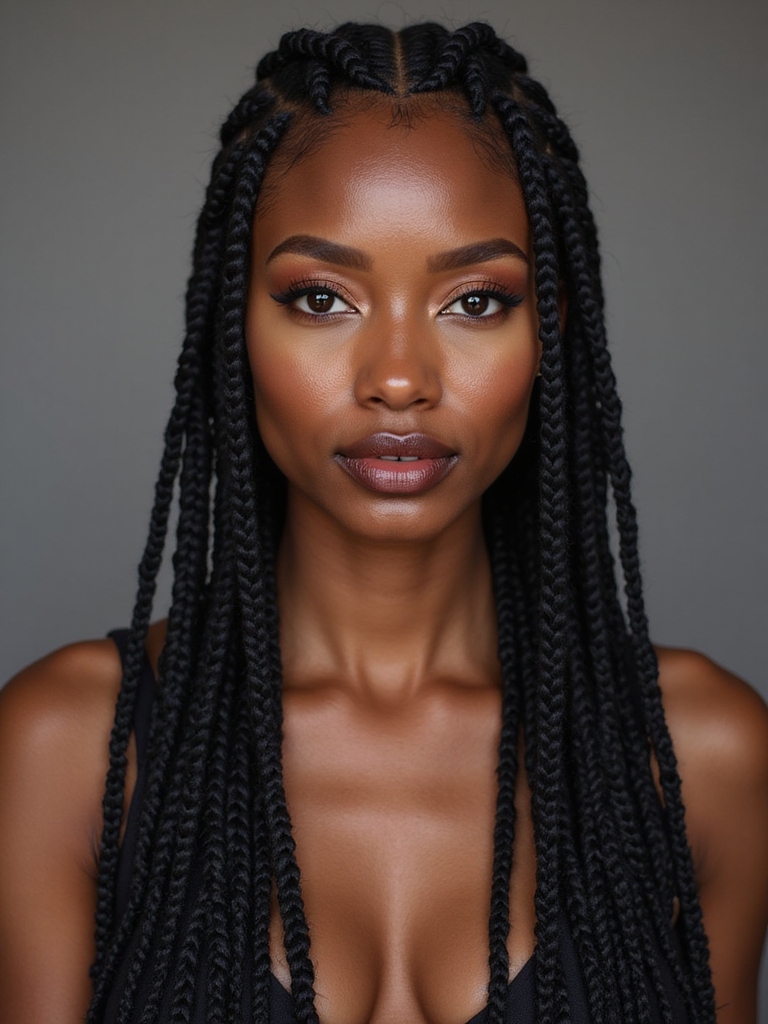
Medium knotless box braids are a versatile choice for many looks, especially when you want low-maintenance styling with reduced scalp tension and easy daily wear.
Picking Patterns: Geometric Lines, Swirls, and Statement Cornrows

I love how a crisp geometric parting gives tribal knotless braids an architectural edge, making every line pop.
You can soften that structure with flowing spiral swirls for a softer, motion-filled vibe, or go all out with bold statement cornrows that demand attention.
Let’s look at how each pattern changes the whole look so you can pick one that fits your style.
Effortless Feed-In Braids were designed to make adding extension hair smoother and gentler on the scalp, reducing tension when installed with feed-in technique.
Crisp Geometric Parting
Although crisp geometric parting might look like a pro-only move, I’ll show you how clean lines, bold swirls, and statement cornrows lift any knotless braid look—giving it structure and instant runway energy.
I map sections with a rat-tail comb, keep edges sleek, and use clipping for sharp angles.
The result? Modern, sculpted braids that frame your face and command attention.
Large knotless box braids are an effortless, versatile choice that pairs perfectly with these designs, offering low-tension styling and long-lasting wear knotless box braids.
Flowing Spiral Swirls
Spirals are my go-to when I want movement and attitude in a knotless braid style—I love how a single swirl can turn plain parting into motion that frames the face.
I pick sweeping, organic curves that follow facial contours, mixing thin and chunky spirals for texture. They read modern and soft, great for adding lift at the crown without rigid lines or heavy structure.
I often pair them with lemonade braids for a contrasting, effortless look that blends precision with relaxed flow.
Bold Statement Cornrows
Make a statement with cornrows that read like graphic art—I’m talking crisp geometric lines, bold swirls, and signature rows that demand attention.
I love mapping patterns that flatter your face, mixing negative space with tight braids for contrast.
We pick placements that elongate or accentuate features, add metallic cuffs or colored extensions, and keep the look modern, wearable, and unapologetically bold.
These styles can be protected and long-lasting when maintained with gentle moisture and proper care routines.
Selecting Extensions: Texture, Length, and Color Options

When I’m choosing extensions for tribal knotless braids, I focus on three things: texture that blends, lengths that layer well, and colors that either pop or seamlessly match—so your finished look reads intentional, not patched.
I pick kinky or wavy fibers to echo natural hair, mix lengths for movement, and choose a dominant shade with one or two accent tones for dimension without looking overdone.
I also prioritize using the right extension type for comfort and longevity, like knotless-friendly fibers that reduce scalp tension and frizz.
Preparing Your Scalp and Hair for a Comfortable Install

Before I even touch the extensions, I prep my scalp and hair so the install feels comfy from start to finish: I cleanse with a gentle, sulfate-free shampoo to remove buildup, follow with a lightweight conditioner to detangle without weighing strands down, and thoroughly dry—damp hair = sore scalp later.
I also soothe sensitive spots with a light, oil-free scalp serum and map braid tension points.
I often choose protective, natural braids to promote hair health while wearing the style.
Detangling, Deep Conditioning, and Moisture Retention Tips

Before I start braiding, I gently detangle to save time and protect strands from breakage.
I follow with an intensive deep-conditioning session so the hair is supple and ready to hold style.
Finally, I seal with a light oil or butter to lock in moisture and extend the life of the braids.
Effortless braided styles often use protective styling to minimize manipulation and promote healthy growth.
Gentle Pre-braid Detangling
If we want knotless braids that last and don’t stress the scalp, I gently detangle and prep each section so it’ll braid smooth and stay hydrated; I’ll work with soaked, slippery hair and a wide-tooth comb or my fingers to remove knots without yanking.
Then I mist with a lightweight leave-in, smooth ends, and seal with a bit of oil to lock moisture before braiding.
I also prefer small knotless sections when aiming for neat, low-tension styles that wear well.
Intensive Deep Conditioning
Locking in moisture starts with a real deep treat—so I soak each section and work through it methodically, not rushing past tangles or skipping product.
I let a rich mask sit under heat, finger-comb, and rinse gently.
Picture the process:
- warm oil melting into strands
- creamy mask coating each braid
- steam lifting cuticle layers
Feels luxe, prepped, and braid-ready. I often choose Medium Knotless Braids to keep tension low and protect the hair while maintaining a polished look.
Sealing for Moisture Retention
Now that my braids are steamed, detangled, and rinsed, I focus on sealing in that moisture so the work doesn’t go to waste.
I press a lightweight oil or butter blend into the scalp and along each braid, smoothing cuticles and locking hydration.
A spritz of water-based leave-in before oil boosts absorption.
Nightly silk scarf wraps keep everything sealed and fresh.
Sectioning Techniques for Clean, Precise Partings

Since precise partings are the backbone of any crisp Tribal Knotless Braids look, I start by mapping the hair into neat sections with a rat-tail comb and clips so each braid sits clean and even.
I keep lines tidy, work symmetrically, and adjust tension. Visual cues:
- Even squares for uniform braid width
- Curved parts for soft, organic edges
- Centerline for bold symmetry
Step-by-Step Knotless Braid Foundation Method

With my sections mapped and clipped, I start the knotless foundation by anchoring a small amount of extension at the root and feeding it into the natural hair with gentle, even tension so the braid grows smoothly from scalp to tip.
I maintain consistent stitch size, palm-roll each pass for neatness, and monitor tension to prevent pulling.
Finish by sealing ends and checking alignment for a sleek, lasting base.
Adding Extensions Seamlessly Without Bulky Knots

Although I start the braid with a tiny amount of extension at the root, I add pieces progressively so they blend without forming bulky knots; I feed the extension into the natural hair in small, subtle layers and secure each pass by smoothing and tucking rather than looping into a visible knot.
I keep tension light and edges neat.
- soft feathered layers
- hidden tucked joins
- sleek, natural flow
Creating Intricate Designs While Preserving Scalp Health
Keeping the braids lightweight and knot-free sets us up to play with patterns without stressing the scalp.
I map designs that follow natural hair growth, spacing sections to avoid tension and using softer parting tools.
I alternate braid sizes, pause to check comfort, and moisturize the scalp regularly.
That combo keeps intricate looks bold but healthy—so your edges stay intact and your style lasts.
Styling Variations: Updos, Half-Up, and Accessory Ideas

I’m loving how a sleek high bun instantly cleans up knotless braids for a polished, runway-ready look.
For a softer, everyday vibe try a half-up knotless crown that keeps hair off your face while showing off the braid patterns.
I’ll also share quick accessory placement tips—think strategic beads, cuffs, and silk wraps to elevate without weighing your scalp down.
Sleek High Bun
When I pull my tribal knotless braids into a sleek high bun, the look instantly reads modern and polished while still honoring the braid texture—it’s my go-to when I want something chic but low-fuss.
I twist and wrap, smoothing edges for a neat silhouette.
Quick accents pop:
- A glossy edge swoop
- A wrapped braid base
- Minimal gold cuffs for shine
Half-Up Knotless Crown
Sleek high buns are my quick polish, but sometimes I want something that frames the face while still showing off the braid work—enter the half-up knotless crown.
I pull the top section into a soft halo, securing with discreet elastics so the knotless pattern stays visible.
It’s chic, low-maintenance, and perfect for days when I want effortless polish with braided texture.
Accessory Placement Tips
I like to play up knotless braids with small, well-placed accents that lift the whole look without stealing the show.
I’ll tuck charms near the crown, clip a few shells along a half-up, or weave metallic thread through an updo edge for shine.
Visuals to try:
- tiny gold cuffs clustered at the temple
- cowrie shells on a side braid
- thin silver thread woven through a bun
Nighttime Routine to Protect Your Knotless Braids

Usually I tuck my knotless braids up before bed to keep them fresh and frizz-free, and you should too.
I wrap a silk scarf or use a satin bonnet, sleep on a satin pillowcase, and mist edges lightly with a hydrating spray.
In the morning I loosen the wrap gently, smooth any flyaways, and my style stays sharp without heavy upkeep.
Refreshing Edges and Reducing Frizz Between Touch-Ups

I’m all about quick edge rescue between appointments, so I gently cleanse my hairline with a soft cloth and a mild cleanser to lift buildup without frizzing the braid pattern.
Then I smooth a dab of lightweight edge oil over baby hairs to tame flyaways and add shine without weighing things down.
At night I wrap my edges with a silk scarf to lock in that neat look until the next touch-up.
Gentle Edge Cleansing
When I need a quick refresh between full touch-ups, I focus on gentle edge cleansing to calm frizz and brighten my hairline without disturbing the knots.
I use soft strokes, minimal product, and targeted rinses to keep things fresh.
Picture it:
- A microfiber cloth sweeping away buildup
- Cool water rinses resetting the hairline
- Delicate parting to lift trapped flakes
Lightweight Edge Oils
After a quick edge cleanse, I reach for a lightweight edge oil to refresh my hairline without weighing down the knots.
I rub a few drops between my fingers and smooth the perimeter, taming flyaways and restoring shine.
It controls frizz between salon visits, absorbs fast, and won’t leave residue.
Perfect for keeping tribal knotless braids looking crisp and modern on the go.
Silk Scarf Nightcare
Wrapped in silk, my nighttime routine becomes the secret to refreshed edges by morning. I smooth a lightweight gel, tie a snug scarf, and wake to softer frizz.
You can recreate this simple ritual:
- Satin-gloss scarf wrapped low, edges tucked
- Gentle, palm-pressed smoothing for hold without crunch
- Morning misting and tiny pats to revive shine and definition
When and How to Remove Knotless Tribal Braids Safely

Because knotless tribal braids sit close to your scalp, I always plan the removal day like a mini-haircare ritual to protect my edges and length.
I work slowly, cutting no more than the exposed ends, unravelling each braid gently from tip to root.
I detangle with a wide-tooth comb, oil my scalp as needed, and pause if I feel tension or discomfort.
Post-Removal Care: Restoring Hair Strength and Growth

Coming out of knotless tribal braids, I treat the next few weeks like a comeback tour for my hair — focused, intentional, and a little celebratory.
I gently clarify, deep-condition, and give scalp TLC while avoiding harsh tools.
I lean into routines that rebuild strength and encourage growth:
- Coconut oil steam sessions
- Protein-rich masks weekly
- Soft silk wraps overnight
Troubleshooting Common Issues: Tension, Slippage, and Breakage

If your scalp starts feeling tender or you notice braids sliding, don’t ignore it — those are the signs to troubleshoot before they turn into breakage.
I check tension first, loosen edges gently, and re-secure slipping braids with a small knot or extra feed-in. I oil the scalp, sleep on silk, and trim fragile ends. Quick fixes prevent long-term damage and keep the look fresh.
I’m obsessed with how knotless tribal braids let you go bold without sacrificing edge health — just pick sizes and patterns that flatter your face, choose extensions that vibe with your texture and color goals, and prep your scalp so the install’s comfy. Keep strands moisturized, protect at night, and refresh edges as needed.
Remove gently, rebuild your moisture and protein balance, and you’ll keep your hair thriving between flawless, jaw-dropping refreshes.


