I’m obsessed with how goddess braids have exploded into every must-save hair inspo — they’re bold, sculptural, and somehow effortlessly chic. From jumbo feed-in pieces with glassy edges to halo crowns and braided buns wrapped in gold cuffs, there’s a version for every vibe.
I’ll walk you through the looks, extras, and quick prep tips to get them lasting and luxe, so keep going to find your perfect style.
Jumbo Goddess Braids With Sleek Edges

When I want a bold, low-fuss look, I turn to jumbo goddess braids with sleek edges — they give instant drama without hours in the chair.
I love how oversized braids feel modern and effortless, framing my face while staying secure.
I slick edges for polish, add a high pony or half-up twist, and voilà: chic, wearable style that lasts through busy days.
Goddess braids are a protective style that helps minimize breakage and promote hair health when installed and maintained properly, making them a go-to for anyone seeking protective braids.
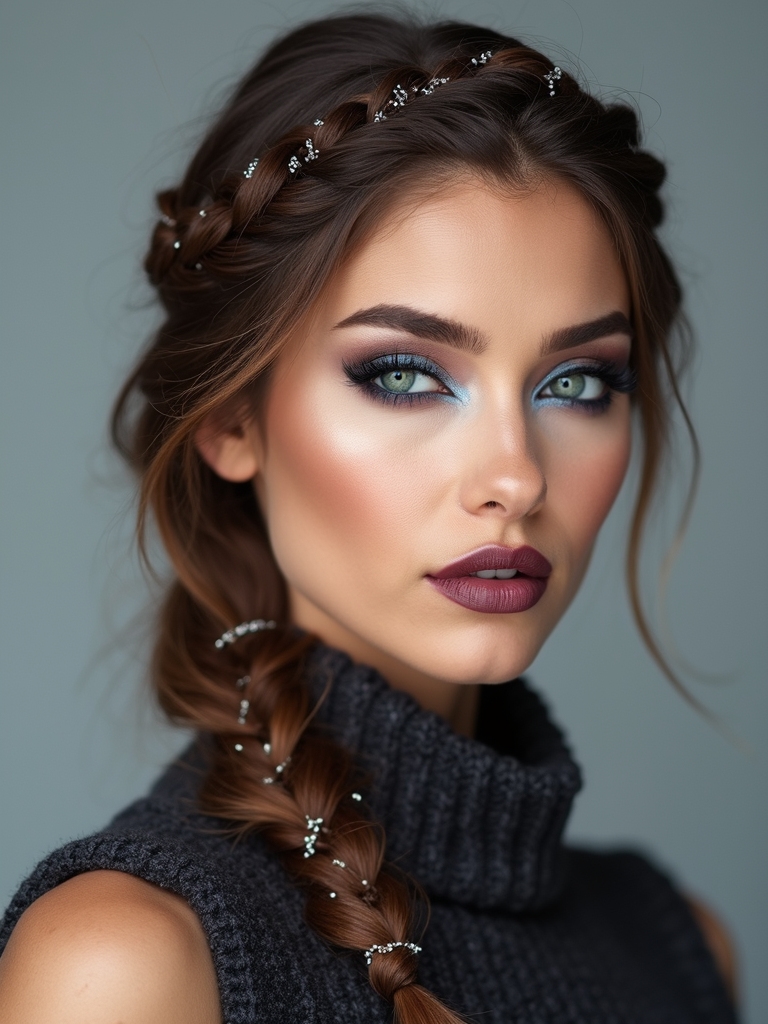
Crown Halo Braids With Baby Hairs

Twirling a crown halo braid around my head always feels like crowning myself in seconds — it’s polished, romantic, and surprisingly low-maintenance.
I love adding delicate baby hairs to frame my face; they soften the look and make it playful.
I slick and swoop tiny edges with gel for definition, then accessorize with tiny flowers or gold cuffs for a chic, modern finish.
Protective styles like braided crowns help retain length and reduce breakage when worn correctly, making them a smart choice for healthy hair.
Goddess Braided Bun With Wrapped Ends

I love how a goddess braided bun with wrapped ends looks, and I’ll walk you through the must-dos: clean prep and smart sectioning to set a neat foundation.
I’ll show the braiding and wrapping technique that keeps the style sleek and fashion-forward.
Finally, I’ll share quick tips to secure the bun so it stays flawless all day.
A key step is mastering clean prep to protect hair health and improve braid longevity.
Prep and Sectioning
Before I start braiding, I always prep the hair so the bun looks sleek and lasts longer: I shampoo or co-wash as needed, detangle with a wide-tooth comb, and apply a lightweight leave-in conditioner plus a small amount of oil to lock in moisture without weighing the hair down.
Then I section cleanly with a tail comb into even parts, clip each section, and label them so styling stays organized and fast.
Goddess braids are versatile and can be styled for casual or formal events with curly braided hairstyles enhancing natural texture and volume.
Braiding and Wrapping Technique
Once the sections are tidy and clipped, I start each braid close to the scalp with a firm, even tension so the bun sits smooth and lasts longer.
I braid to mid-length, then wrap the ends around the base, tucking and layering for that polished goddess look.
I keep movements rhythmic and relaxed, checking symmetry and texture as I shape a flawless wrapped-ended bun.
This simple method is inspired by classic Two Braids techniques that make styling quick and reliable.
Secure Finish Tips
Even as I finish wrapping each braid into its bun, I keep a few go-to tricks ready to lock everything in place without adding bulk.
I want your bun sleek, secure, and comfy—no pins popping or frizz stealing the show. Try these simple steps for a long-lasting, polished look.
- Use small clear elastics beneath the wrap
- Tuck ends tightly and pin discreetly
- Smooth edges with a light gel
- Finish with a mist of flexible-hold spray
Feed-in braids create a natural-looking, low-tension base that helps protect hair while styling, making them a go-to for protective styles like Feed-In Braids.
Half-Up Half-Down Goddess Plaits

I love how half-up half-down goddess plaits let you frame your face with an elegant crown placement while keeping movement below.
I’ll show you how to blend sculpted braids into textured loose ends for that effortless, trendy finish.
Stick with me and we’ll get a look that’s polished on top and beautifully undone underneath.
Boho goddess braids are all about combining structure with free-flowing texture for an everyday, wearable style that channels effortless boho.
Elegant Crown Placement
With a few strategic plaits and a touch of patience, I’ll show you how to place a half-up crown that feels polished without being stiff.
I lift front sections, braid toward the back, secure at the crown, then tug gently for soft volume.
It’s chic, comfy, and stays put for outings or events.
- Start with clean, detangled hair
- Braid two mirrored sections
- Pin at the crown
- Loosen for softness
This technique works well for many looks and can be adapted into an Effortless Braided Bun that suits casual or formal occasions.
Textured Loose Ends
After braiding the top half, I let the lower sections fall into soft, textured loose ends that give the style effortless movement and a lived-in vibe.
I tease and mist lightly, then finger-comb for natural separation.
Those relaxed ends balance structure with playfulness, framing my face and swaying as I move.
It’s the perfect half-up, half-down look for casual days or date nights.
Braided cornrow styles often incorporate intricate cornrow patterns to enhance texture and visual interest.
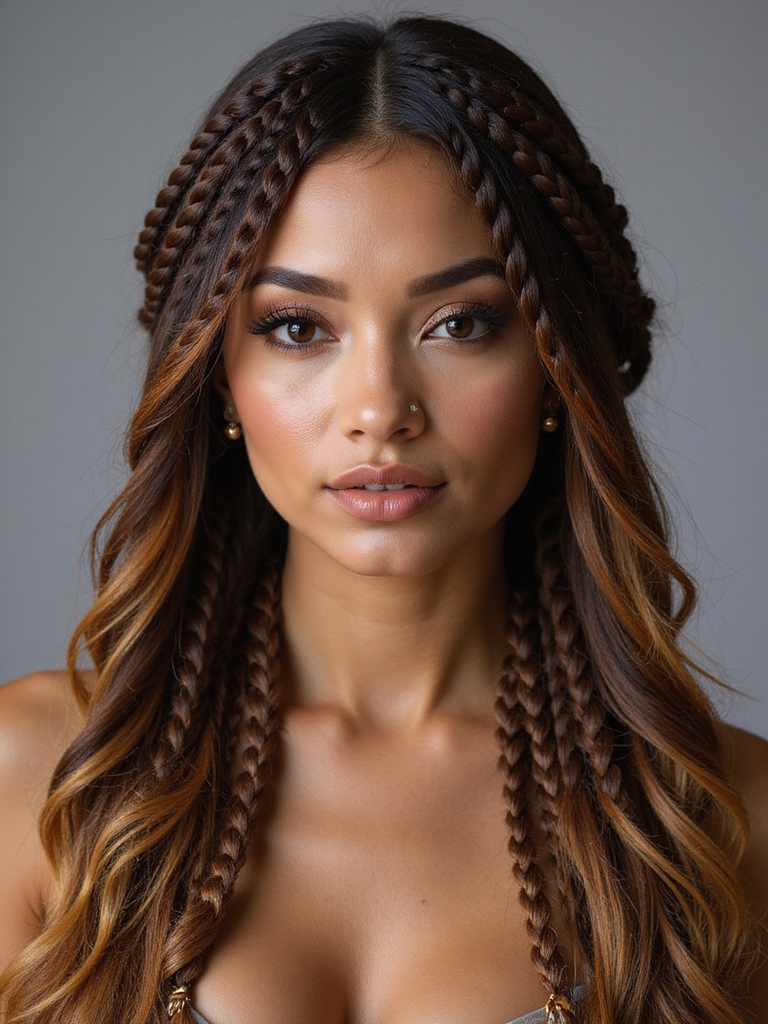
Intricate Geometric Goddess Cornrows

Although they look complex, I can walk you through Intricate Geometric Goddess Cornrows so you’ll see how striking shapes and clean lines come together to frame your face; these patterns mix artistry with structure and give any look a bold, modern edge.
I love how crisp parts and angles elevate simple braids into wearable art.
- Face-framing motifs
- Sharp, clean parts
- Symmetry play
- Polished edges
These styles often draw on techniques from Pretty Braided Hairstyles to create textured, dimensional looks.
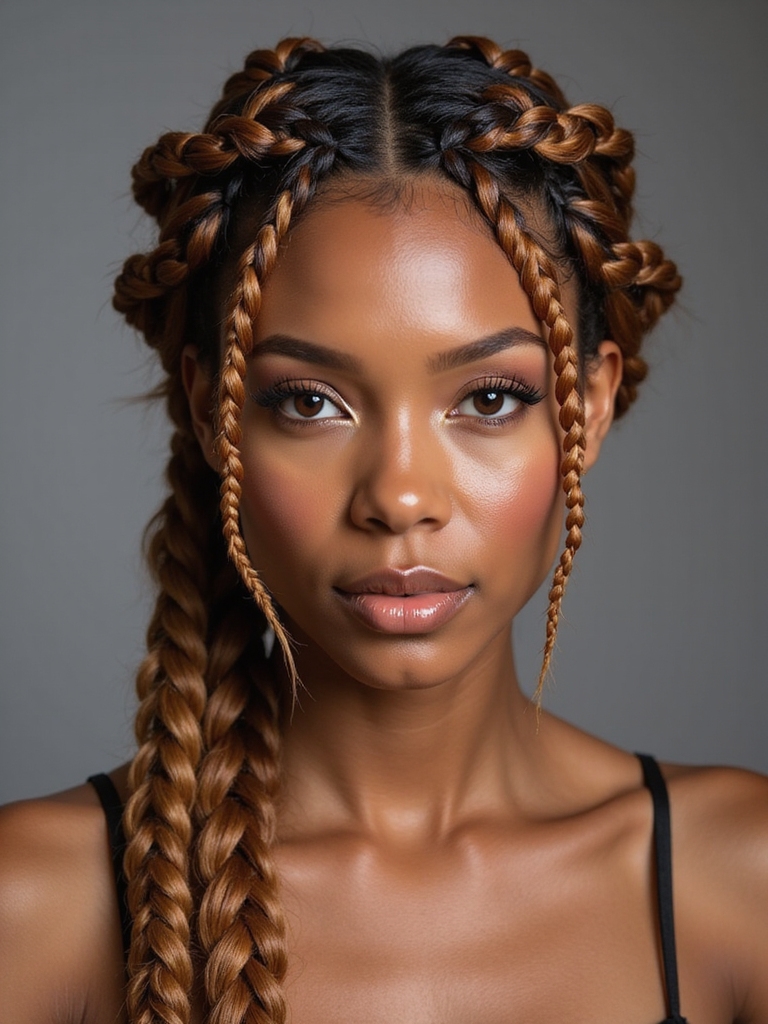
Feed-In Goddess Braids for Natural Volume

For adding instant, natural-looking volume, I turn to feed-in goddess braids because they build fullness without the chunky, unnatural look of traditional extensions.
I love how the feed-in technique creates seamless growth from the scalp, giving airy, soft braids that frame my face.
It’s low-maintenance, feels lightweight, and lasts—perfect when I want a polished, voluminous style that still looks effortlessly natural.
Goddess Box Braids With Beaded Accents

If you’re loving the airy fullness of feed-in goddess braids, you’ll also enjoy how goddess box braids bring that same soft, sculpted look with a playful twist — beads.
I love mixing sizes and scattering beads for shimmer and movement. It feels fun, chic, and low-maintenance.
- Lightweight box braids
- Strategic bead placement
- Easy styling options
- Protective and trendy
Mermaid Goddess Braids With Color Streaks

I love how mermaid goddess braids let you play with bold color placement to frame your face or create a hidden pop of shade.
I’ll share quick tips for positioning streaks so they complement your braids and skin tone.
Then we’ll cover simple ways to keep those vibrant hues looking fresh between touch-ups.
Color Placement Tips
While planning color placement for mermaid goddess braids, I like to start by imagining how each streak will move with the braid so the hues look intentional rather than random. I pick contrast, face-flattering tones, and ribbon-like placement for flow.
Try bold pops near the face and softer blends through the lengths for dimension.
- Frame the face
- Vary thickness
- Alternate brightness
- Keep symmetry
Maintaining Vibrant Hues
Now that you’ve planned color placement to flatter your face and flow with each braid, let’s keep those mermaid streaks popping.
I protect color by using sulfate-free shampoo, cold rinses, and weekly color-depositing masks. I avoid heat, sleep on a silk scarf, and refresh faded tones with temporary dyes between salon visits. These small habits keep hues vivid and braids Instagram-ready.
Sleek Low Ponytail Goddess Braids

Slip into a sleek low ponytail with goddess braids when you want a look that’s polished but still full of edge. I love how it frames my face, lies smooth at the nape, and stays chic all day.
It’s effortless to dress up or down, and quick to refresh between events.
- Glossy finish
- Soft baby hairs
- Secure yet flexible
- Works with accessories
High Sculptural Goddess Braids Updo

I’m excited to show you how a high sculptural goddess braids updo lifts into an elevated crown structure that turns heads. I’ll walk through sleek edge detailing to keep the look polished and modern.
Then I’ll share long-lasting hold techniques so your style stays flawless all day (and night).
Elevated Crown Structure
With a few strategic twists and lifts, I turn goddess braids into an elevated crown that feels equal parts regal and modern. I sculpt height, tuck ends for a seamless finish, and secure pieces so the shape stays bold all day.
You’ll get compliments and effortless vibe — it’s bold without fuss.
- Dramatic height
- Clean tuck finish
- Lightweight hold
- Day-to-night polish
Sleek Edge Detailing
After sculpting that elevated crown, I shift focus to sleek edge detailing to sharpen the look and keep the updo modern.
I glide small sections with a lightweight gel, sculpting baby hairs into delicate swoops and waves that frame my face. Tiny, precise strokes and a fine-tooth comb give that polished, architectural finish—clean, trendy, and effortlessly chic for any occasion.
Long-lasting Hold Techniques
Though the sculptural height steals the show, I lock the style in place using a few reliable long-lasting hold techniques so it survives wind, dance floors, and long days.
I grease edges lightly, use strong pins, and finish with flexible-hold spray for movement without crunch.
- Prep with moisture-lock gel
- Anchor with U-pins
- Wrap with silk scarf briefly
- Finish with shine spray
Goddess Braids With Twisted Knot Details

If you’re looking to elevate classic goddess braids, I love adding twisted knot details for a modern, textured twist that still feels effortless.
I weave small twisted knots along the braid shaft, creating eye-catching dimension and a chic, sculpted look.
It’s playful and polished, perfect for festivals or everyday glam, and easy to customize by size, spacing, and placement.
Goddess Braided Ponytail With Curls

Imagine stepping out with a sleek goddess braid gathered into a high ponytail that spills into bouncy, defined curls—I love how the look combines sculpted edges with playful volume.
I wear this for brunch or date night; it’s chic and effortless. Try these tips:
- Smooth edges for a polished finish
- Secure braids for long wear
- Curl ends for bounce
- Use shine serum for glossy hair
Accessorized Goddess Braids With Chains and Clips

After playing up a ponytail with curls, I love switching gears to goddess braids dressed up with chains and clips for instant edge and glamour.
I add delicate gold chains threaded along braids and mix in decorative clips for sparkle. It’s effortless to elevate casual looks, perfect for concerts or date nights, and lets me express bold, polished style without fuss.
Soft, Wispy Goddess Braids for a Romantic Look

When I want a softer, more romantic vibe, I loosen goddess braids and pull out tiny wisps around my face and nape to create that effortless, dreamy look.
I love how it softens features and still feels polished. Try gentle tugging, light misting, and delicate accessories for date-ready hair.
- Tug braids softly
- Pull face-framing wisps
- Use lightweight hairspray
- Add tiny floral pins
Multidirectional Goddess Braids Pattern

I love how those soft, wispy goddess braids feel romantic, but I also like switching things up with a multidirectional pattern to add modern edge and movement.
I braid in varied directions—diagonals, swirls, and opposing parts—to create texture and visual flow.
It livens up any outfit, frames your face uniquely, and keeps the look fresh, bold, and effortlessly chic.
I hope you’re as excited as I am to try these goddess braids — they’re bold, protective, and totally wearable for any vibe. If you want jaw-dropping jumbo braids, a polished crown halo, or soft wispy plaits with gold cuffs, there’s a look here that’ll boost your confidence and keep your hair healthy.
Play with textures, colors, and accessories, prep with moisture-lock products, and have fun making the style your own.