
I love how a few beads can turn simple braids into something totally personal, playful, and unexpectedly chic. I’ll walk you through picking the right beads, prepping hair so it stays healthy, and fun ways to place them—from tiny seed accents on cornrows to bold, chunky finishes.
Stick with me and you’ll have a fresh stack of ideas to try next time you braid—plus tips to keep your hair happy afterward.
Benefits of Adding Beads to Braided Hairstyles

I love how beads perk up a simple braid — they add instant personality and a little snap to your whole look.
I use them to highlight movement, weigh ends for sleekness, and mix colors for playful contrast. They turn a basic style into a statement, protect delicate strands at stress points, and make styling feel creative and fun every time.
I also find that adding braids can transform a hairstyle for every occasion with minimal effort.
Choosing the Right Beads for Your Hair Type

When you’re picking beads, think about what your hair needs as much as what looks cute — I’ll walk you through the quick basics so you don’t end up with beads that slip, snag, or feel like tiny weights.
For fine hair pick lightweight, larger-holed beads; for thick or textured hair choose smaller holes, sturdy materials like wood or acrylic, and avoid tiny glass that tugs.
Different braid patterns work better for different textures, so match your bead placement to your braided hairstyle and hair type.
Tools and Supplies You’ll Need to Bead Braids at Home

Now that you’ve picked beads that suit your hair, I’ll walk you through the actual kit you’ll need to make them stay put.
Think small but mighty: bead hooks, a bead applicator or loop, sturdy elastics, and a selection of hair-friendly beads and sealants.
I’ll also point out gentle hair oils and detanglers so your strands stay happy while you’re working.
For variation and durability, consider incorporating braided bun techniques like the effortless braided bun Braided Bun Hairstyles to expand your styling options.
Essential Beading Tools
If you’re ready to give your braids a little extra personality, you’ll want the right tools on hand — and I’ll walk you through the essentials so you won’t be scrambling mid-style.
I keep a bead tray, narrow beading needle/loop, sturdy elastic bands, small scissors, and a hair clamp.
A few bead sizes and a selection of metal or plastic rings finish the kit—simple, effective, joyful.
Braided ponytails can be dressed up or down for any event, from casual outings to formal affairs, making them a versatile choice for braided ponytail styling.
Hair-Friendly Supplies
Gathering the right hair-friendly supplies makes beading braids at home way less fiddly and a lot more fun—I keep things simple but thoughtful.
I recommend snagging smooth wooden or acrylic beads, snag-free elastics, a beading needle or loop, a wide-tooth comb, lightweight oil or detangler, and small clear rubber bands.
These protect strands, slide easily, and keep looks tidy without damage.
Braided headbands can add instant polish to casual looks and are great for experimenting with texture and shape—try a simple crown braid for an easy entry to braided headband styles.
Prep Steps to Protect Hair Before Beading

Before I start threading beads, I always give my hair a little TLC so the extras don’t stress my strands. I detangle gently, apply a lightweight leave-in, and seal ends with a bit of oil.
I section hair neatly, clip off loose pieces, and choose bead sizes that won’t pull. Quick tension checks during styling keep everything comfy and damage-free.
Seed Beads on Cornrows: A Delicate Look
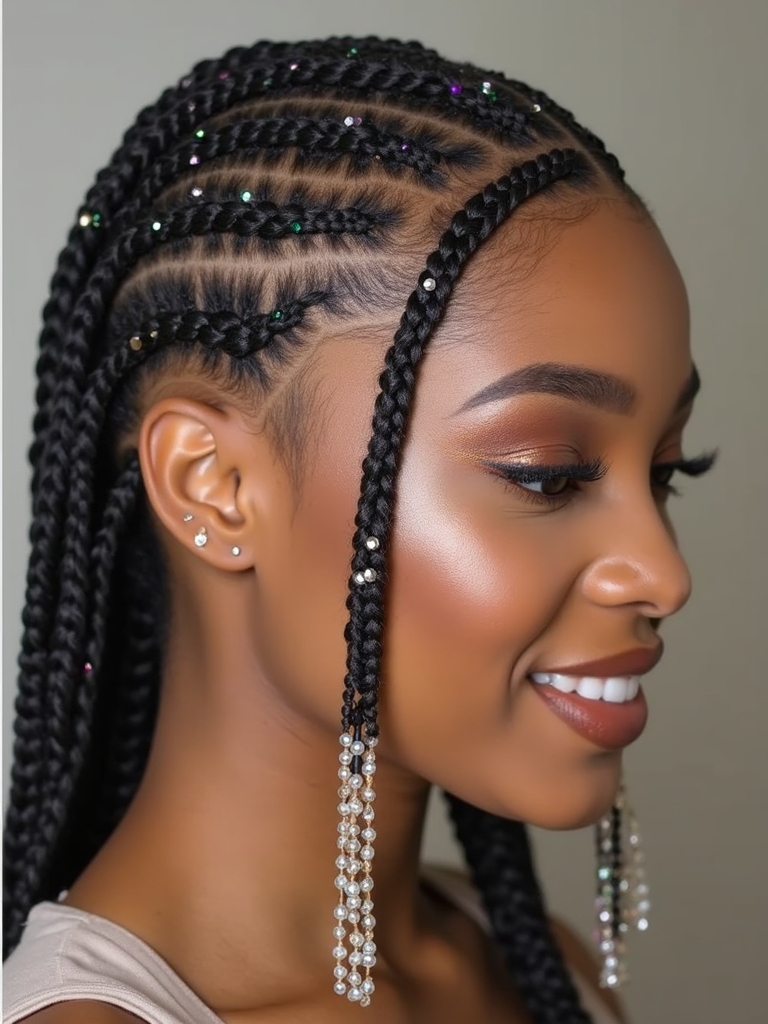
I love how tiny seed beads can totally change cornrows, so I’ll walk you through smart bead placement techniques that keep the look balanced.
I’ll show how to thread those fiddly little beads without swearing (much) and how to lock everything in with edge control for a neat finish.
Stick with me and you’ll get a delicate, durable style that actually lasts.
Bead Placement Techniques
When I add tiny seed beads to cornrows, I aim for a delicate balance that complements the braid instead of overpowering it.
I tuck beads near ends for subtle sparkle, cluster a few at partings for interest, and stagger placement down a row to create movement.
I keep spacing intentional, mix two colors sparingly, and step back to adjust until it sings.
Threading Small Beads
Let me show you how to thread those tiny seed beads onto cornrows without turning the whole look into a disco ball — it’s all about gentle precision.
I’ll walk you through tiny-thread tricks, patience, and playful placement so the result feels delicate, not heavy.
- Use a thin beading needle.
- Secure beads with a small knot.
- Space beads evenly.
- Finish with a dab of clear glue.
Styling With Edge Control
Often I start with a tiny swipe of edge control and a toothbrush — you’ll thank me later.
I smooth baby hairs around neat cornrows, then slide tiny seed beads close to the scalp for a delicate, polished finish.
Edge control keeps strands sleek so beads sit securely.
It’s simple, precise, and gives that finished, intentional vibe without fuss.
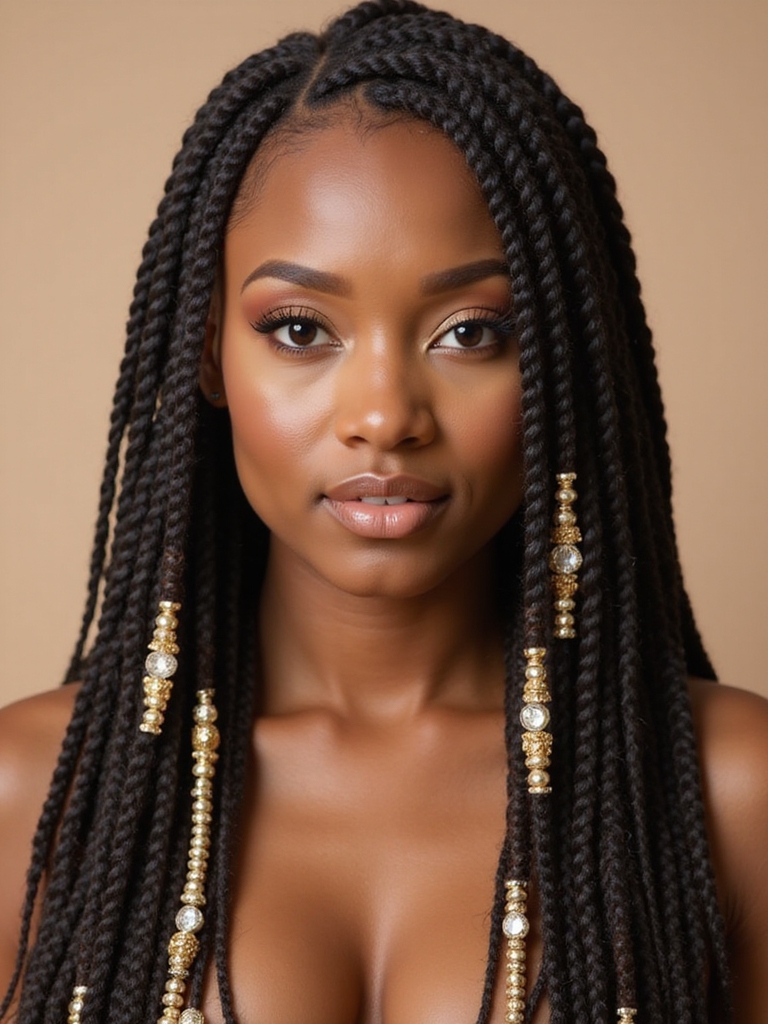
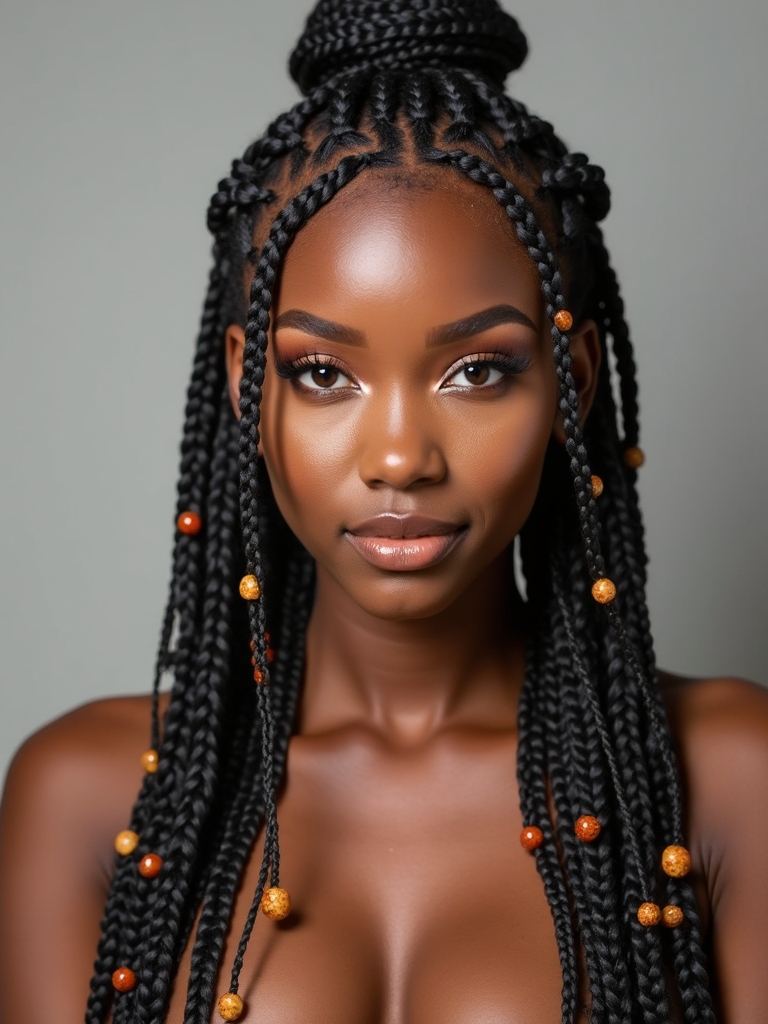
Chunky Wooden Beads on Box Braids for Bold Style

I love how chunky wooden beads instantly punch up a set of box braids — they give you weight, rhythm, and a whole lot of attitude without trying too hard. I wear them to feel bold, earthy, and playful.
They clack when I move, anchoring each braid’s vibe.
- Statement energy
- Natural texture
- Easy swaps
- Secure placement
Threading Glass and Acrylic Accents Into Twists

I’m excited to talk about threading glass and acrylic accents into twists because the right bead choice makes all the difference—glass gives shine while acrylic keeps things lightweight.
I’ll show you simple, secure threading techniques so beads won’t slip or snag as you go about your day. Stick with me and you’ll learn how to balance style and durability without any fuss.
Choosing Bead Types
Let’s talk beads — I love how a few glass or acrylic accents can turn a simple twist into a statement.
I pick beads for color, weight, size, and vibe so my twists stay comfy and cute. Consider:
- Lightweight acrylic for daily wear
- Glass for shine and polish
- Size matching twist thickness
- Color palette to tie the look together
Secure Threading Techniques
Start by threading with confidence — I’ve learned a few tiny tricks that keep glass and acrylic beads from slipping off or cracking as you wear them.
I knot thread discreetly, use a dab of clear glue on glass holes, and slide beads onto a protective nylon loop before adding them to twists.
Test tension so beads sit snug without stressing hair.
Pattern Ideas: Mixing Beads, Color, and Braid Size
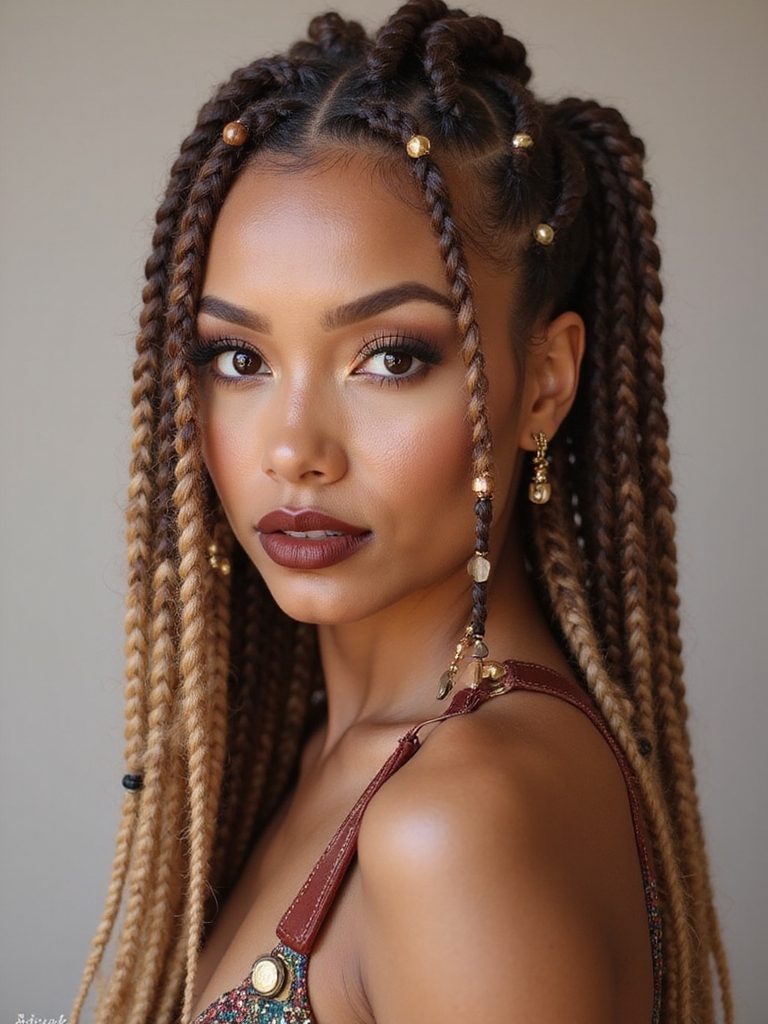
I love mixing beads, color, and braid size because it’s where personality really shows up in a hairstyle.
I play with contrasts—tiny braids with chunky beads, alternating colors, ombré sequences, and spaced patterns to make rhythm.
Try these playful combos:
- Tiny braid + bright single bead
- Chunky braid + mixed metallics
- Ombre beads along medium braids
- Alternating bead colors per braid
Securing Beads Safely: Knots, Sleeves, and Glue Alternatives

When I secure beads, I like to keep things simple but sturdy, so they don’t slip off mid-day or tug at my scalp; knots, sleeves, and non-toxic glue alternatives each have their place depending on the look and the wear.
I favor tiny tight knots for natural hair, silicone sleeves for longevity, and water-based adhesives sparingly—gentle, removable, and scalp-friendly for comfortable, creative styles.
Quick DIY Beaded Braids for Everyday Wear

I’ll show you how to get braid-ready in minutes with quick prep tricks that keep your hair smooth and tangle-free.
Then we’ll play with simple bead techniques—sliding, threading, and knotting—that add instant flair without fuss.
Stick around and you’ll be rocking easy, everyday beaded braids in no time.
Quick Braid Prep
Because prepping your hair right makes beaded braids actually fast, I start with just three simple steps that save time and drama later. I keep things practical and playful—clean, detangled, and trimmed ends.
Then I section smartly so beads slide on easily.
- Clarify wash
- Detangle with conditioner
- Trim snags
- Section and clip into workable parts
Easy Bead Techniques
Let’s jump into the fun part: adding beads that actually stay put and look cute without taking forever.
I’ll show simple tricks—use small rubber bands to lock beads, slide on beads before finishing a braid, and knot ends securely.
Mix clear elastic for hidden hold or colorful bands for flair.
These quick methods keep beads neat, comfy, and ready for everyday wear.
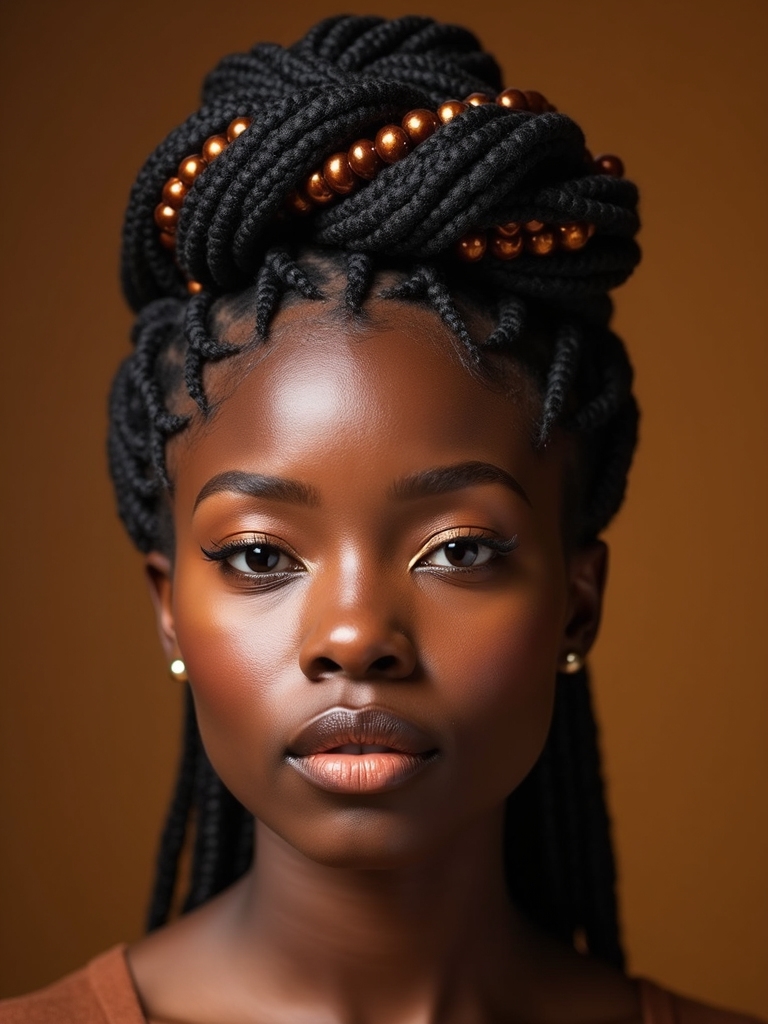
Special-Occasion Beaded Updos and Crown Styles

When I’m getting ready for a big event, I love turning braids into something regal by adding beads and twisting them into updos or crowns that actually sparkle in photos.
I’ll keep it simple, comfy, and bold so you feel like royalty without the fuss:
- Low braided bun with scattered beads
- Halo crown braid with pearl accents
- Twisted side updo with metallic beads
- Mini braided tiara with colorful glass beads
Maintaining and Washing Braids With Beads
I usually treat washing and maintaining beaded braids like a thoughtful spa day for my hair — gentle, deliberate, and a little bit celebratory.
I dilute shampoo, focus on my scalp, and rinse thoroughly so beads don’t trap residue. I pat dry, apply lightweight oil on scalp, and refresh edges with a soft brush.
Nightly silk wrap keeps beads secure and reduces frizz.
Removing Beads and Caring for Your Natural Hair
After a few weeks of rocking beads, I treat removal like a mini ritual: gentle, patient, and totally focused on protecting my natural hair.
I talk you through quick steps I actually use, no drama, just care.
- Untangle beads with oil and fingers.
- Undo knots slowly.
- Shampoo scalp gently.
- Deep-condition and air-dry.
Cultural Meaning and Respectful Styling With Beads
Cleaning up beads and caring for your hair got us thinking about what those beads really mean beyond aesthetics.
I honor traditions by learning origins, asking friends about significance, and choosing patterns respectfully.
I avoid cultural copying without context, credit creators, and mix modern flair with mindful reasons.
That way my beaded braids celebrate heritage instead of appropriating it.
Inspiring Photo-Ready Ideas to Personalize Your Beaded Braids

With a few simple tweaks, I can make my beaded braids look totally photo-ready and uniquely mine. I love mixing textures, colors, and tiny charms to tell a mini story.
Here are quick ideas I actually use:
- Contrast beads by size and sheen.
- Add metallic cuffs near the roots.
- Tie a silk ribbon at the ends.
- Cluster beads for focal points.
I hope you’re buzzing with ideas — beads really are the easiest way to make braids feel like you. Try a few seed beads for subtle sparkle or chunky colorful ones for a bold mood, and remember gentle prep and nightly care will keep hair happy.
Play, mix sizes, and respect the cultures behind these styles as you create. Most of all, have fun—your braids should make you grin every time you catch your reflection.


