
I love how a bold braid can flip a whole vibe, so I’m sharing clever twists and textured ideas you can actually wear. I’ll walk you through oversized plaits, micro-braid mosaics, ladder accents and more—practical tips on placement, extensions and color that make each look pop.
Stick with me and you’ll find a go-to statement style that fits your mood and face—next up, which braid should we try first?
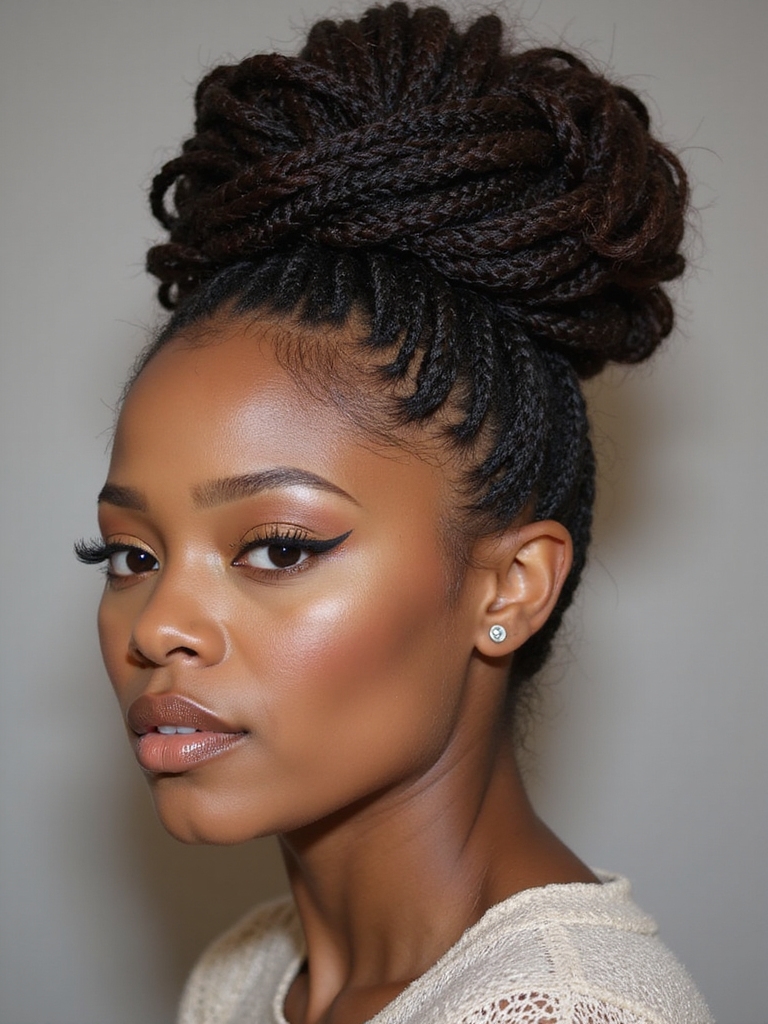
Sculptural Oversized Plaits
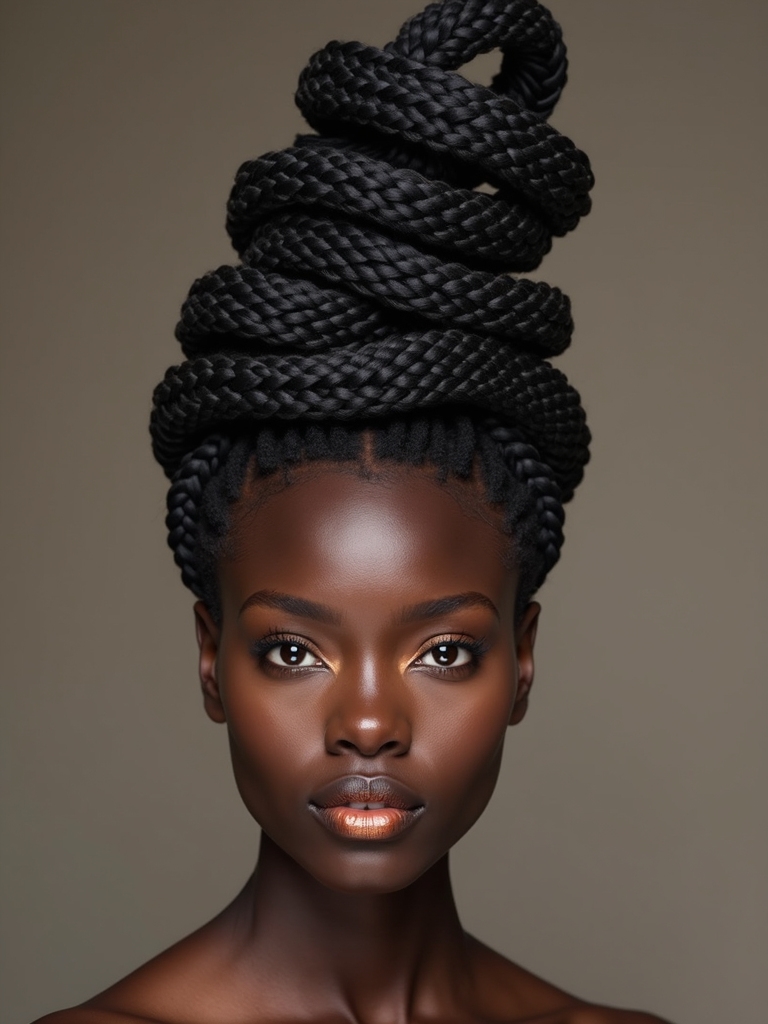
Think of Sculptural Oversized Plaits as braids gone bold — I love how they turn simple hair into wearable architecture.
I’ll show you how to create dramatic, chunky plaits that hold shape: tease for texture, secure with strong elastics, and pin strategically to sculpt curves.
They suit statement events or casual flair, lasting longer when prepped with texturizing spray and patience.
Long braided hairstyles offer many variations, from fishtails to rope braids, that can inspire even bigger sculptural looks with long braided hairstyles.
Micro-Braid Mosaic
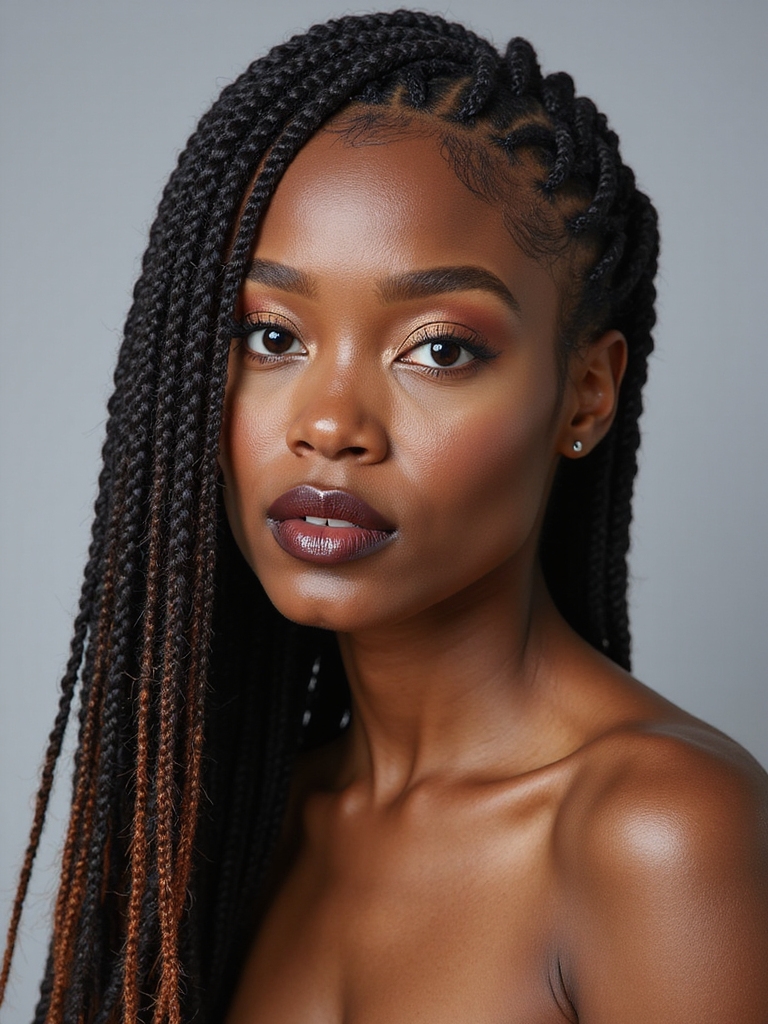
I love how micro-braid mosaics let you place tiny braids like pixels to build striking designs.
I’ll show scalp-friendly techniques so your hair stays healthy while we play with pattern placement and tension.
Then we’ll talk color accents that make those miniature motifs pop without overwhelming the look.
For versatile styling, consider combining them with other Braided Ponytail Hairstyles and learning braid maintenance to keep the look fresh.
Tiny Braid Placement
When I map out tiny braids, I treat the scalp like a mini city grid—every braid gets a purpose and a place so the whole mosaic reads clean and intentional.
I plan focal lines, map symmetry or deliberate chaos, and vary direction for texture.
Placement frames the face, highlights features, and controls movement.
I stagger density to avoid bulk and design mini patterns that pop.
Fresh braided styles often blend classic techniques with modern twists to keep looks current, like experimenting with new braided hairstyles to refresh a signature mosaic.
Scalp-Friendly Techniques
Usually I start by treating the scalp like skin that needs respect—my goal is tiny braids that look crisp but don’t pull. I gently detangle, moisturize with a light oil, and section small, even parts.
I braid with relaxed tension, pause to check comfort, and secure ends softly. That way the micro-braid mosaic stays neat without stressing follicles. I also incorporate techniques from Effortless Natural Braided Hairstyles, focusing on protective styling and braid placement to suit every texture, creating a true micro-braid mosaic that preserves hair health.
Pattern Color Accents
Sometimes a pop of color is all it takes to turn a neat micro-braid mosaic into a wearable artwork, and I’ll show you how to place accents without overpowering the scalp-friendly foundation.
I pick two contrasting shades, dot them into geometric clusters or thin lines, then step back. Placement near partings or crown adds drama; keep spacing regular for a tidy, modern look. Adding a simple braided crown can frame the face and enhance overall balance, making the colorful accents stand out as intentional braided hairstyles.
Ladder Braid Accent

I love how a ladder braid accent can sit along the crown or frame the face to instantly change your hair’s shape and draw the eye.
I’ll walk you through the simple step-by-step technique—sectioning, creating the rungs, and securing each loop—so you can recreate the look without frustration.
Try it near a part or along the temple and you’ll see how placement transforms the whole style.
Placement and Visual Effect
When I add a ladder braid as an accent, I think about how its placement can literally change the whole vibe—slot it near the hairline for a delicate, face-framing touch, tuck it behind the ear for a polished, asymmetrical look, or run it down the crown to emphasize height and texture.
I use placement to balance features, draw attention, or soften angles with playful precision.
Step-by-Step Technique
Placing the ladder braid changes the whole mood, so now I’ll show you exactly how to create it step by step.
I guide you through sectioning, looping, tightening, and finishing so it reads crisp and intentional.
- Section a thin vertical strip.
- Create a small Dutch stitch.
- Loop strand under to form the rung.
- Secure and blend for polish.
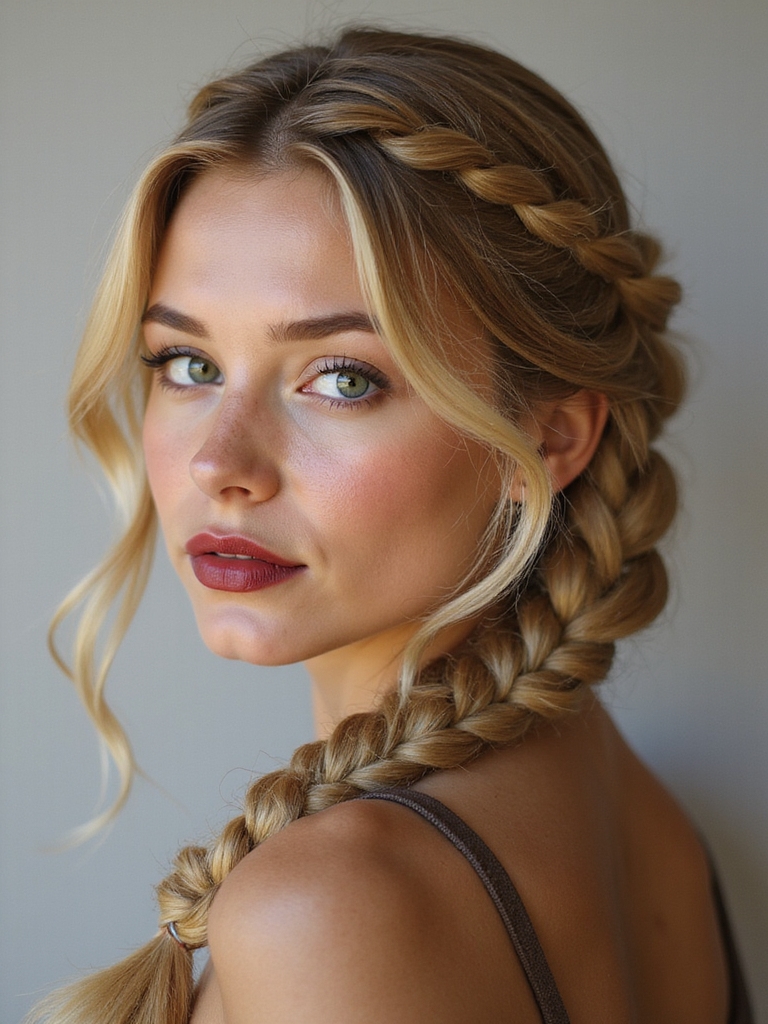
Fishtail Halo Crown
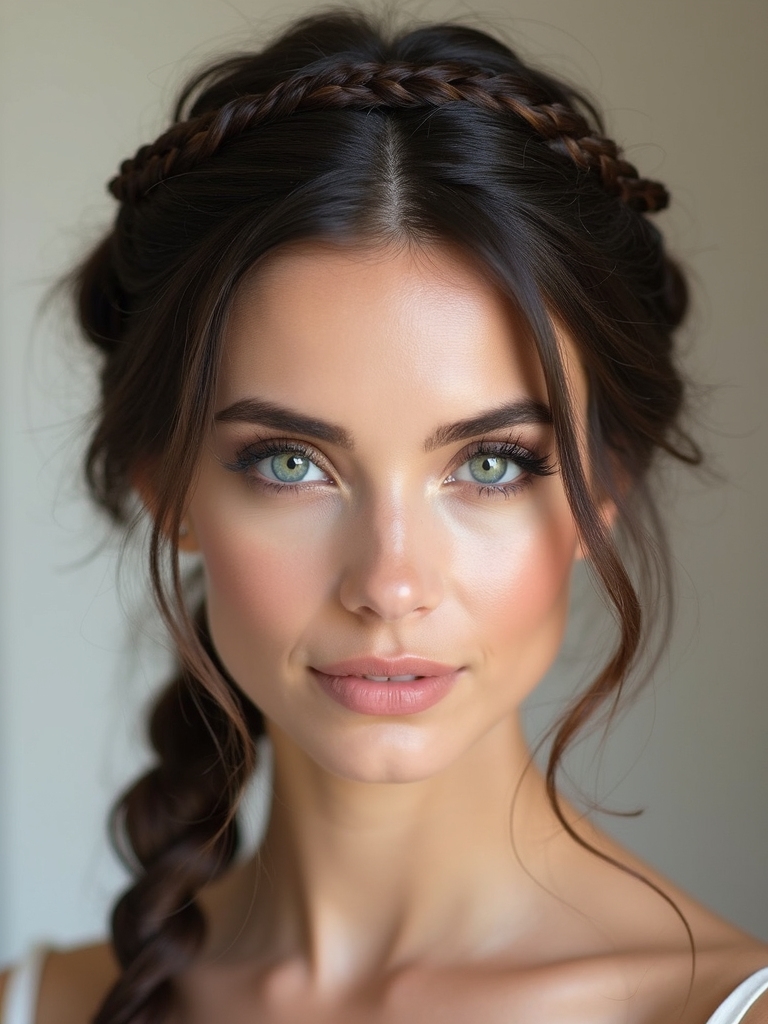
I love how a fishtail halo crown instantly makes a look feel effortless and special.
I braid along my hairline, weaving thin sections for that detailed, textured finish, then pin the braid into a crown.
It’s great for weddings or messy-chic days, stays secure with discreet pins, and works on most lengths.
Try loosening bits for softness and misting with light hairspray.
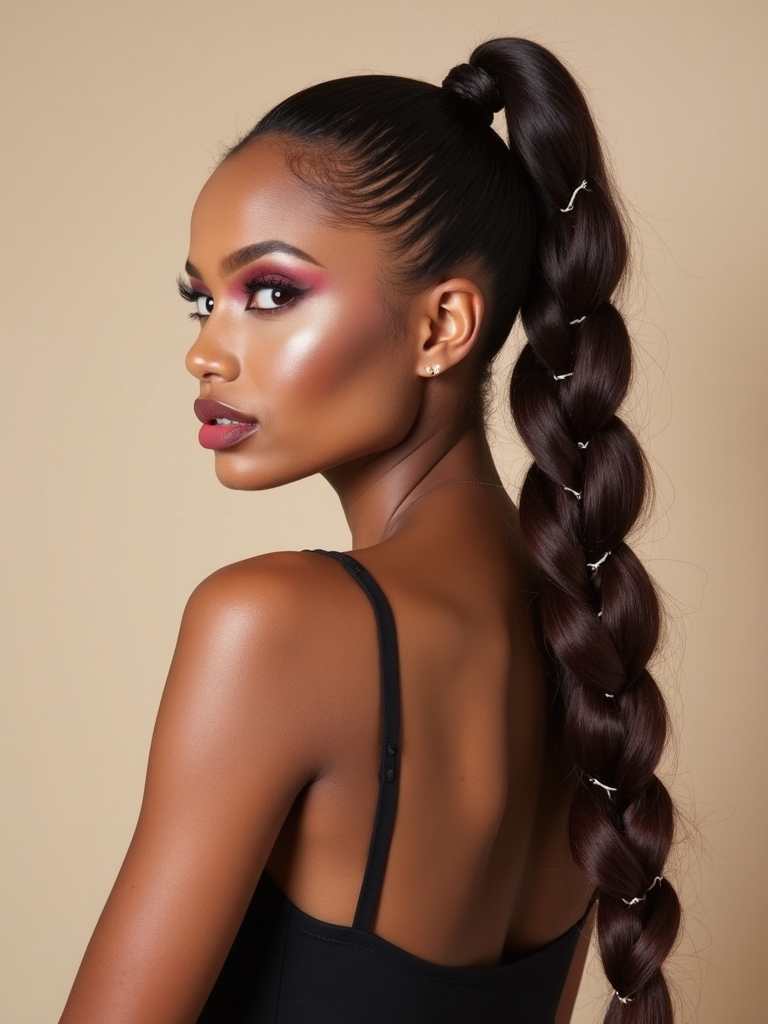
Rope-Twist Double Ponytail
Grab two sections, secure them into high ponytails, and let’s twist — that’s the easy magic behind the rope-twist double ponytail.
I love how it’s quick, polished, and playful.
Try this:
- Smooth each section.
- Twist both strands tightly.
- Wrap and secure ends.
- Tug gently for volume.
It’s practical, bold, and perfect for days you want effortless flair.
Cornrow Zigzag Pattern

I love how a crisp zigzag cornrow can totally transform a look, so I’ll show you how to get those sharp partings just right.
I’ll walk through laying out a symmetrical zigzag pattern so both sides mirror each other and the style reads clean.
Then I’ll share quick maintenance and styling tips to keep the rows neat and the scalp healthy between touch-ups.
Sharp Parting Technique
Think of the scalp as a tiny map and I’m your guide to carving those crisp zigzags—I’ll show you how to make sharp partings that turn simple cornrows into eye-catching patterns.
I keep lines clean with tension control, a fine rattail comb, steady hands, and patience.
- Section
- Comb
- Secure
- Braid
Symmetrical Zigzag Layout
Once you’ve mastered sharp partings, I’ll walk you through laying out a symmetrical zigzag that makes cornrows pop like a geometric crown.
I mark the center, measure equal sections, and use a comb to carve mirrored zigzags. Start slow, keep tension consistent, and clip stray hairs.
The result’s bold, balanced, and surprisingly easy once you get the rhythm.
Maintenance and Styling Tips
Usually I keep maintenance simple so the zigzag cornrows stay sharp without fuss.
I’ll tidy edges, moisturize scalp, and sleep with a silk scarf. Try these quick rituals:
- Shampoo gently weekly.
- Apply light oil nightly.
- Refresh parts with a toothbrush.
- Re-braid loose ends promptly.
These steps keep the pattern crisp, comfy, and runway-ready without drama.
Bubble Braid Cascade

I love using the bubble braid cascade when I want a fun, low-effort look that still turns heads; it’s basically a string of voluminous, playful “bubbles” linked down the back or to the side.
I pinch sections after elastic ties for instant volume, secure with clear bands, and mist lightly for hold. It’s quick, adaptable, and perfect for casual days or festivals.
Dutch Lace Braided Updo
I love starting a Dutch lace braided updo by choosing the right base braid placement—centered, off to the side, or even in a horseshoe shape can change the whole vibe.
If you want extra length or volume, I’ll show you how to add extensions seamlessly into the lace braid so nothing looks bulky or obvious.
Then we’ll finish it off with simple accessories—pins, combs, or a scattering of flowers—to keep it secure and stylish.
Base Braid Placement
When I’m planning a Dutch lace braided updo, I start by choosing the base braid placement like it’s the map for the whole hairstyle — get it wrong and everything else fights you.
I pick placement based on face shape, parting, volume needs, and outfit.
- Face shape
- Part line
- Volume balance
- Practical wearability
Adding Hair Extensions
Now that the base braid is set, it’s time to bring in extensions to build length, fullness, or color pops that the natural hair can’t give.
I clip in thin wefts close to the scalp, blending as I feed hair into the Dutch lace braid. I check tension, trim stray fibers, and smooth joins so the updo reads seamless and lively without weighing my crown down.
Finishing With Accessories
I’ll tuck in the finishing touches that take a Dutch lace braided updo from neat to knockout. I love tiny pearls, a silk scarf wrap, bobby pins arranged like stars, and a spritz of strong-hold spray.
These add polish without overpowering the braid.
- Pearls
- Scarf
- Decorative pins
- Strong-hold spray
Beaded Bohemian Braids

I love how beaded Bohemian braids instantly turn a simple plait into a festival-ready statement, so I’ll walk you through the basics and a few easy tricks to get that effortless, artsy vibe.
I thread small wooden or metallic beads onto strands before braiding, stagger placements, and secure with clear elastics.
Mix textures, keep it loose, and don’t overdo beads for balance.
Waterfall Braid With Curls

If you want a look that’s romantic but doesn’t feel fussy, try a waterfall braid with curls — it’s one of my go-tos when I want hair that reads effortless and polished at the same time.
I braid, let strands fall, curl ends, and tug for shape. It’s quick, flattering, and adaptable.
- Quick
- Romantic
- Low-maintenance
- Versatile
Braided Bun With Twisted Tendrils

Twist a few face-framing tendrils, weave a simple braid, and tuck everything into a low bun for an easy look that feels styled but not stiff.
I love how those twisted tendrils soften my face while the braid adds texture.
It’s quick: secure the bun, pin the braid around it, and pull pieces loose for movement.
Perfect for errands or date night.
Side-Swept Milkmaid Braids
Try sweeping your braids to one side for an instantly romantic, fuss-free look I keep coming back to.
I love how side-swept milkmaid braids feel polished yet relaxed.
They frame my face, stay put, and work for day or night.
Try this simple checklist:
- Smooth roots
- Braid firmly
- Tuck neatly
- Secure discreetly
Elastic-Inserted Ladder Pony
I love how the elastic-inserted ladder pony turns a simple ponytail into something clever and modern — you weave small elastics through sections to create a laddered, textured look that still feels effortless.
I’ll show quick steps, suggest elastic spacing, and offer hold tips so your style lasts all day.
It’s playful, practical, and surprisingly fast once you get the rhythm.
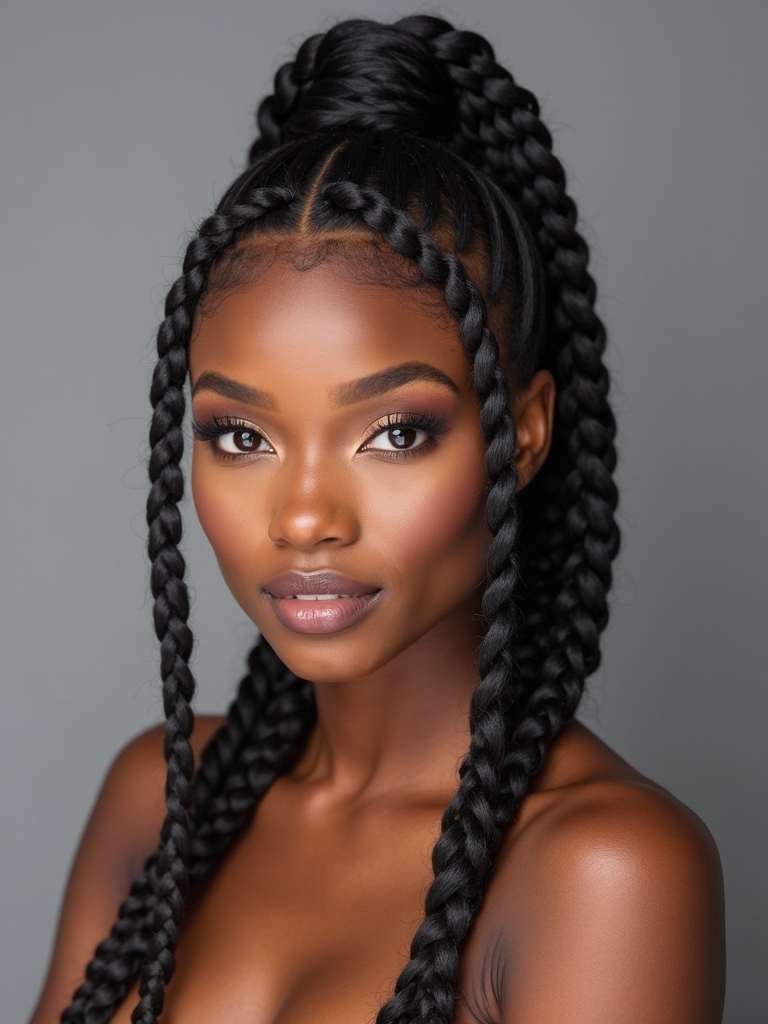
Color-Blocked Box Braids

A few bold blocks of color can turn basic box braids into a statement without adding fuss — I like to mix two or three complementary shades and tuck them in strategically so the look reads intentional, not busy.
I choose colors to flatter, then balance placement for drama without chaos.
- Pick two/three shades
- Test placement
- Tuck strategically
- Finish neat
Braided Mohawk With Shaved Sides

Grab your clippers and your comb — I love how a braided mohawk with shaved sides turns everyday hair into something fierce and low-maintenance.
I braid a central strip—box or cornrows—then shave the sides for contrast.
It’s bold, easy to style, and grows out neatly.
Perfect for busy days or events when you want edgy polish without constant upkeep.
I hope you’re feeling inspired to try one (or five) of these braided statements — they’re all about fun, drama, and a little architectural flair. Mix textures, play with placement, and don’t be afraid to add color, beads, or a bold part.
Start small or go full couture; these looks work for everyday outings or big nights. Ready to braid your vibe into something unforgettable? Go create and slay, babe!


