I’ve got go-to winter hat hairstyles that keep you polished indoors: quick root blasts or dry shampoo for instant lift, soft face-framing layers or curtain bangs to avoid hat flatness, and loose Dutch braids or textured waves prepped with sea‑salt spray so they pop when the cap comes off.
I also love a sleek low pony or messy low bun—elastic-free options for fine hair—and soft roller boosts at the crown for instant dome; keep going and I’ll share step‑by‑step tricks.
Quick Volume Boost After a Beanie

I’ll show you how to bring limp, flattened hair back to life after a day in a beanie—fast and glam. I shake roots, mist with a texturizing spray, and scrunch to rebuild body.
I flip my head, blast roots with a cool blast, then smooth ends with fingers for shine. Instant lift, touchable volume, and polished warmth-ready hair.
Black curly hair loves moisture and definition, so I also refresh curls with a lightweight leave-in to maintain curl definition.
Sleek Low Ponytail for Berets

Pairing a beret with a sleek low ponytail instantly feels chic and effortless.
I smooth my hair back, secure it at the nape, and wrap a strand to hide the elastic — it reads polished under the beret without fuss.
It flatters the face, keeps hair tidy indoors, and lets bold lips or a statement earring steal the spotlight.
A headband-inspired approach can elevate the look by creating chic headband updo contrast and structure.
Easy Textured Waves Under a Knit Cap

I love slipping on a chunky knit cap over loose, texturized waves — it instantly makes me look cozy and photo-ready without a ton of effort.
I rough-dry hair, mist sea-salt spray, and scrunch for undone volume. Tuck front pieces to frame my face, let ends peek out, and finish with lightweight hairspray so the waves survive hat removal while staying touchably soft and chic.
Winter braids can also stay neat in cold weather when you prep hair with the right texture and hold coat of hairspray.
Low Messy Bun That Survives a Hat

When I want polished-but-effortless hair under a slouchy beanie, I reach for a low messy bun that actually survives hat wear — and still looks chic when the cap comes off.
I loosely twist, secure low at the nape, and tug face-framing pieces for softness. It’s modern, forgiving, and perfectly undone for indoors.
- dry shampoo for grip
- loose elastic
- strategic bobby pins
- soft hairspray
This style is one of the easiest effortless updos that always looks polished.
Face-Framing Layers to Prevent Flatness

I love how soft, wispy bangs and layered face-framing pieces instantly rescue hair from getting squashed under a hat.
I’ll show you how those delicate layers add movement and lift so your silhouette stays chic all day.
Trust me, a few strategic cuts make winter hats look intentional, not flat.
Effortless curtain bangs create a natural part and framing that enhances the face while wearing headwear, especially when combined with face-framing layers.
Soft, Wispy Bangs
Often I reach for wispy, face-framing bangs because they add instant movement and keep a hat from flattening my whole look.
I sweep them slightly to the side, teasing for softness and letting a few strands peek from under my brim for effortless glamour.
- Soft texture for motion
- Lightweight styling spray
- Gentle blow-dry lift
- Touch-up with fingers throughout day
These bangs work especially well on black hair because the wispy layers enhance natural shine and dimension.
Layered Face-Framing Pieces
If soft bangs give you that peek-a-boo glamour, layering face-framing pieces magnifies it by creating dimension around your face so hats won’t squash your shape.
I sculpt pieces that skim cheekbones, softening hats’ pressure and adding movement when I remove them.
Light layers around the jaw lift my profile, and a touch of shine serum keeps strands sleek, never flat, under wool or knit.
Effortless long layers with curtain bangs add length and flow that maintain shape even after a day in a beanie, showcasing how long layers and curtain bangs work together.
Half-Up Twists for Slouchy Hats

When I want a look that’s effortlessly chic under a slouchy beanie, I twist two sections from my temples into a soft half-up knot that keeps hair off my face while letting volume peek out the back.
I love how it reads polished yet relaxed.
- Quick to do
- Protects face framing layers
- Adds sculpted volume
- Works with texture
This simple technique is one of many effortless half updos that look completely styled.
Braided Crown That Holds Shape Indoors

I’ll start by creating a tight Dutch braid along the hairline so the base stays anchored under a hat.
Then I slip in small padding for just the right lifted volume that won’t collapse when I’m indoors.
To finish, I mist generously with long-hold hairspray and smooth any flyaways so the crown keeps its polished shape.
Cornrow styles often use tight, sculpted braids to create defined updos that command attention.
Secure Dutch Braid Base
Tuck, braid, and secure — I love starting a Dutch braid crown because it gives me that polished, runway-ready look that actually survives a day indoors without collapsing into frizz.
I anchor the braid close to the scalp, pin tightly, and mist with flexible hold for shine.
- Start near the nape
- Braid tightly, adding strands
- Use U-pins discreetly
- Finish with light spray
For extra versatility, you can transition the crown into an effortless braided ponytail that works for both casual and dressy occasions and holds up well indoors with minimal touch-ups, especially when you begin with a braided ponytail base.
Padding for Volume
After anchoring that Dutch braid close to my scalp, I like to add soft padding so the crown reads full without feeling stiff.
I tuck a small foam insert or rolled sock beneath the braid, smoothing hair over it for a seamless look. It gives instant lift, holds shape under a hat, and looks effortlessly luxe when I remove my hat indoors.
Finishing With Hairspray
Usually I finish the braided crown with a fine mist of flexible-hold hairspray so the shape survives evenings indoors without feeling crunchy. I gently smooth flyaways and press the braid into its place, keeping movement natural and elegant.
A little sheen spray warms the light. I love how it stays polished under a hat and then bounces back when removed.
- Flexible hold
- Light mist
- Targeted smoothing
- Soft shine
Side-Swept Lob for Cloche and Bucket Hats

When I want instant polish with a cozy edge, I sweep my lob to the side so it slips perfectly under a cloche or bucket hat, framing the face without bulk; the slight asymmetry reads chic and effortless, and it keeps your neckline clean while the hat does the rest.
I add a glossy finish and soft bend at ends for motion that peeks out just right.
Loose Dutch Braid for Thick Hair

When I style a loose Dutch braid for thick hair, I always start by prepping for volume with a light texturizing spray and a root lift so the braid looks full under a hat.
I tease gently at the crown and braid loosely, keeping the sections soft so the hat sits smoothly without flattening your shape.
To finish, I secure loose ends with a snag-free elastic and tuck or pin excess hair for a polished, cozy look.
Prep for Volume
Plaiting a loose Dutch braid before you pop on a winter hat is my go-to trick for instant, lasting volume—especially with thick hair that can otherwise flatten under fabric.
I braid loosely, tug sections for lift, and let the braid settle so waves form when I remove the hat.
Try these quick prep steps:
- Add lightweight mousse
- Section hair at crown
- Dutch braid loosely
- Tug for airy volume
Secure Loose Ends
I smooth down stray hairs and wrap the tail of my loose Dutch braid with a soft, snag-free elastic so nothing peeks out from under my hat; this little fix keeps the braid tidy and the silhouette sleek without undoing the airy volume I worked for.
Then I tug gently along the braid’s loops to amplify softness, mist with light-hold spray, and slip on my hat.
Tucked-In Ends for Shorter Cuts

Though shorter cuts can feel stubborn under a snug beanie, I love tucking in the ends to keep a sleek, polished silhouette that still feels effortlessly chic.
It’s quick, flattering, and keeps flyaways contained while indoors.
I’ll usually add a touch of shine serum and gentle pins for hold.
- Smooth with serum
- Tuck under collar
- Use discreet bobby pins
- Finish with light hairspray
Smooth Blowout Touch-Up After Hat Removal

When I take off my winter hat, I immediately refresh my roots with a quick blast of volumizing spray and a focused blow-dry to lift and separate.
I smooth flyaways with a tiny dab of lightweight serum or a soft bristle brush for instant polish.
Then I run a warm flat iron over the ends to restore that sleek, salon-fresh finish.
Quick Root Volumizing
Shake out your hair and let me show you a quick root-volumizing trick that brings a smooth blowout back to life after hat removal.
I gently tease roots, mist with lightweight spray, and smooth the ends for salon polish.
Try these steps to revive lift without disrupting your sleek finish:
- Section roots lightly
- Backcomb gently at crown
- Apply volumizing mist
- Smooth over with paddle brush
Tame Flyaways Fast
Now that the roots have some lift, I tackle the little wisps that give away hat wear — and I do it fast.
I smooth sections with a small round brush and a quick blast from my blow dryer, then seal with a lightweight serum on fingertips. It’s polished, effortless, and instant—perfect for stepping indoors without sacrificing that salon-fresh, glamorous finish.
Restore Sleek Ends
I slip the hat off and instantly tend to the ends — the part that betrays the most hat wear — by whipping out my round brush and a low-heat blow dryer for a quick, controlled touch-up.
I smooth, sculpt, and seal with tiny movements so my blowout reads polished, not flattened.
- Section ends with tension
- Use low heat, focused airflow
- Curl under slightly
- Finish with light serum
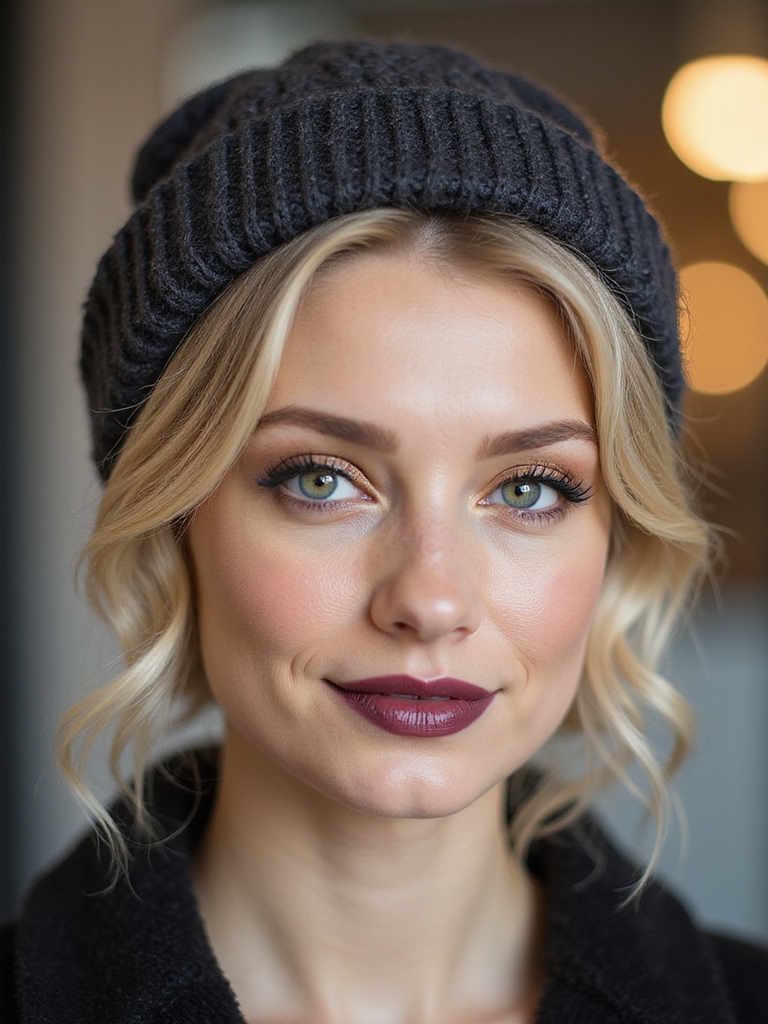
Tousled Pixie Styling for Beanie Days

I often reach for a slouchy beanie when the cold hits, and my go-to for keeping things chic is a tousled pixie that peeks out just enough to look effortlessly polished.
I finger-style texture with a lightweight paste, emphasize soft fringe and sideburns, and smooth any fuzz with a serum. The result is casually glamorous, framing my face while staying cozy under a hat.
Soft Roller or Clip Volume Trick

For extra lift under a snug hat, I tuck soft rollers or clip-in pads at my roots before I pop my beanie on, letting them create a gentle, natural dome instead of a helmet-y flatness.
- Position rollers where crown needs height
- Use lightweight clips to avoid dents
- Heat briefly for stubborn hair
- Remove after a few minutes for instant polish
Elastic-Free Updo for Fine Hair
After popping in rollers for lift, I’ll show you an elastic-free updo that keeps fine hair sleek and soft under a hat.
I twist sections into a low chignon, securing with bobby pins and a silk scarf for frictionless hold.
It reduces breakage, preserves volume, and feels polished—perfect for slipping into a beanie without crushing the shape or adding bulk.
Quick Dry Shampoo Refresh and Root Lift

Spritzing a few targeted bursts of dry shampoo at my roots and working them in with my fingertips is my fastest trick for instant lift and refreshed texture under a hat.
I love the matte, airy finish that keeps styles effortless and luxe all day.
- Target roots only
- Massage for lift
- Brush lightly to blend
- Finish with a spritz of texturizer
I love how these hat-friendly hair hacks keep you looking effortlessly elegant from cold commutes to cozy cafes. Whether you’re adding instant lift with a little root-refresh or slipping into a sleek low pony for polished poise, each trick delivers chic confidence.
Picture plush berets, bouncy beanies, and tousled tresses—soft, shiny, season-ready styles that survive hats and still stun indoors. Stay glamorous, stay game-ready, and savor every stylish season.