
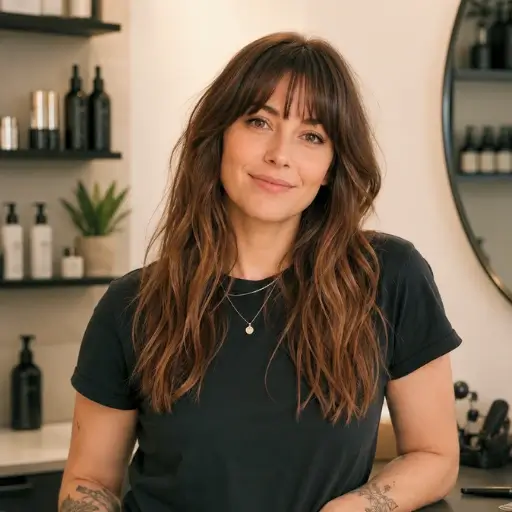

I’ve got a handful of easy updos that always look polished—think messy low buns with face‑framing tendrils, sleek low knots, and textured high buns for instant lift. I love twisted low chignons and looped buns that you can anchor with hidden pins, plus braided crowns and double twists for romantic detail.
A simple sock bun or a low bun wrapped in a silk scarf feels luxe in minutes. Stick with me and I’ll show how to make each one flawless.
Messy Low Bun
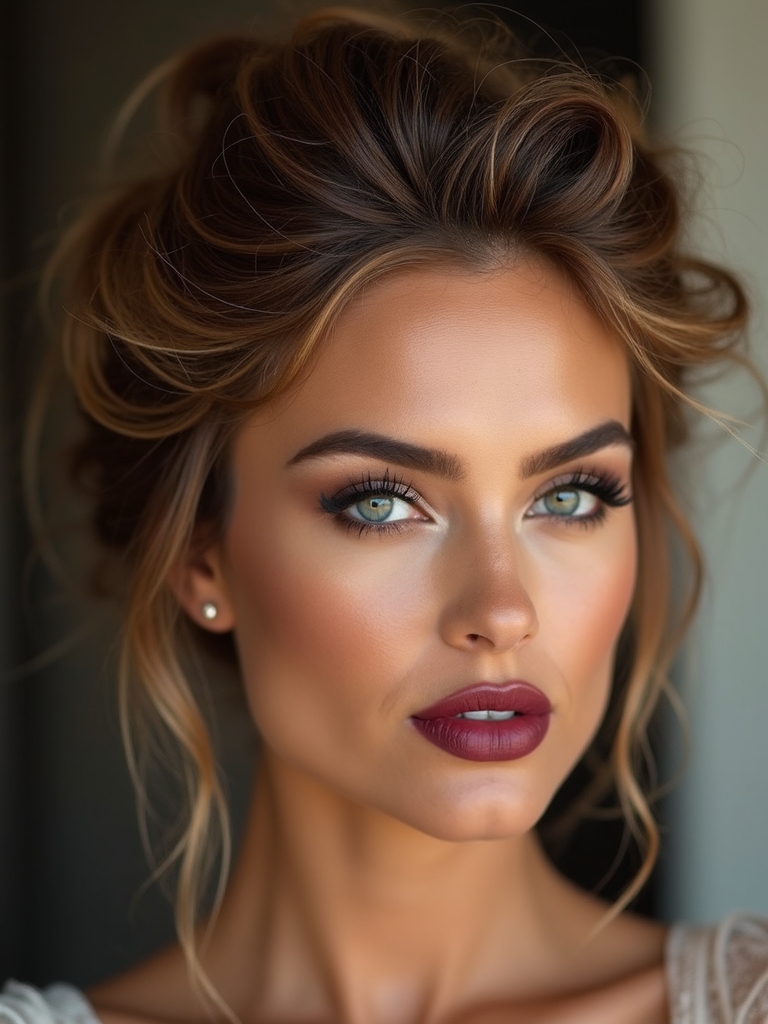
I often reach for a messy low bun when I want to look effortlessly chic without overdoing it; it’s my go-to for glossy, undone glamour.
I leave tendrils, tease the crown slightly, and secure with pins that hide.
A touch of texture spray and a jeweled clip elevate it instantly.
It reads polished but relaxed—perfect for day-to-night polish.
Messy updos celebrate undone elegance and make styling quick and versatile, often relying on pin placement to hold shape without looking stiff.
Sleek Low Knot
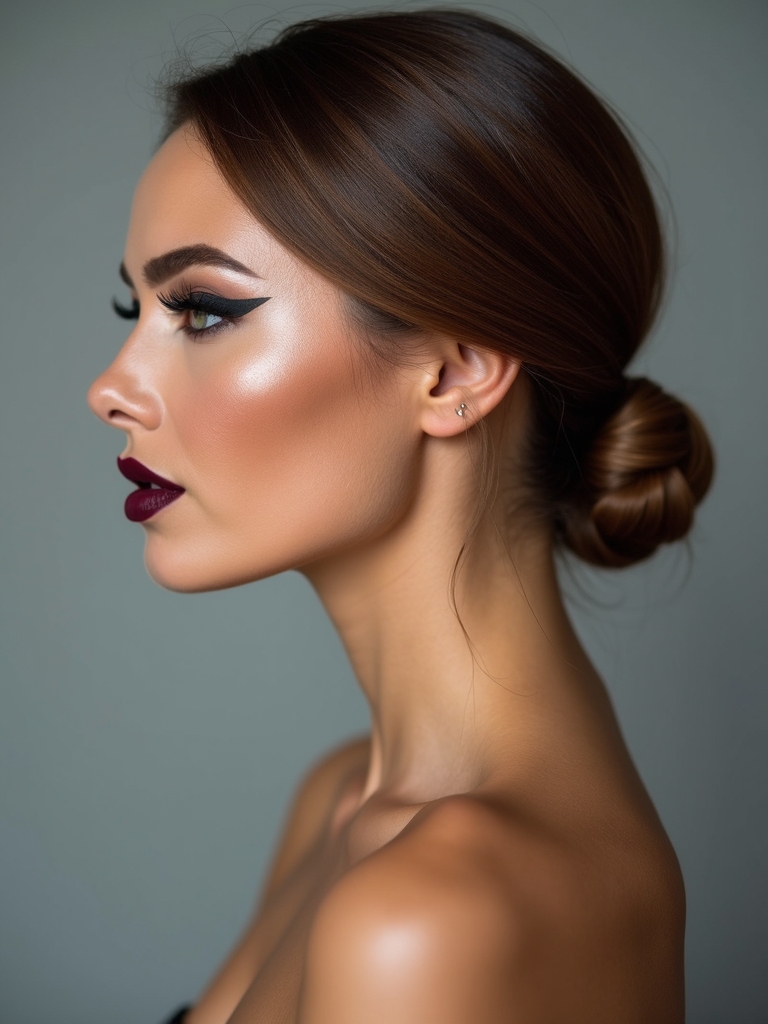
When I want a look that’s polished and minimalist, I reach for a sleek low knot that says quiet confidence. I smooth hair, part precisely, and secure a low knot at the nape for instant chic.
It flatters faces and works for events.
- Smooth hair
- Precise part
- Low nape placement
- Secure with pins and hairspray
A sleek low knot is also a great option for natural updo styling because it complements many hair textures.
Textured High Bun
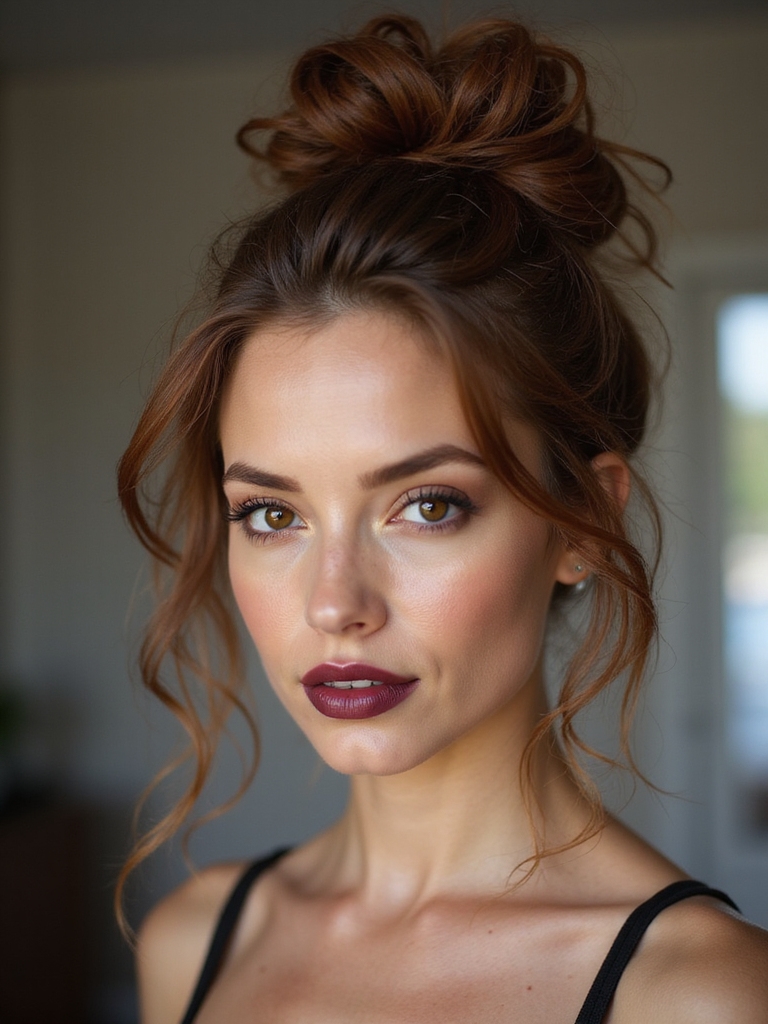
Embracing texture adds instant drama, so I tease and twist my hair into a high bun that reads effortlessly undone but totally intentional.
I loosen face-framing pieces, mist with a flexible-hold spray, and tug at loops for volume.
The result feels modern and luxe—perfect for evening or daytime glamour—wearing a textured high bun always makes me look polished without seeming overworked.
For a quick finish, I often use a texturizing product to enhance grip and definition.
Twisted Low Chignon
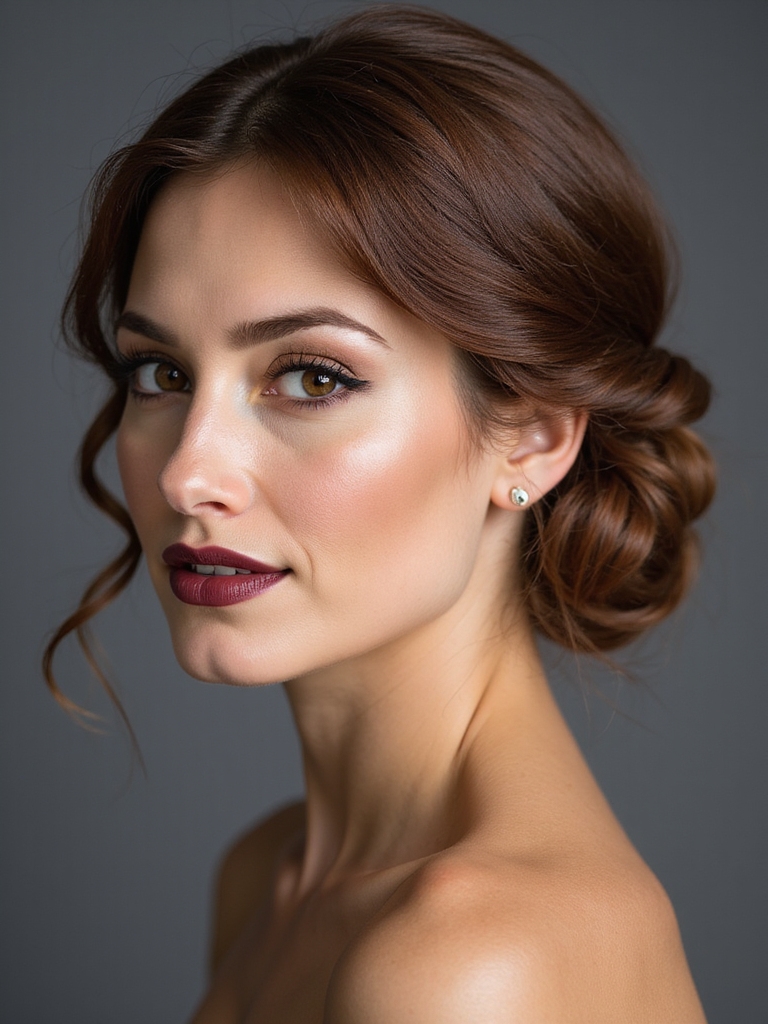
Twisting my hair into a low chignon feels like dressing it in satin—sleek, refined, and quietly sensual.
I love how it flatters my neck and holds all day with minimal fuss.
For a polished finish I:
- Smooth strands with lightweight oil
- Twist sections toward nape
- Coil into a low bun
- Secure with pins and hairspray
Low updos like the low chignon are versatile and appropriate for many events, from casual days to formal occasions, making them a go-to low updo choice.
Braided Crown Updo
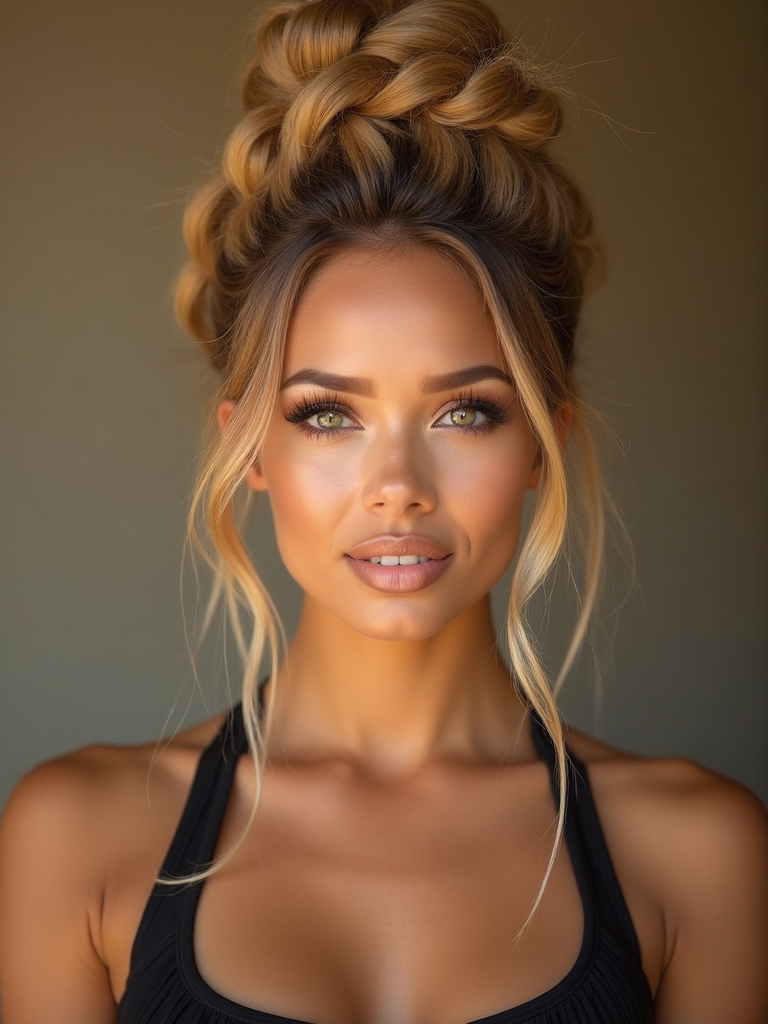
I’ll walk you through prepping the hair for a flawless braided crown updo, from smoothing products to sectioning for clean lines.
Then I’ll show the braiding techniques—Dutch, fishtail, or rope—and how to shape them so the crown sits perfectly.
Finally, we’ll lock everything in place with pins and the right finishing sprays so your look lasts and sparkles.
Braided updos often combine multiple braid types to achieve an elegant braided updo that’s both secure and stylish.
How to Prep
Before I braid, I always start by giving my hair a clean, smooth base so the crown sits polished and stays put.
I prep like a pro: cleanse, detangle, and add lightweight texture for grip without frizz.
Then I section precisely and mist with shine spray for a soft, luxe finish.
- Shampoo light
- Condition ends
- Detangle gently
- Texture mist
Natural hair updos often benefit from techniques that respect curl pattern and moisture balance, like a Natural Hair Updo that minimizes manipulation and enhances definition.
Braiding Techniques
Start by mapping the crown with intention: I part and pick up sections as if sketching the frame for a halo, then braid each side cleanly so the finished crown reads polished, not fussy.
I favor tight Dutch braids for structure or loose bohemian three-strands for softness, weaving hair toward the nape to create symmetry and glam without overworking texture.
For formal events, choosing the right braid can elevate the look, as braided crown updos often combine elegance with lasting hold.
Securing and Finish
With a firm hold in mind, I pin the braids into place by tucking each end under the opposite strand and securing discreetly with matching bobby pins so the crown looks seamless and intentional.
I finish with shine spray and delicate hairspray to lock shape without stiffness.
- Conceal pins
- Add texture
- Smooth flyaways
- Boost shine
Feed-in braids are a low-tension technique that creates natural-looking volume by gradually adding hair as you braid, which helps the updo sit comfortably and securely.
Low Ponytail Wrapped Into a Knot
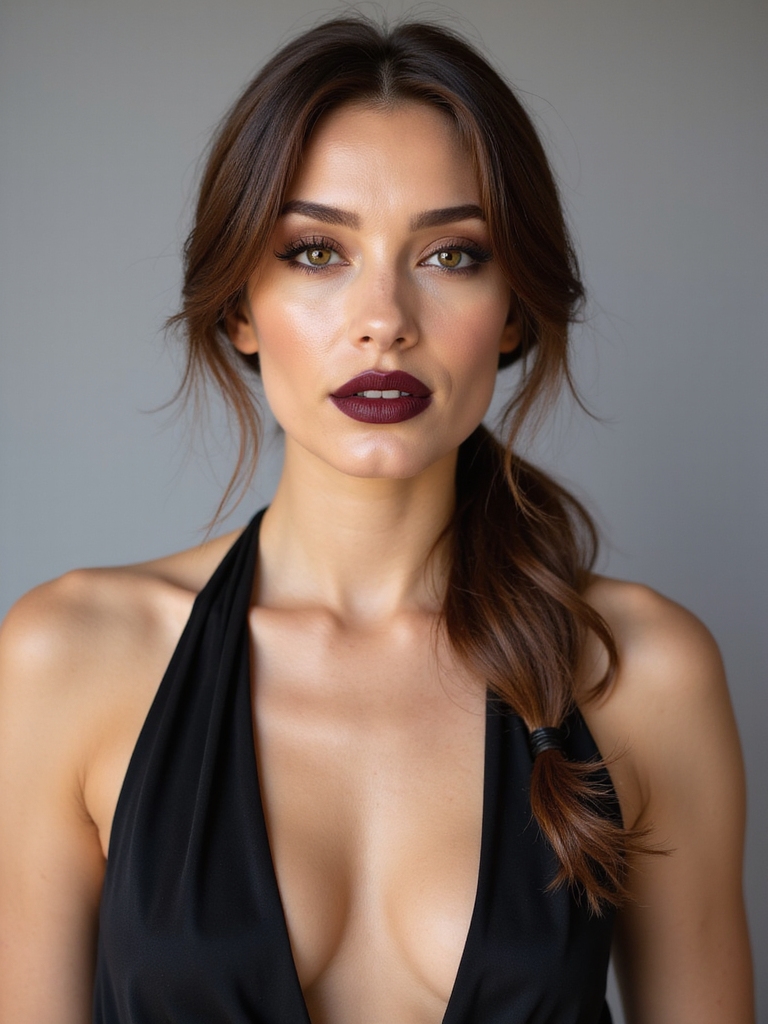
I love how a low ponytail wrapped into a knot can feel effortlessly chic, and I’ll walk you through prepping and adding the right texture so it holds all day.
I’ll outline a clear step-by-step for crafting the knot itself, from sectioning to twisting, so it looks polished every time.
Finally, I’ll show you the best ways to secure and finish the style—pins, hairspray, and those little touch-ups that make it runway-ready.
This variation is inspired by classic low bun techniques that keep styles elegant and secure.
Prep and Texture
Prepping my hair for a low ponytail wrapped into a knot means I focus on clean texture and a bit of grip so the style sits polished all day.
I love a satin serum, light mousse at roots, and gentle teasing for volume. Then I smooth and secure.
- Satin serum
- Lightweight mousse
- Soft teasing
- Texturizing spray
Work-friendly updos like this blend chic effortless updos with practical steps so you get a stylish look that lasts through the day.
Step-By-Step Knotting
Start by gathering your hair at the nape into a low ponytail and securing it with a clear elastic so the base sits smooth and sleek.
I twist the ponytail gently, loop it around the elastic once, then fold the remaining length over and through to form a neat knot.
I ease pieces for softness, keeping the look polished and effortlessly glamorous.
Secure and Finish
Now I lock the knot in place so it feels polished all day. I tuck ends, pin discreetly, and mist for shine.
My approach keeps the low ponytail knot sleek and comfy, perfect for glam or errands.
- Tuck ends neatly
- Use bobby pins hiddenly
- Apply light hairspray
- Smooth flyaways with serum
Half-Up Twist With a Bun
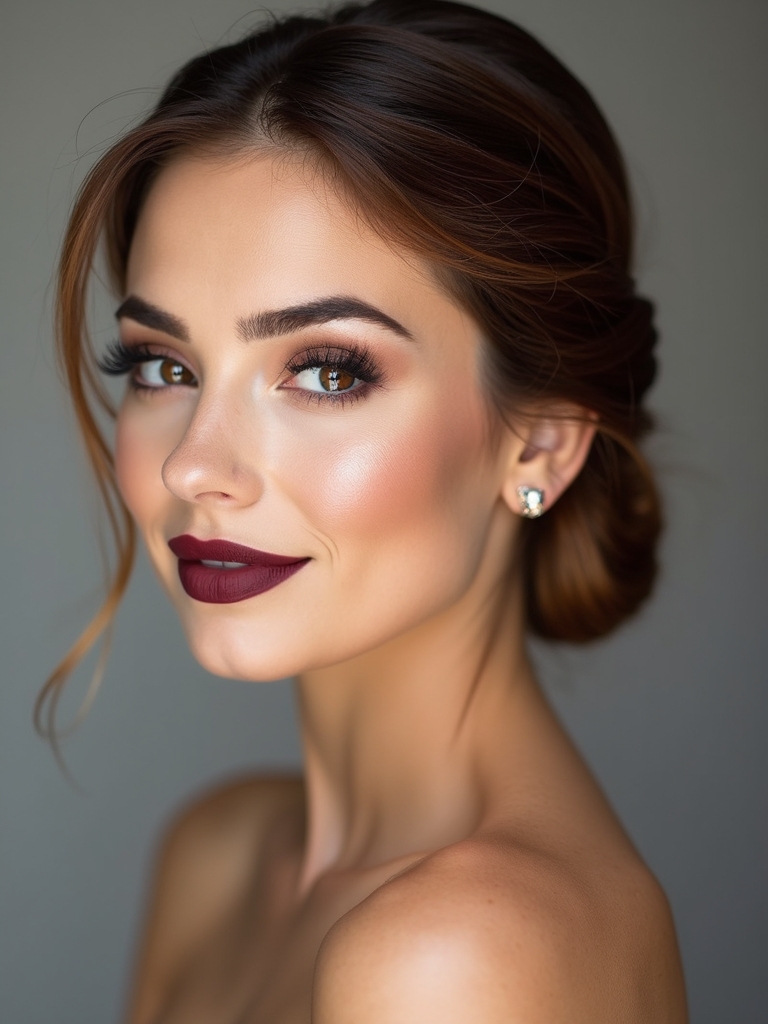
I love how the half-up twist with a bun marries polished elegance with playful ease—it’s the go-to when I want my face framed but still feel put together.
I twist two sections from my temples, secure them above the crown, then wrap a small bun for instant sophistication.
I loosen pieces for softness, mist with shine spray, and voilà: chic, effortless, runway-ready in minutes.
Knotless Pull-Through Updo
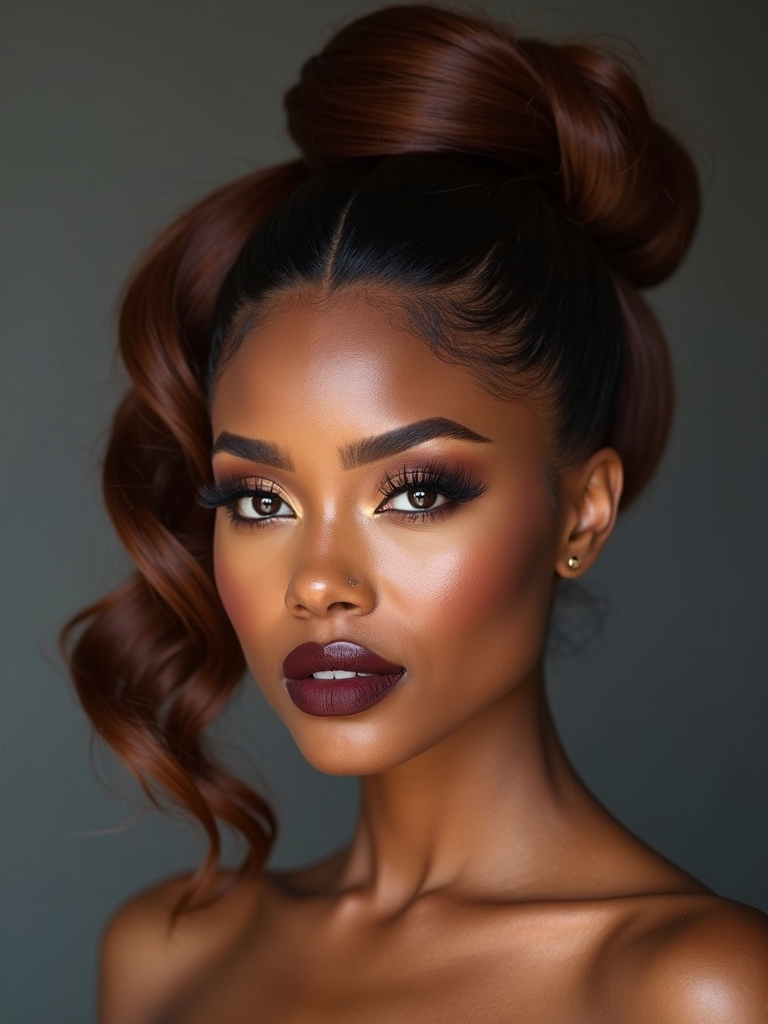
If you love the half-up twist with a bun, you’ll appreciate how the knotless pull-through updo lifts that same polished vibe but with more volume and a seamless, braided look.
I use it for red carpets or date nights—effortless glam with texture and movement.
- Volume
- Seamless braid
- Soft face-framing
- Long-lasting hold
Vintage-Inspired Rolled Updo
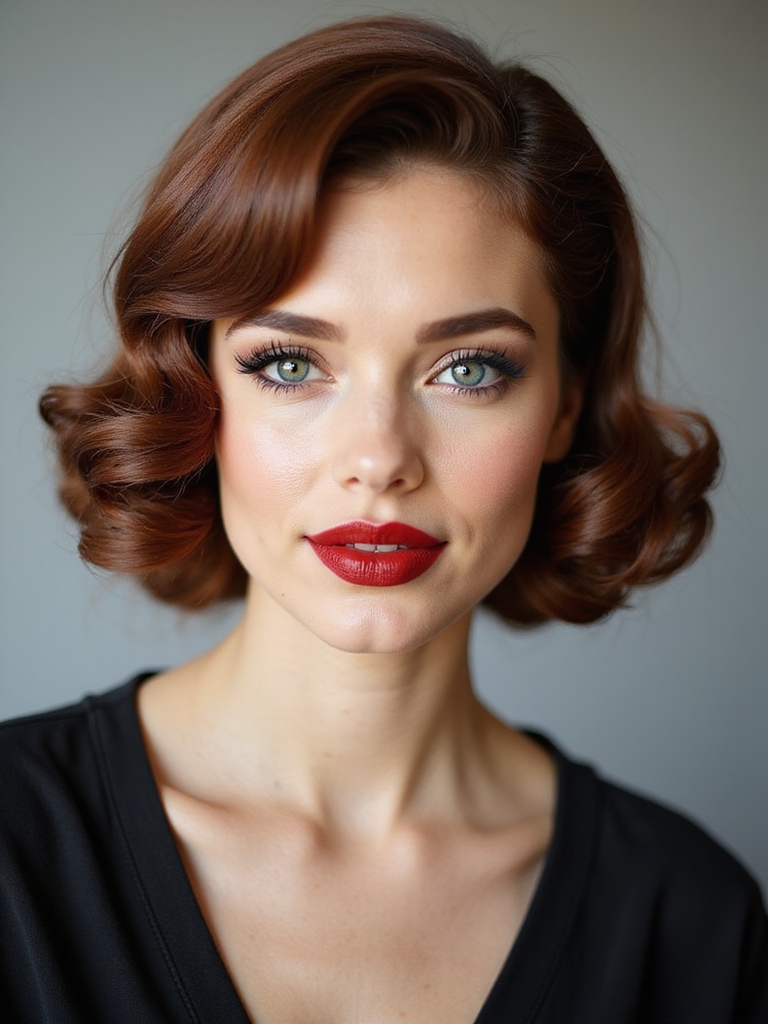
When I’m aiming for old Hollywood glamour, the vintage-inspired rolled updo is my go-to for weddings and cocktail parties—it’s all about sculpted curves and glossy finish that photograph beautifully.
I smooth sections, roll them into structured waves, and pin with invisible bobby pins for a seamless look. A light sheen spray keeps everything sleek without stiffness, ensuring timeless elegance that flatters every face.
Tousled Topknot
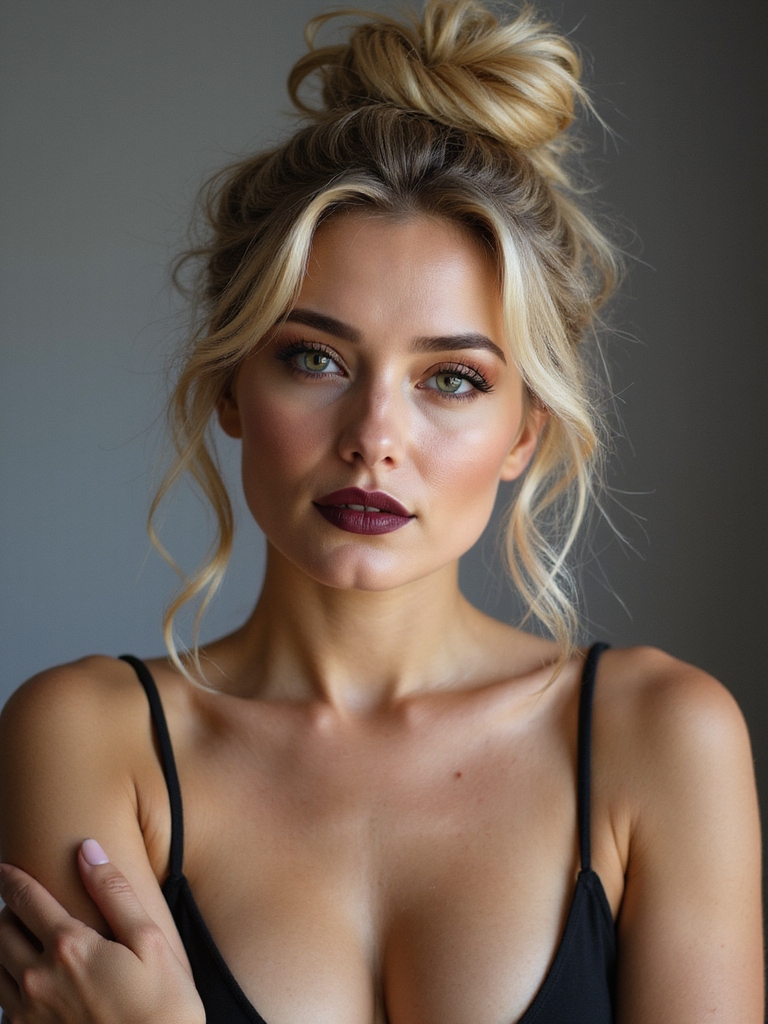
I often reach for a tousled topknot when I want effortless chic that still reads polished: I tease the crown for lift, gather it loosely at the crown, and twist just enough to let pieces fall soft and face-framing.
I finish with a spritz and fingertips to loosen.
- Texture
- Height
- Face-framing strands
- Flexible hold
Side-Swept Twisted Bun
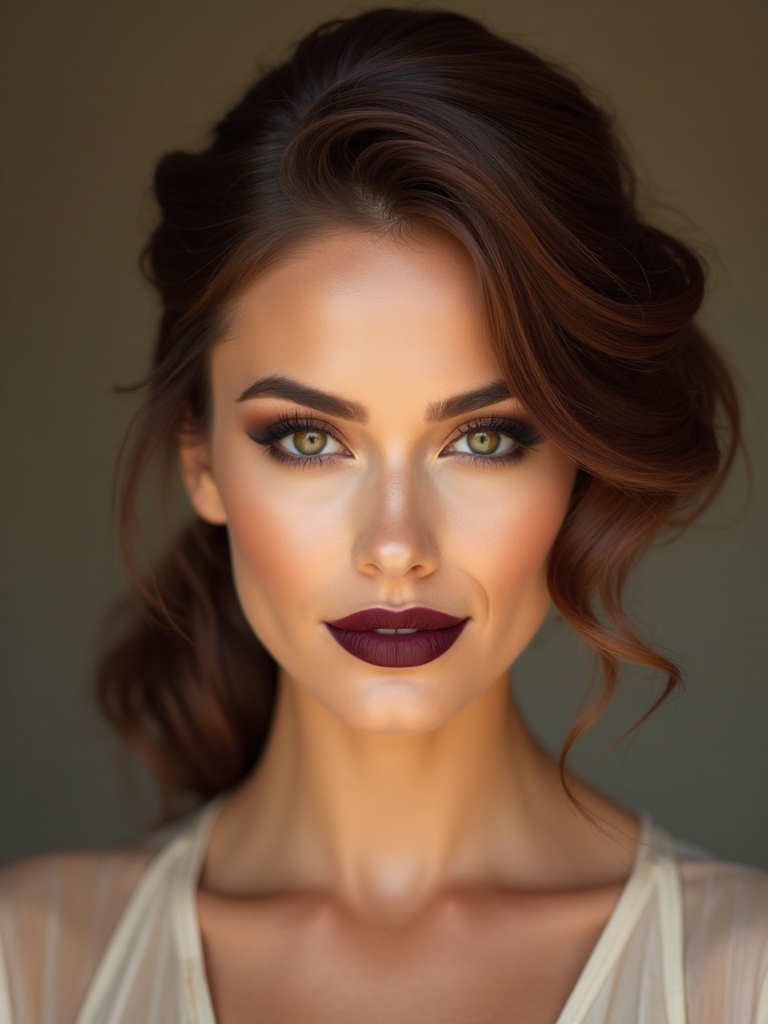
After loosening a topknot, I often sweep hair to one side and twist into a low bun for a look that’s polished but still soft. I secure it with pins, tugging subtly for volume, then mist with a light-hold spray.
It’s chic for events or date night, instantly elevating simple outfits while feeling effortless and modern—glamour without fuss.
Loop Bun With Face-Framing Strands
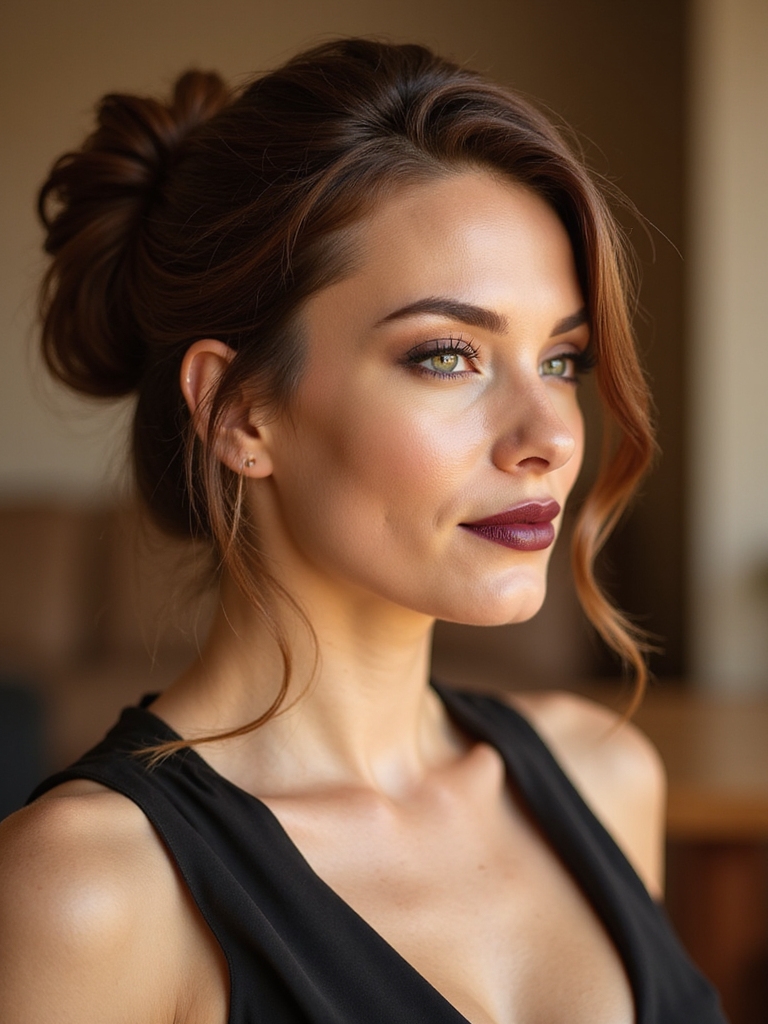
I’ll walk you through prepping and sectioning so the loop bun sits polished and secure.
Then I’ll show how to form a soft, chic loop and anchor it without bulk.
Finally, we’ll finish with delicate face-framing strands that soften the look and add instant glamour.
Prep and Sectioning
Start by cleansing and lightly misting your hair with a heat protectant — I like a lightweight spray that adds slip without weighing strands down.
Then I section precisely, leaving face-framing pieces free and creating a tidy pony for the loop.
- Detangle smoothly
- Section crown to nape
- Clip side pieces forward
- Secure base ponytail
Creating the Loop
I tease the crown lightly and smooth the ponytail into my hands, then loop the length back through the base to form a soft, voluminous bun while leaving the pre-sectioned face-framing strands loose.
I secure the loop with pins tucked invisibly, coaxing gentle shape and lift. The result reads effortlessly chic—glamorous but undone—perfect for elevating any look without fuss.
Finishing Face-Framing Strands
To soften the look, I coax those loose face-framing strands into place with a few intentional touches that feel effortless but read polished.
I want them soft yet structured, framing cheekbones and eyes. Try these quick moves:
- Twist tiny sections outward.
- Lightly mist flexible-hold spray.
- Smooth with fingertips.
- Pin ends discreetly behind ear.
They elevate the loop bun instantly.
Double Twist Crown
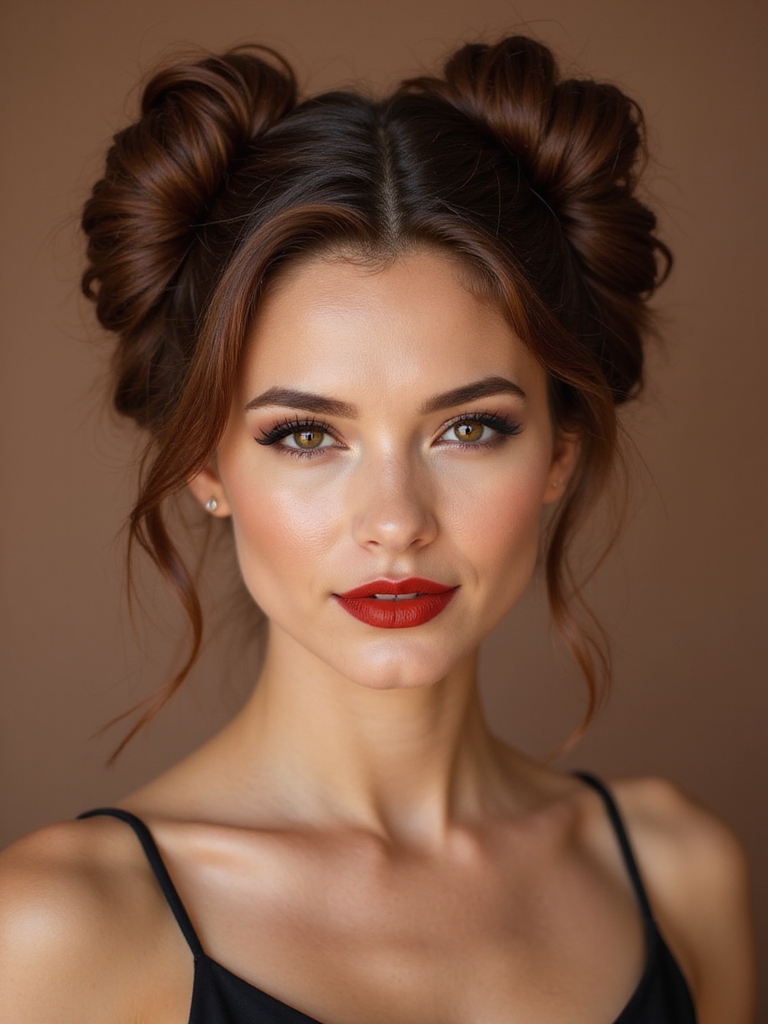
With a few precise twists and a touch of hairspray, I can turn ordinary hair into a Double Twist Crown that looks effortlessly regal; think soft, sculpted ropes framing the head like a modern halo.
I twist two sections from each side, pinning them across the crown, smoothing flyaways for shine. It’s polished, wearable glam that elevates any outfit without fuss, perfect for daytime or evening.
Simple Sock Bun
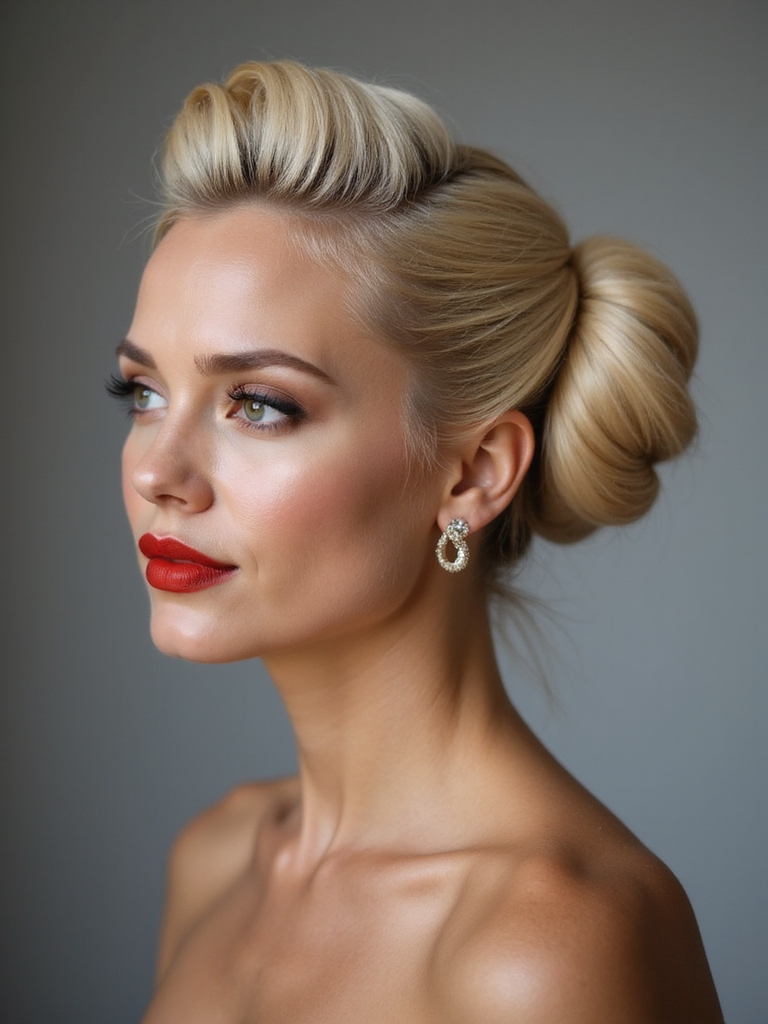
I’ll show you how to create a polished sock bun by first prepping and smoothing the hair so it looks glossy and sleek.
Then I’ll walk you through forming the perfect rounded bun with a sock or donut tool for instant volume.
Finally, I’ll explain how to secure it discreetly and finish with hairspray and shine for a long-lasting, red-carpet result.
Prep and Smooth Hair
Smoothing my hair before I start the simple sock bun makes the whole look feel polished and luxe.
I prep with gentle care, aiming for sleekness and shine.
My quick routine:
- Brush thoroughly to remove tangles.
- Apply a lightweight smoothing serum.
- Blow-dry with a round brush for gloss.
- Finish with a fine-tooth comb and light hairspray for sleek hold.
Creating the Bun
I gather my hair into a high ponytail, smoothing any flyaways with my hands so the base sits sleek and secure—this sets the chic foundation for the bun.
I slide a rolled sock donut over the pony, spread strands evenly, and wrap hair around it, tucking ends neatly.
The shape instantly reads polished and luxe, perfect for daytime glam or evening elegance.
Securing and Finishing
Once the bun’s shape feels balanced, I lock it in place so it stays flawless all day or night.
I’ll smooth flyaways and secure the sock bun with a few strategic pins, then set with mist. Small details make it polished — sleek, elegant, effortless.
- Tuck ends neatly
- Add bobby pins strategically
- Use hairspray light mist
- Finish with shine serum
Soft Low Bun With a Hair Scarf
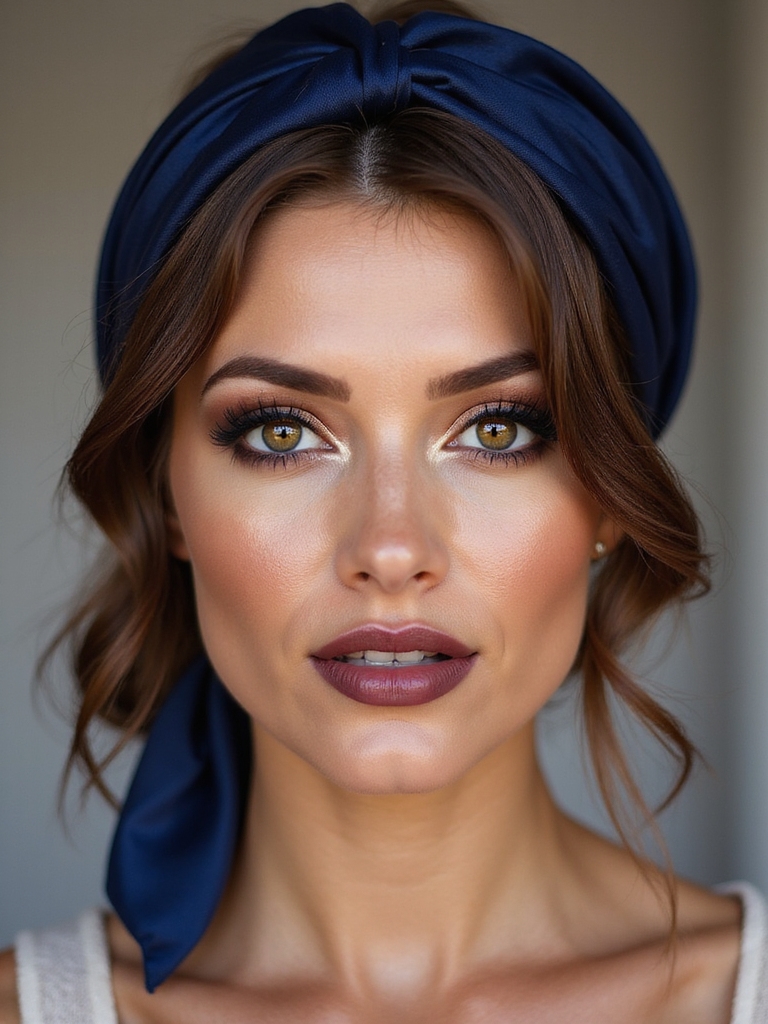
With a silk scarf draped over my fingers, I twist my hair into a soft low bun that feels effortlessly chic and perfectly undone.
I wrap the scarf around the bun, tying a neat knot or bow to anchor stray pieces and add instant polish.
This look flatters every face, hides imperfect pins, and elevates a simple updo into something refined and undeniably glamorous.
I always reach for these updos when I want to look polished without fuss—one twist and I’m camera-ready. Once, after a rain-soaked run, I twisted my hair into a messy low bun and got three compliments before my coffee cooled; it felt like fastening a silk ribbon around a bouquet.
That’s the charm here: quick techniques that turn everyday hair into polished statements, effortless elegance that makes you feel styled and unmistakably put together.


