
I love quick curly updos that celebrate texture—think high puff with defined edges, low twisted bun, or a half-up bantu knot crown for instant polish. I’ll show how pineapple scarves preserve curls, tuck-and-roll faux hawks add height, and sleek low ponies keep ends bouncy.
Mini bun clusters and braided crowns give chic variety, while side-swept puffs pair beautifully with clips. Stick with me and you’ll get easy step-by-step tips to elevate every look.
High Puff With Defined Edges

I always reach for a high puff when I want instant polish with minimal fuss; it lifts the face and celebrates your curl pattern in one chic move.
I smooth edges with a lightweight gel, use a scarf to set them for a minute, then fluff the crown for volume. It’s quick, elegant, and keeps your natural texture front and center.
Effortless curly updos are perfect for everyday school looks because they’re fast, low-maintenance, and flattering.
Low Twisted Bun

If you love the ease of a high puff but want something more polished for evening or work, a low twisted bun gives you that same celebration of texture with a sleeker silhouette.
I twist sections toward the nape, secure with pins, then mist with lightweight oil for shine. Smooth edges subtly, avoid over-tightening to keep volume. It’s elegant, protective, and surprisingly quick.
Many curly updos for black women can be adapted into this style for variety and added convenience, such as transitioning from a puff to a low bun with simple twists curly updos.
Half-Up Bantu Knot Crown

Create a Half-Up Bantu Knot Crown when you want a look that’s equal parts regal and playful.
I section the top half, twist small pieces into neat knots, and secure them with pins for a clean finish.
Leave the back curls defined and moisturized.
It frames the face beautifully, adds instant height, and holds all day—perfect for events or elevated everyday glamour.
Black hair updos often incorporate protective styling to reduce manipulation and promote hair health; consider trying a protective updo as an option.
Pineapple Updo With Scarf
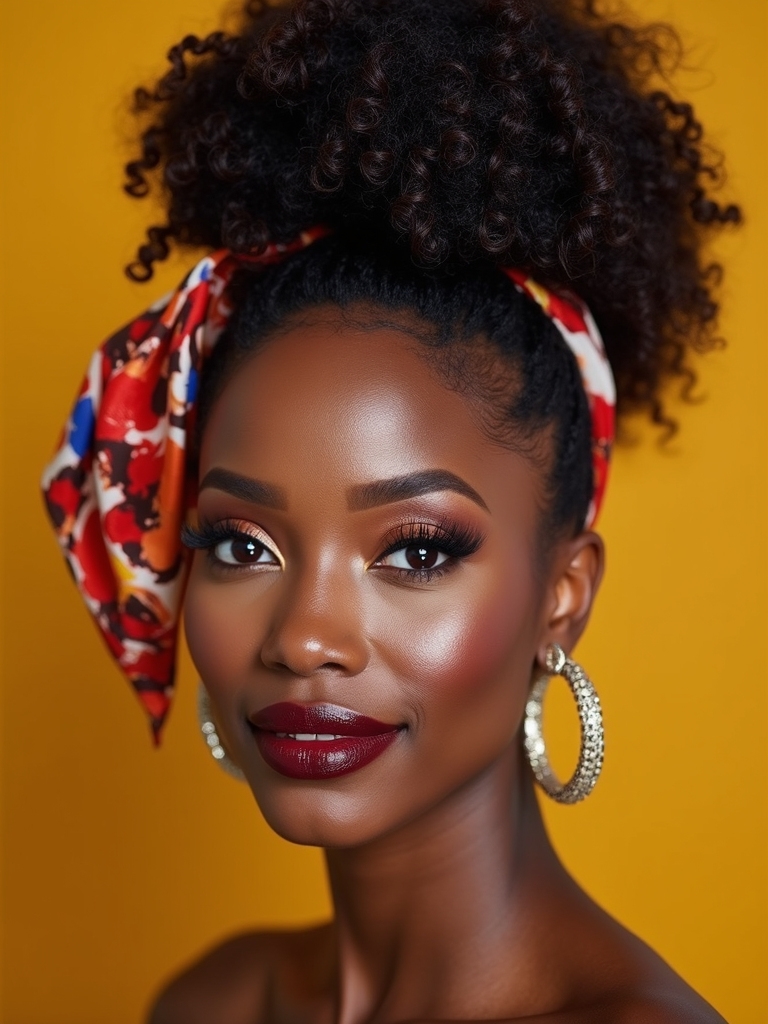
A pineapple updo with a scarf is my go-to for preserving curl definition while looking effortlessly chic, and I’ll show you how to get that polished, face-framing finish.
I gather hair high, secure loosely to protect volume, then tie a silky scarf at the hairline to smooth edges and add glam.
Tip: use a lightweight oil for shine and gentle hold.
Curly updo styles are perfect for Black women who want to own their style with confidence and flair.
Faux Hawk Tuck and Roll

I love how the Faux Hawk Tuck and Roll lifts my curls into an edgy, yet polished silhouette that reads both modern and glam.
I tuck sides, roll the crown, and secure with pins for height and movement. It frames my face and holds definition without stiffness.
- Use lightweight gel for hold
- Pin discreetly for smoothness
- Add shine serum sparingly
- Refresh with mist
This style borrows techniques used in elegant updos for shoulder-length hair, especially the tuck-and-roll method to create volume and structure.
Flat Twist Updo

If you like the structured lift of the Faux Hawk, you’ll love how the Flat Twist Updo keeps that polished edge while offering softer, face-framing movement.
I create clean flat twists along the scalp, gather ends into a low, textured bun, then release a few tendrils for softness. Use a shine serum and edge brush for sleekness without stiffness—elegant, wearable, and camera-ready.
The look is inspired by classic French Twist techniques that emphasize vertical lift and smoothness.
Puff and Pin Side Sweep

With a little lift at the crown and a few well-placed pins, I turn the classic puff into a red-carpet side sweep that flatters every face shape.
I smooth edges, define curls, and secure volume for lasting glam.
- Start with stretched puff for shape
- Apply edge control for sleekness
- Pin diagonally toward one ear
- Finish with lightweight shine spray
Natural curly updos are all about celebrating your texture and creating structure with the hair’s natural volume and pattern — try a method that enhances texture while maintaining movement.
Double Dutch Braided Updo

Keeping that sleek side-swept puff in mind, I flip the look into a Double Dutch Braided Updo that balances polished structure with soft curl detail.
I braid two Dutch sections from the hairline, secure them into a low wrapped bun, then release defined curls at the crown for dimension. Use edge control for shine, light gel for hold, and a satin scarf to set without flattening your texture.
This style pairs beautifully with protective styling techniques like braided bun to minimize manipulation and promote hair health.
Messy Top Knot With Face-Framing Curls

I love how a messy top knot with face-framing curls looks effortlessly chic, and I’ll walk you through prepping and detangling to keep your curls healthy before you style.
Next I’ll show you how to create that tousled, secure top knot without sacrificing volume.
Finally, I’ll give quick tips for shaping and setting the face-framing curls so they soften your features and last all day.
These easy curly updos are perfect for busy days and can be done in minutes with effortless techniques.
Prep and Detangle
Usually I start by soaking my curls in a lightweight leave-in conditioner, then gently detangling from ends to roots with a wide-tooth comb so the strands stay defined and frizz-free.
I prep with care, protecting curl pattern and moisture for those face-framing tendrils.
- Section hair into manageable parts
- Use a slip-rich product
- Finger-first detangling
- Smooth edges with gel
Wet-look styles can enhance shine and definition when you use products designed for wet-look styles and apply them to damp curls.
Creating the Top Knot
Once you’ve prepped and detangled, I’m going to show you how to build a messy top knot that keeps your curl definition while leaving just enough face-framing tendrils to soften the look.
I gather hair high, twist loosely, and secure with a silk scrunchie so curls stay defined. I pull small sections out strategically, mist with lightweight oil, and set with a flexible hold.
Styling Face-Framing Curls
To finish the messy top knot with a soft, face-framing touch, I pull out curated tendrils around my hairline and define each curl with a dab of lightweight cream so they sit polished without feeling stiff.
I fluff, pin slight bends, and mist lightly for hold.
- Soften edges, not flatten.
- Finger-twist for definition.
- Use oil sparingly.
- Balance volume and face shape.
Low Puff With Twisted Bangs

I’ll show you how to create a chic low puff with twisted bangs, starting with proper prep and moisture so your curls look glossy and defined.
Then I’ll walk you through twisting the bangs for soft, face-framing movement and explain how to secure them without flattening your texture.
Finally, we’ll finish with hold and shine tips to keep the style polished from day to night.
Prep and Moisturize
Before I start styling, I always give my hair a clean, well-hydrated base so the low puff and twisted bangs sit sleek and last all day.
I use lightweight products that define without weighing hair down, focusing on scalp health and slip for easy shaping.
- Clarifying shampoo weekly
- Deep conditioner once a week
- Leave-in detangler daily
- Lightweight oil sealant nightly
Twisting the Bangs
Start by parting a soft bang section and coating it with a bit of leave-in for slip and definition; I like to work with stretched hair so the twist lays smooth and polished.
I twist the section away from my face, keeping tension even, then gently pancake for volume.
Finish by tucking the end into the puff for a refined, face-framing effect that feels luxe yet effortless.
Secure and Finish
Once the bang is tucked into the puff and you’ve fluffed to taste, I secure the look by anchoring the low puff at the nape with a soft hairband and a few strategically placed bobby pins so nothing budges but the silhouette stays feminine and sleek.
I finish with shine mist and gentle edges for polished, lasting glam.
- Use satin scarf for 10 minutes
- Pin where hair feels loose
- Light oil on ends only
- Mist from arm’s length
Twist-Out Halo Updo

I love how the twist-out halo updo turns my natural texture into a polished, red-carpet–ready frame for the face; it lifts curls into a soft crown that reads elegant without feeling stiff.
I create defined twist-outs, gently fluff and shape, then pin around my head, securing with discreet pins. Finish with lightweight oil and flexible-hold spray for shine, movement, and long wear.
Sleek Low Pony With Curly Ends

I love the contrast of a super-sleek crown with bouncy curly ends, and getting it right starts with thorough prep and moisture so your curls spring without frizz.
I’ll show you the smooth-sides technique I use—think gentle brushing with a light gel and a soft bristle brush—to keep the top glossy.
Then we’ll secure everything with a style-friendly band that holds without flattening the curls at the nape.
Prep and Moisture
With a few deliberate steps I’ll make sure your hair looks glossy and holds the sleek low pony all day while the ends stay bouncy and defined.
I prep with clean, damp hair, layer lightweight leave-in, and seal with oil, focusing on ends so curls pop without weight.
- Cleanse with a hydrating shampoo
- Apply a lightweight leave-in
- Seal ends with oil
- Use a curl-defining cream
Smooth Sides Technique
Although sleek sides need precision, I make the Smooth Sides Technique simple by working in small sections and using just a few high-shine tools and products.
I brush sides flat with a soft boar-bristle brush, apply a lightweight gel for control, and smooth with a silk scarf briefly.
Finish by letting curly ends spring free for contrast — polished, intentional, effortlessly glamorous.
Secure With Style-Friendly Band
Secure the look with a style-friendly band that holds your sleek low pony in place without crushing your curls—I’ll reach for a snag-free elastic or a satin-covered tie that gives lift at the crown and gentle support at the nape.
I tuck and fluff ends for polished bounce.
- Choose satin to prevent snagging
- Twist slightly for sleekness
- Add a decorative clip
- Refresh with light oil
Mini Buns Cluster Updo

I love how mini buns clustered across the crown instantly lift a curly updo from casual to couture, and I’ll show you how to make them look intentional rather than tossed together.
I create uniform sections, smooth roots with a lightweight gel, then coil each curl into small buns, pinning securely.
Finish with a shine mist and strategically loosen a few tendrils for soft, elegant movement.
Braided Crown With Loose Curls

When I want a look that’s regal but still relaxed, I braid a crown around the hairline and let the rest fall as soft, defined curls—it’s the perfect balance of structure and movement.
I love how it frames my face and stays airy.
- Use lightweight gel for hold without crunch
- Finger-detangle for curl definition
- Secure braids with clear elastics
- Finish with a shine mist
Side-Swept Puff With Accessory

I sweep my hair to one side and gather it into a high puff, then tuck a statement accessory—like a jeweled barrette or silk scarf—against the hairline to elevate the whole look.
I smooth edges with a lightweight gel, fluff the puff for volume, and angle the accessory to frame my face.
It’s effortless, chic, and perfect for day-to-night shift.
I hope these updos feel like little rituals you can turn to when you want to age like fine satin—glossy, confident, effortless. Think of each style as a jeweled bookmark in your day: the high puff for instant lift, a twisted bun for quiet polish, a scarf-tied pineapple for playful drama.
Wear them like a signature scent—subtle, unmistakable. Keep your edges sleek, textures celebrated, and remember: your hair tells the world you’ve arrived.


