I’ve mastered winter braids that actually survive commutes, coats and gusts—think Dutch braids for sleek, all‑day hold and boxer braids prepped with texturizing spray and dry shampoo for grip.
I’ll tuck rope braids into low buns for hat days, wrap halo crowns to keep ears warm, and seal chunky or four‑strand styles with a lightweight conditioning serum for shine and moisture. Keep a few pins and flexible mist handy, and I’ll show you how to finish each look.
Classic Dutch Braids for All-Day Hold

When I want a braid that looks polished and actually lasts through frosty commutes and holiday parties, I reach for classic Dutch braids—they sit tight against the scalp, resist frizz, and give a sleek, runway-ready finish without constant fuss.
I love how they frame my face, tame bulk, and pair with scarves or coats—quick to do, chic, and reliably elegant all day.
I also find that mastering the basic steps of Dutch braids helps the style stay neat even in windy or wet weather.
French Crown Braid to Tame Flyaways

Because I want my hair to look polished even in damp, windy weather, I turn to a French crown braid to lock down flyaways and add instant glamour—wrapping hair around my head smooths frizz, hides static-prone ends, and gives a chic, effortless halo that works with hats and scarves.
I braid close to the scalp, mist with shine spray, and pin discreetly for a sleek, enduring finish.
Formal braided styles like the French crown are ideal for elegant braided updos because they combine control with sophistication.
Rope Braid Low Bun for Commuter-Friendly Styling

I love how a sleek rope braid low bun gives commuters polished hair without fuss, so I start by prepping with a smoothing serum and firm-hold spray for lasting shine.
Then I’ll walk you through the twisting technique—section, twist each strand away from the face, and wrap into a low bun.
Finally, I’ll show secure options from hidden pins to a low donut for reliable, chic hold on the go.
Delicate knotless braids offer a softer scalp feel and can inspire gentler tension techniques you can adapt for braided buns.
Prep for Sleek Hold
With a few simple prep steps, I get a sleek, commuter-proof rope braid low bun that lasts through wind, rain, and long subway rides.
I smooth hair with a lightweight serum, mist a flexible-hold spray, and detangle with a boar-bristle brush.
I section cleanly and secure elastic snugly at the nape, ensuring polished shine and friction-free hold for a polished, all-day finish.
This look draws inspiration from Boho Fulani Braids and adapts their effortless chic for everyday wear.
Twisting Technique Steps
Once my base is smoothed and secured, I start the rope braid by splitting the ponytail into two even sections and giving each a gentle twist toward the same direction; then I wrap them around each other away from my face, keeping tension firm but not pulling at the roots so the finish stays sleek without looking strained.
I glide my fingers to tighten, coaxing shine and clean definition.
This effortless style is ideal for commuters because the Sleek Braided Ponytail maintains polish through long travel without frequent touch-ups.
Secure Bun Options
After tightening the rope braid to that smooth, glossy finish, I loop it low at the nape for a commuter-friendly bun that stays neat through wind and crowds.
I tuck and pin with discreet bobby pins, mist lightly, and step out polished.
- Secure: hidden pins
- Finish: lightweight hairspray
- Protect: silk scarf on commute
Adding a protective layer like Tribal Braids can help reduce breakage and keep the style intact longer.
Boxer Braids With Added Texture

I love starting boxer braids by prepping the hair for grip — a little texturizing spray and some powder at the roots gives everything something to hold onto.
Then I show simple techniques like backcombing, sea-salt mist, and gentle twisting to build lived-in texture before braiding.
To finish, I lock the style with a firm mist, slide in discreet pins, and rough up the edges for lasting hold and chic movement.
Two braids are a timeless, practical choice that suits many face shapes and hair types, especially when enhanced with effortless braids for everyday style.
Prep for Grip
With a few quick spritzes and a teasing comb in hand, I build the foundation that keeps boxer braids looking sharp all day.
I prime strands for grip without weighing them down, focusing on clean sections and light hold.
My essentials:
- Dry shampoo near roots for texture.
- Lightweight styling cream on lengths.
- Fine-tooth comb for crisp parting and lift.
Effortless knotless braids deliver a natural look with less tension, so I often choose them for comfort and longevity, especially when creating medium styles with knotless technique.
Adding Texture Techniques
Now that the foundation’s set and the parting’s sharp, I add texture to boxer braids in ways that make them look effortlessly luxe rather than plain.
I gently pancake strands, tease mid-sections, and pull tiny face-framing wisps for softness. A light salt spray and selective braiding—mixing tight and slightly loose sections—creates dimension that catches winter light and reads chic, not messy.
I often draw inspiration from Pretty Braids for achievable looks and subtle variations.
Finishing for Hold
Usually I finish boxer braids by locking in that lived-in texture without flattening the shape, and I focus on spot-hold and breathable control so the style lasts through cold winds and cozy layers.
I adore a soft, resilient finish that feels chic, not crunchy.
- Mist flexible hairspray at roots and ends.
- Pin stray pieces for structure.
- Smooth oil on tails for shine.
Cool braids bring polished ease to any look with minimal effort, especially when you add texture-enhancing techniques like subtle tugging to create volume.
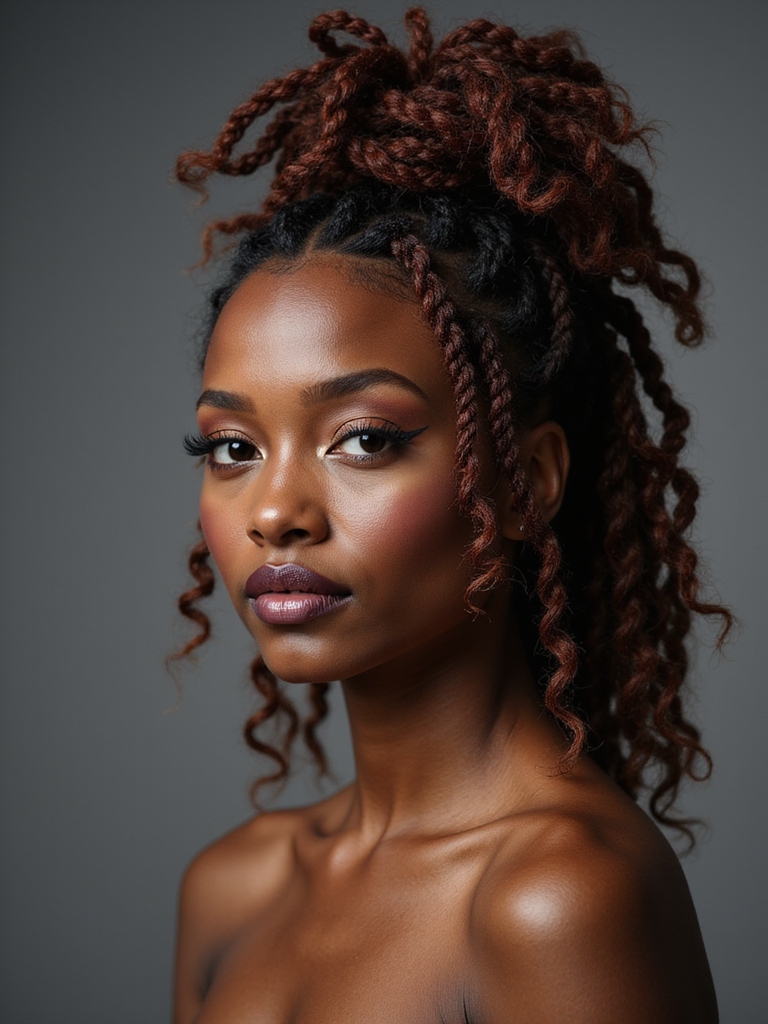
Halo Braid Wrapped for Extra Warmth

When I wrap a halo braid around my head on chilly days, it feels like putting on a couture scarf that was braided just for me; the style keeps my ears warm while looking effortlessly elegant.
I secure the braid close to the scalp for insulation, mist with a shine spray, and tuck loose ends for a polished finish that reads luxe yet practical for winter outings.
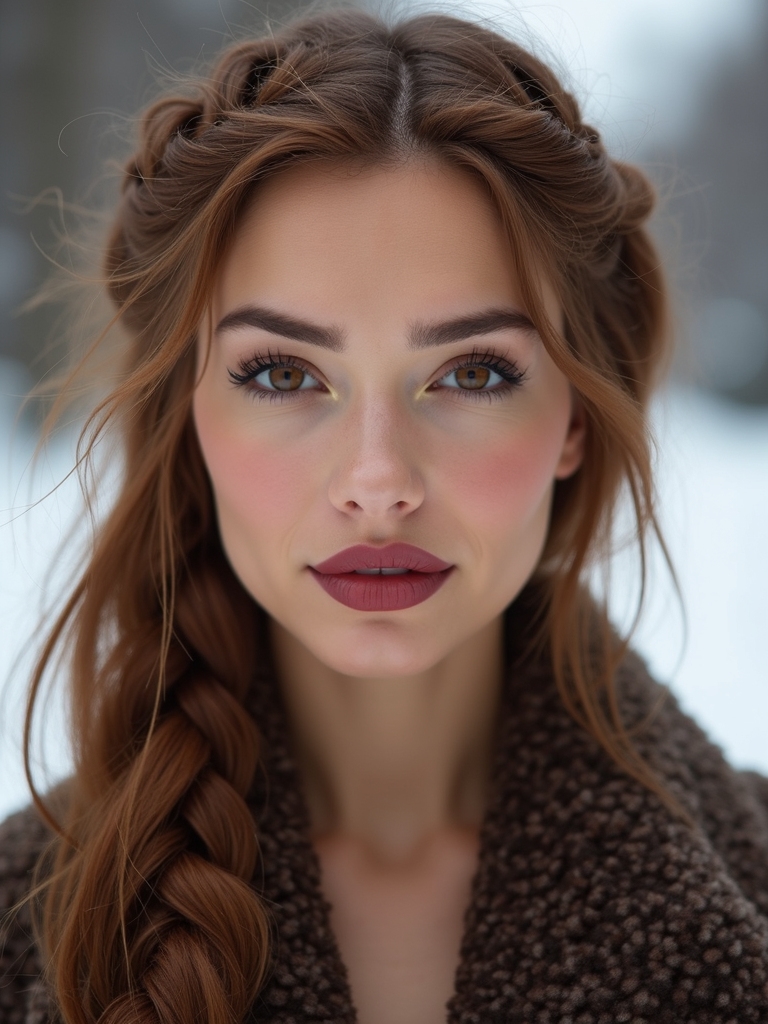
Milkmaid Braids With Soft Volume

I’ll walk you through prepping hair for silky, snag-free braids so your milkmaid looks polished from the start.
Then we’ll lift and softly tease the crown to create that romantic, airy volume without losing the braid’s neat shape.
Finally, I’ll show you the smart pins and hairspray tricks that keep the style secure and wearable all day in chilly weather.
Prep for Smooth Braiding
Starting with a smooth, nourished base makes milkmaid braids with soft volume look effortless and luxe, so I always begin by detangling and applying a lightweight leave-in to tame frizz without weighing hair down.
- Smooth roots with a serum for shine.
- Use a soft-bristle brush to polish strands.
- Lightly mist with a flexible-hold spray to lock texture and prevent flyaways.
Creating Soft Crown Volume
With a few strategic lifts and a gentle backcomb, I build the soft crown volume that makes milkmaid braids feel romantic rather than flat.
I tease lightly at the root, smooth the surface with a paddle brush, and coax height where needed.
The result is elegant lift that frames the face, catching winter light and turning a simple braid into something effortlessly glamorous.
Securing for All-Day Wear
Lock the look in place so your milkmaid braid survives gusts, mitts, and a long day out. I anchor soft volume with discreet pins, a micro elastic, and a spritz of flexible hairspray so it stays chic but touchable.
Follow my simple trio:
- Pin strategically under the braid.
- Secure ends with a clear elastic.
- Finish with light misting.
Fishtail Braid With Hidden Elastic

Wrapped around my wrist like a secret, the hidden-elastic fishtail turns a simple braid into something sleek and polished.
I weave tight, smooth sections, slipping a clear elastic beneath the final plait so the finish looks continuous and luxe.
It keeps flyaways tamed, holds through chilly wind, and reads effortlessly chic for evening plans or daytime errands without fuss.
Twisted Side Braid to Protect Ends

Next up, I’ll show you how a twisted side braid can shield your delicate ends while still looking effortlessly chic.
First I’ll walk you through prepping and sectioning so the twist lays smooth and tight against your scalp.
Then I’ll cover how to secure the braid neatly and finish with products that lock in polish without weighing hair down.
Prep and Sectioning
Before I start braiding, I prep the hair so the ends stay sealed and lustrous: I detangle with a wide-tooth comb, apply a lightweight oil to the mid-lengths and ends, then mist with a heat-protectant leave-in if I’ll be using heat later.
I section precisely for a twisted side braid to protect ends.
- Clean parts
- Smooth panels
- Clip extras
Securing and Finish
While I braid, I keep tension consistent so the twist stays sleek and the ends remain protected, then I secure the tail with a small snag-free elastic that won’t crease or break the hair.
I smooth a light serum over the twist, mist with flexible-hold spray, and tuck the tail under or pin gracefully. The result is polished, protected, and utterly chic.
Braided Top Knot for Windy Days

When gusts pick up and I still want my look to feel polished, I reach for a braided top knot that keeps every strand in place and looks effortlessly chic; it’s the winter updo that survives wind and still reads runway-ready.
- I braid sleek sections for grip.
- I wrap into a compact knot.
- I secure with hidden pins and hairspray.
Lace Braid Along the Hairline

Along the hairline I love weaving a delicate lace braid that frames the face like a couture accessory — it keeps flyaways tamed and instantly lifts your features.
I braid close, adding small sections so the look stays sleek through scarves and damp days. Finish with a light-hold spray and discreet pins; it reads polished, soft, and effortlessly elegant for winter outings.
Double Dutch Braids Into a Low Chignon

If you want a chic, cozy updo that survives hats and holiday parties, I braid two Dutch plaits from the temples and curve them into a low chignon at the nape.
I tuck ends neatly, secure with pins, and mist for hold.
It feels luxe, polished, and practical.
- Prep: texture spray
- Pin: hidden grips
- Finish: flexible hairspray
Braided Ponytail With Added Grip

I love giving a simple ponytail an elevated twist by braiding into it and adding texture for grip so it stays sleek under hats and through parties.
I braid a small section at the crown, wrap it around a secured pony, and tease lightly for texture. A bit of texturizing spray and discreet pins lock everything, creating a polished, glamorous look that lasts all night.
Waterfall Braid Accent for Slippery Hair

For slippery hair I rely on a waterfall braid accent to add hold and movement without weighing strands down. I weave delicate sections to create airy texture that resists slippage and still looks polished for winter nights.
Try these quick tips:
- Prep with light texturizing spray.
- Secure with discreet pins.
- Finish with flexible-hold mist for shine and grip.
Four-Strand Braid for Stronger Hold

When I want a braid that actually stays put through wind, coats, and long winter nights, I reach for a four-strand braid—it’s sculpted, secure, and instantly elevated.
I weave narrow, deliberate sections for texture and grip, fastening with a clear elastic and a few discreet pins.
The result feels luxe, polished, and reliably neat without sticky products, perfect for chilly nights out.
Chunky Braid With Conditioning Serum Lock-in
Moving from the tidy structure of a four-strand, I reach for something bolder: a chunky braid sealed with a conditioning serum to keep strands shiny and soft through winter’s bite.
I braid with purpose, smoothing flyaways, then lock in moisture for lasting sheen.
- Prep: lightweight serum
- Technique: loose, oversized sections
- Finish: mist and gentle hold
So there you have it — a runway-ready playbook for frostproof hair that actually behaves. Picture me, cape fluttering, braids immaculate like they’ve signed a contract with the cold: Dutch twins refusing to frizz, a halo braid smugly warming my ears, a chunky braid sealing in serum like a beauty burrow.
You’ll look polished whether you’re dashing for a latte or surviving a blizzard — glamorous, clever, and annoyingly neat.