I love how insanely pretty straight back braids instantly level up any look—clean middle part, sleek sides, long even plaits that feel polished without trying too hard. I’ll walk you through the tools, the prep, and the exact parting trick I swear by, plus quick touch-ups and chic finish ideas.
Stick around and I’ll show you how to make them last and glow from day to night—your next go-to is closer than you think.
Why Straight Back Braids Are the Ultimate Quick Glam

I always reach for straight back braids when I want to get glam fast — they’re a no-fuss way to look polished and put-together in minutes.
I love how sleek sections frame my face, how the style lasts through a busy day, and how it instantly reads chic without fuss. It’s a reliable, confident look that saves time and feels effortlessly elevated. I especially appreciate the neat finish and longevity of feed-in braids for a polished result.
Tools You Need for Crisp, Long-Lasting Parts

I always start with clean parting tools — a fine-tooth comb and a tail comb keep lines sharp and precise.
I pair those with edge-control essentials to smooth flyaways and lock parts in place for days.
Believe me, the right tools make the whole look feel polished and effortless.
Feed-in braids rely on a specific weaving technique that gradually integrates extensions for a seamless finish.
Clean Parting Tools
Let’s zero in on the tools that make crisp, long-lasting parts actually happen: with a good rat-tail comb, a set of fine-tooth clips, a spray bottle for control, and a lining brush for edge work, you’ll cut down on slipups and drama.
I swear by a lightweight comb, metal clips for firm hold, and a fine mist—simple, efficient, and salon-neat every time.
A sleek braided ponytail requires clean parting to keep the style looking polished from start to finish.
Edge-Control Essentials
Usually I reach for a few edge-control essentials that turn a so-so part into a mirror-smooth, long-lasting line: a medium-hold gel or pomade, a boar-bristle brush or small toothbrush for smoothing, a quick-drying edge brush for precision, and a lightweight setting spray or scarf to lock it in.
I dab, sculpt, and whisper “stay” while wrapping—neat, confident, salon-fresh every time. A well-chosen fringe can flatter your features by balancing proportions and highlighting your best angles, so consider face shape when deciding on bangs.
Prep Steps for Smooth, Sleek Hair Before Braiding
First, I always detangle thoroughly so my parts lay flat and my braids look crisp.
Then I moisturize and seal to keep strands smooth and reduce frizz.
If I’m using heat, I apply a protectant so my hair stays sleek and healthy.
Effortless braided ponytails can elevate any look with minimal fuss, especially when you learn basic braided ponytail techniques for different occasions.
Detangle Thoroughly First
I always start by detangling thoroughly because smooth hair makes braids look crisp and last longer.
I gently work from ends to roots, using a wide-tooth comb and patience so nothing snags or frizzes.
- Section hair into manageable parts
- Finger-detangle first for knots
- Use a wide-tooth comb next
- Smooth with a paddle brush for sleekness
Also, for long styles it’s helpful to choose an updo-inspired braid that complements length and volume, like a classic chic updo for added elegance.
Moisturize and Seal
Saturating strands with a lightweight leave-in and locking it in with an oil or butter is my go-to for braid-ready hair — it keeps frizz down and makes the part lines crisp.
I work product section by section, smoothing from root to tip, concentrating where edges need hold.
A little goes a long way; this combo adds shine, slip, and long-lasting control for flawless straight back braids.
Medium knotless braids are a great option for achieving this look because they reduce tension and create a natural finish with less breakage.
Use Heat Protectant
Because heat is part of my prep routine, I always spritz a good heat protectant before I touch a flat iron or blow dryer — it’s the unsung hero that keeps strands smooth and prevents that fried, dull look.
- Shields hair from high temps
- Adds slip for easy smoothing
- Reduces frizz and flyaways
- Helps color and moisture stay put
How to Create a Perfect Middle Part Every Time

When I want that flawless straight-back look, getting a perfect middle part is my first move—it’s the backbone of the whole style.
I use a fine-tooth comb, clip sections, and align nose-to-ponytail for symmetry.
I press the comb gently along the scalp, check in a mirror, and tweak tiny stray hairs.
Simple, quick, and always sharp.
Achieve a softer frame by incorporating soft curtain bangs to complement the straight-back braids and add effortless movement.
Classic Straight Back Braids: Step-by-Step

Once I’ve nailed that crisp middle part, I start by smoothing each side with a little gel so the braids sit sleek and neat.
I grab three even sections and braid tightly, securing ends, then tug gently for shape.
It’s quick, tidy, and totally glam:
- Section hair evenly
- Braid with firm, even tension
- Secure with a small elastic
- Smooth flyaways
You can adapt this technique from basic Lemonade Braids tutorials to create effortless everyday looks.
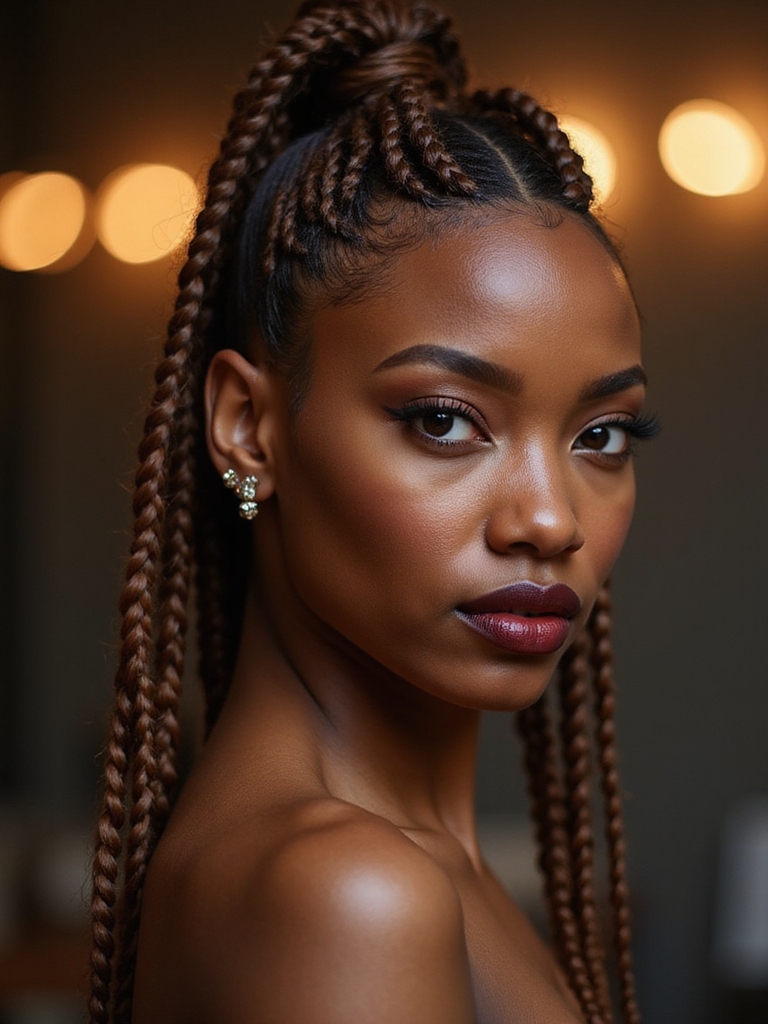
Sleek High Ponybraid for an Elevated Look

If I want instant polish with a little attitude, I pull my hair into a high, sleek pony and braid down the length for a look that’s both chic and workproof.
I smooth flyaways, secure tightly, then braid confidently. It lifts the face, plays nicely with statement earrings, and survives busy days—effortless glam that says I’m put together without trying too hard. Try pairing it with curtain bangs for a soft, face-framing finish.
Low Wrapped Braid for Understated Elegance

Tucking my hair into a low, wrapped braid feels like slipping into a favorite cashmere—effortless, refined, and a little bit luxe.
I love how it tames flyaways, flatters any neckline, and still feels relaxed for daytime or dinner.
- Sleek finish with soft, face-framing tendrils
- Secure without feeling tight
- Works on textured or straight hair
- Easy to dress up or down
Double Straight Back Braids for Sporty Chic
I split my hair down the middle and braid straight back into two neat plaits when I want a sporty, no-fuss look that still reads polished—think gym-ready but photo-ready too.
I keep tension firm, neat edges, and secure ends so braids last through runs or errands. It’s practical, confident, and instantly pulled-together, perfect for busy days when I want sleek style with minimal effort.
Adding Hair Jewelry and Accessories to Make Them Pop
Sprinkle a little sparkle and your double straight-back braids go from sporty to show-stopping in seconds. I love swapping tiny cuffs, colorful beads, silk ribbons, or a statement clip to match mood or outfit.
Try mixing metals and textures for depth, but keep placement balanced so the braids stay sleek and eye-catching.
- gold cuffs
- pastel beads
- silk ribbon ties
- bold hair clip
Tips for Keeping Baby Hairs Smooth and Polished
Usually I smooth baby hairs with a tiny amount of product and a soft brush so they look polished without being plastered to my head.
I use a light gel or edge control, feather with the brush, and blot excess with a tissue.
For shine, a dab of oil on fingertips works.
Sleep on a silk scarf to keep things neat overnight.
How to Make Braids Last Through Sweat and Humidity
Often I treat sweat and humidity like a challenge I can beat: I prep my scalp, seal the hair, and pick products that hold without stiffening, so my braids stay neat through workouts, summer days, and surprise rain.
- Use a lightweight gel and oil sealant.
- Choose tight, even plaits.
- Sleep on a silk scarf.
- Refresh edges with a mist, not heavy cream.
Quick Touch-Up Tricks for On-the-Go Refreshes

I always keep a tiny kit in my bag so I can rescue my braids in seconds: a travel spray bottle with water and a bit of leave-in.
I also stash a small edge brush, a clear gel stick, a few bobby pins, and a satin scrunchie.
A quick spritz, smooth flyaways, tuck loose ends, and braid lines snap back—fast, neat, totally put-together.
Transitioning Straight Back Braids From Day to Night
I love how straight back braids keep my daytime look cool and low-key—perfect with a tee and sneakers.
When night rolls around, I swap in bold earrings, slick a little edge gel, and let the braids shine for instant glam. Stick with small tweaks like accessories and texture and you’ll go from casual to show-stopping in minutes.
Daytime Casual Styling
Usually I keep my daytime look relaxed with straight back braids that are low-effort but still polished, and I’ll show you how small tweaks turn that casual vibe into after-hours glam.
I wear breathable tees, minimal makeup, and comfy sneakers, then tweak textures or accessories later.
- Loose face-framing strands
- Simple hoop earrings
- Soft matte lip balm
- Lightweight denim jacket
Evening Glam Up
Switching up from my laid-back daytime braid vibe to an evening-ready look only takes a few smart swaps and a little attitude.
I slick edges, add gold cuffs, and swap my tee for a sleek top.
A bold lip, statement earrings, and a spritz of shine serum instantly elevate the braids.
I feel polished, fierce, and ready to own the night.
Styling Variations for Different Hair Lengths and Textures

While straight back braids are instantly glam, I tweak the technique depending on your hair length and texture so the look always feels effortless and secure.
- Short hair: micro braids and clever edge control for a sleek finish.
- Medium: half-up variations add volume without bulk.
- Long: elongate parts and add beads for movement.
- Coily: stretch first, then feed-in braids to reduce tension.
Caring for Your Scalp and Braided Hair Between Styles
I keep my scalp happy between styles with a simple hydration routine—light oil or a soothing spray massaged in twice a week keeps itch and flakiness at bay.
At night I protect my braids with a silk scarf or bonnet so they stay neat and don’t frizz while I sleep.
Believe me, a little nightly care goes a long way toward keeping your braids glam and healthy.
Scalp Hydration Routine
Usually I keep my scalp routine simple but intentional. I refresh and soothe between styles with light products and gentle care.
- Spray diluted aloe vera or hydrating mist
- Massage jojoba or grapeseed oil into dry spots
- Spot-clean with diluted shampoo when needed
- Use a cooling serum for itch relief
This keeps braids healthy, fresh, and ready to slay.
Protecting Braids Overnight
Keeping your scalp happy during the day sets the stage for how you treat your braids at night, so here’s how I protect them while I sleep.
I wrap with a satin scarf, tuck edges gently, and sleep on a satin pillowcase.
I mist roots lightly with a water-oil blend, avoid tight styles, and refresh any frizz in the morning for neat, lasting braids.
I hope you’re feeling inspired to try these insanely pretty straight-back braids — they’re my go-to for instant glam when I want fuss-free polish. With a crisp middle part, a little edge control, and maybe a gold cuff or two, you’ll be photo-ready in minutes.
Play with height, length, and accessories to match your vibe, and don’t forget scalp care between wears. Go on—braid it, slay it, and own that sleek confidence.