
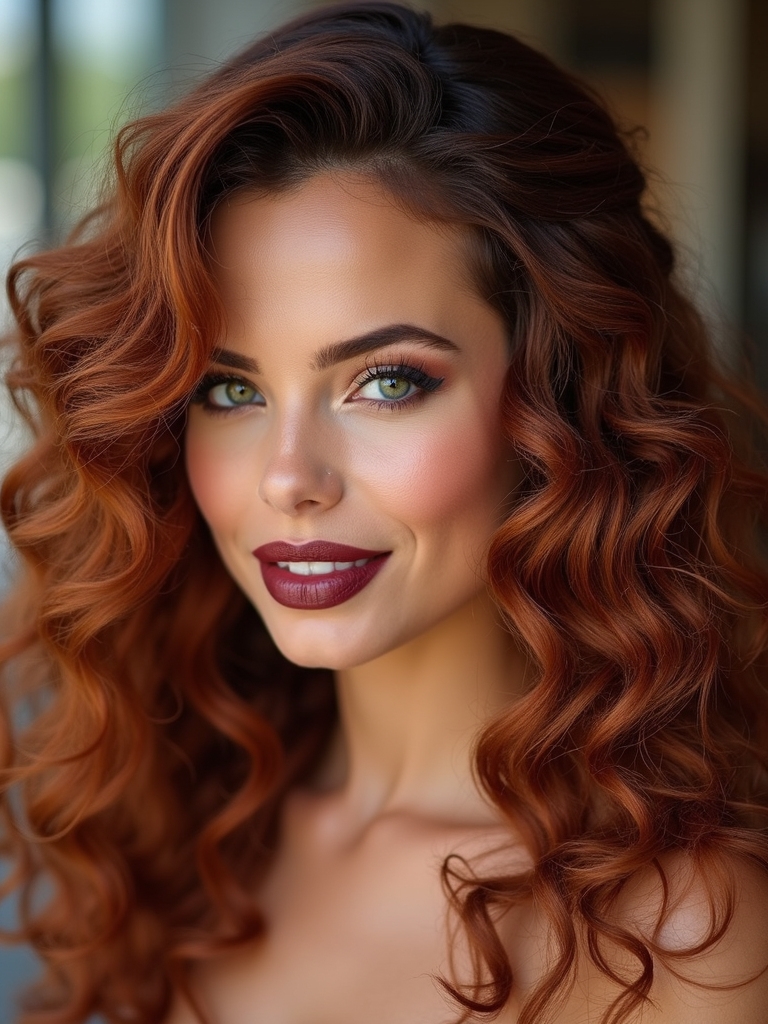
I love half-up curly looks because they lift and frame without flattening your coils; I section the top, mist heat protectant, define ringlets with a lightweight cream, then twist or braid panels and pin above the crown for instant height and movement.
I finish with a soft-hold gel at ends, a shimmer serum and a light mist so curls stay glossy and touchable. Stick with me and I’ll show step-by-step tweaks for shape, volume and hold.
Effortless Half-Pinned Ringlets

I love how effortless half-pinned ringlets instantly make you look polished without feeling overdone — here’s how I get that glossy, face-framing effect every time.
I define curls with a lightweight cream, separate into front sections, and twist small ringlets before pinning them back with discreet bobby pins.
I finish with a spritz of shine mist and light-hold spray to keep movement intact.
Bridesmaid braid updos often use braids incorporated into the style for subtle drama and added texture.
Twisted Crown Half Updo

With a few simple twists you can elevate curls into a regal twisted crown half updo that looks like you spent hours on it—without the fuss.
I’ll show you how: section two front panels, twist each toward the back, secure with bobby pins crossing for grip, then loosen twists for volume.
Finish with light misting and a shine serum for polished, touchable texture.
For an added touch, try incorporating a small delicate detail like a thin braid or ribbon to enhance the half-up braided look.
Braided Half Halo

Let’s braid a half halo that frames your curls like a crown—I’ll walk you through a simple, salon-worthy method that looks intricate but goes fast.
Start by parting hair slightly off-center, pick a section above one ear, and Dutch-braid toward the opposite temple.
Secure with pins, repeat on the other side, then join and tuck ends invisibly.
Finish with light hairspray for shine.
Cornrow techniques can be adapted to create elegant updos that protect hair and reduce manipulation, such as using cornrow updo methods to anchor and shape the halo.
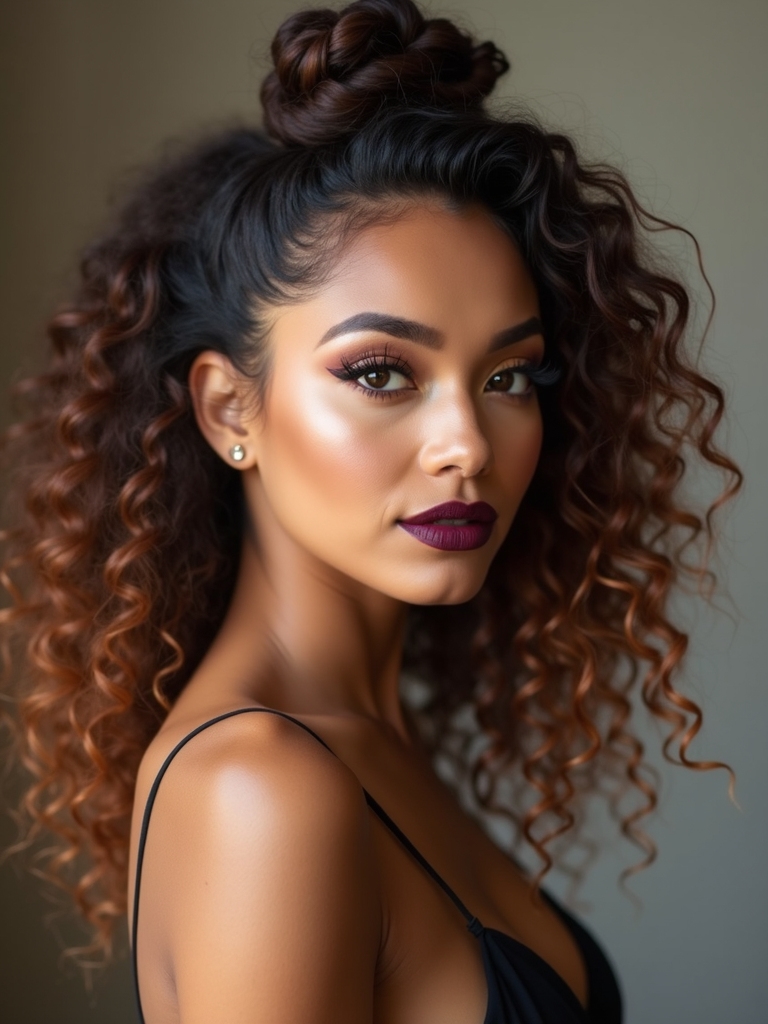
Topknot Half up With Face-Framing Curls

I love showing you how a topknot half-up can sit perfectly at the crown to give height without overwhelming your curls.
I’ll walk you through where to place the knot and how to tease for volume, then show simple securing tricks—like loose pins and a soft elastic—that won’t flatten your face-framing tendrils.
Follow my steps and you’ll keep those soft curls framing your face while the knot stays secure and airy.
These effortless half updos often use simple teasing techniques to create natural lift without stiff styling products.
Placement and Volume Tips
When I position the topknot, I’m thinking about balance — too high and it reads severe, too low and it loses its playful lift — so I aim for a spot that flatters your face shape and lets the curls fall like a frame.
I create volume by gently backcombing crown roots, teasing only where needed, and releasing curls to cascade, keeping proportions elegant and fresh.
Soft curly updos work best when you preserve natural texture and avoid over-working the curls, allowing for soft finish that enhances movement.
Securing Without Flattening
To keep that lifted crown from collapsing as you pin the topknot, I’ll show you how to secure it without squashing the curls that frame your face.
I twist the top section loosely, anchor with a claw clip or soft elastic, then pin strategically beneath the twist for lift.
Leave face-framing curls untouched, mist with light hold spray, and fluff gently for shape.
This approach pairs beautifully with a soft curtain bangs look that keeps the style airy and modern.
Low Clip Sweep With Volume

With a few precise twists and a statement clip, I’ll show you how to create a Low Clip Sweep With Volume that looks effortlessly luxe.
I gather side sections, twist loosely toward the nape, and tease roots softly for lift.
Anchor the sweep with a decorative clip just below crown height.
Finish with a light mist to hold shape while keeping bounce and texture.
For an alternative finish, you can pair this look with an effortless ponytail technique to frame the face and enhance movement.
Loose Half-Up Ponytail for Curly Hair

I’m going to show you how to create a loose half-up ponytail that starts with smart prep and protection so your curls stay healthy and frizz-free.
I’ll explain how to secure the top section without flattening your volume, using the right placement and tools.
Finally, we’ll finish with curl definition techniques so the look reads polished and effortless.
Half-up, half-down styles are an effortless way to highlight natural texture while keeping hair out of your face, and they work especially well for curly hair.
Prep and Protect
Prepping my curls is the secret that keeps a loose half-up ponytail looking polished all day.
I detangle gently with a wide-tooth comb, apply a lightweight leave-in to define and hydrate, then seal ends with oil.
I mist a heat protectant before any styling touch-ups and diffuse on low to set shape.
These steps preserve bounce, reduce frizz, and protect strands.
Curly work-friendly styles often focus on effortless texture to maintain a professional yet natural look.
Secure Without Flattening
Even though you want your half-up ponytail to stay put, I’ll show you how to secure it without squashing your curl pattern — think airy lift at the crown and defined ringlets cascading below.
I gather a top crown section, tease gently for volume, then wrap a soft elastic once, tucking excess hair under for hold. Use a silk scrunchie and hairpins to anchor, not compress.
Braids added to the sides can frame the face and add texture to the look, creating effortless half braided hairstyles that enhance definition.
Finish With Definition
Start by coaxing each curl into shape so your loose half-up ponytail reads polished, not undone—I’ll define individual ringlets with a small amount of curl cream or lightweight gel, scrunching from mid-shaft to ends to encourage bounce without crunch.
Then I:
- Smooth edges with a silk scarf.
- Loosen crown for volume.
- Pin stray pieces for shape.
The result: glossy, defined glamour.
Half-Up Pull-Through Braid
With a few clever pulls and a little patience, I’ll show you how to create a half-up pull-through braid that looks complex but comes together fast; it lifts your curls, adds volume, and keeps the face framed glam.
I section crown hair, secure three mini ponytails, pull outer sections through centers, pancake for fullness, and pin discreetly—instant textured elegance that stays soft and bouncy.
Messy Half Bun With Defined Coils

I start this look by prepping my curls with curl-friendly products so each coil gets definition and hold.
Then I twist small sections to sculpt those glossy, defined coils before gathering the top half into a loose, textured bun.
I’ll show you how to secure the bun so it feels effortless and stays beautifully undone all day.
Prep With Curl-Friendly Products
I’ll prime your curls like a pro so that the messy half bun sits effortlessly and the coils stay defined all day. I’ll guide you through luxe, curl-friendly picks—lightweight cream, frizz-fighting serum, and a flexible gel—to enhance shine and hold without crunch.
- Leave-in cream
- Lightweight oil/serum
- Soft-hold gel
Twisting for Defined Coils
Once you’ve prepped your curls, I start by sectioning the top half into manageable pieces so each twist gets attention and holds its shape.
I twist small sections away from the face, smoothing with a touch of cream to define coils. I pin each twist loosely to create height and movement, teasing only slightly for a lived-in, glamorous finish that still feels effortless.
Secure Loose, Textured Bun
Gather a few bobby pins and a soft hair tie, and let’s craft a secure loose, textured half bun that keeps those defined coils front and center. I’ll show you quick, glamorous steps to lock shape without stiffness.
- Section crown, twist lightly.
- Wrap into a loose bun, secure with tie.
- Pin strategically, pull coils for texture.
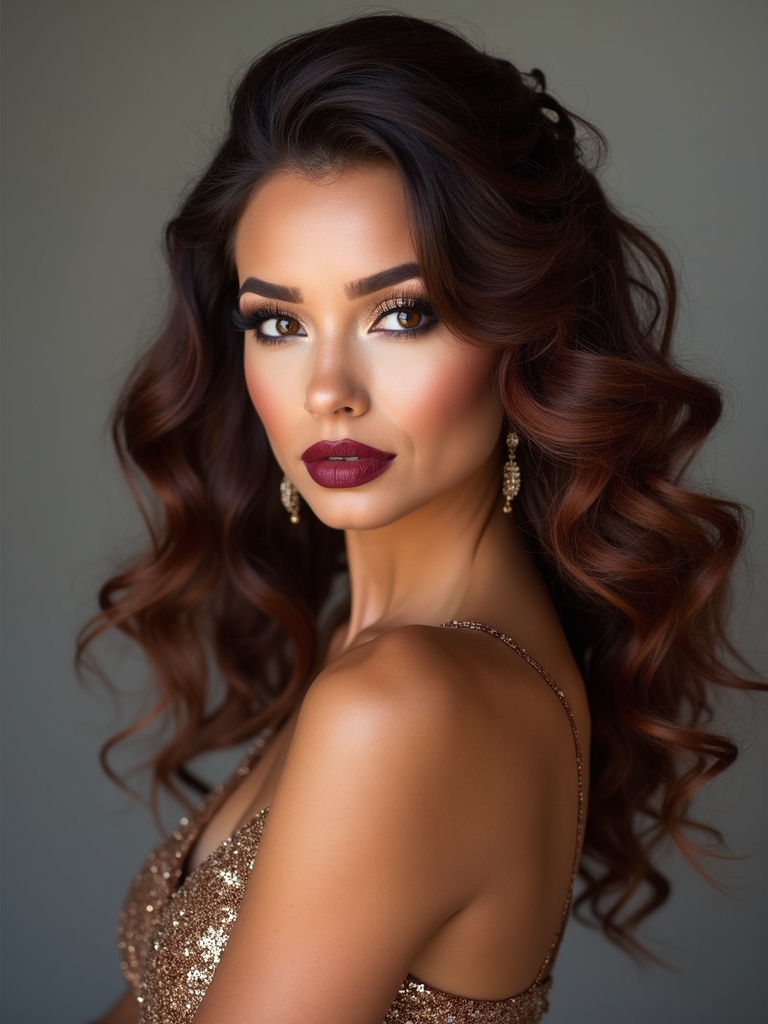
S-Shaped Wave Half Up

Think of the S-shaped wave half up as your go-to for that red-carpet curl without the fuss; I’ll show you how to create deep, glossy waves that sweep back into a chic half-up silhouette.
I’ll guide you: define S-waves with a large-barrel iron, set with cooling clips for hold, brush gently into an S, then pin the top section back for polished volume.
Accessorized Half up With Scarves and Clips

I love dressing up a half updo with a silk scarf or statement clips because they instantly lift the look from simple to styled; I’ll show you how to place each accessory so it feels effortless, secure, and runway-ready.
I’ll guide you through folding, anchoring, and finishing touches for polished texture.
- Fold scarf
- Anchor clip
- Set with pins
Half-Up Knot With Twist Details
I love placing twists just above the crown to keep the knot balanced and let my curls cascade evenly.
I’ll show you how to angle each twist so the knot sits centered without pulling at the roots.
Then I’ll teach you quick, secure techniques—pins and hidden elastics—that hold the knotted twist all day without flattening your volume.
Twist Placement for Balance
With a few strategic twists, I balance the half-up knot so your curls sit perfectly framed around your face. I guide placement to flatter your features, emphasizing asymmetry or symmetry as needed.
Try these quick adjustments:
- Twist near temples for lifted frame.
- Place lower at crown for volume.
- Offset slightly to soften profile.
Follow each tweak for instant glamour.
Securing the Knotted Twist
Secure the knot by anchoring each twist where it meets the half-up bundle so your curls stay polished all day. I slip small clear elastics at the base, then pin twists with U-pins hidden beneath coils.
I cross pins for extra hold and mist a lightweight shine spray to tame frizz without weight. The result: a secure, elegant half-up knot that lets texture shine.
Vintage-Inspired Half Roll for Textured Hair

Although vintage rolls might look intricate, I’ll show you how to create a glamorous half roll on textured hair without fuss, step by step.
I’ll guide you to sculpt soft volume, pin securely, and let curls peek for romance.
Follow these simple actions:
- Section and backcomb lightly.
- Smooth, roll inward, and secure with pins.
- Release curls and set with spray.
Curly Half up With Micro Braids

I’ll show you how to elevate your curls by weaving in petite micro braids that add texture, edge, and a touch of boho-glam to a half-updo.
I’ll braid small sections at the hairline, secure them into the crown with discreet pins, and leave curls cascading.
Finish with light oil for shine and a flexible spray to keep movement without stiffness.
Half-Up Fishtail Accent for Thick Curls
If you liked the boho edge of micro braids, you’ll love how a fishtail accent brings sculpted glamour to thick curls.
I’ll show you quick steps to nail it:
- Section top half and detangle gently.
- Create a loose fishtail from one side, pulling pieces to match curl volume.
- Secure, mist with flexible hold, and pancake for fullness.
Sleek Sides With Voluminous Top Half

Polish the sides sleek and sculpt the top into glorious volume—I’ll walk you through a look that feels modern and red-carpet ready.
Start by smoothing sides with gel and a fine-tooth comb, pinning them behind your ears.
Tease the crown, define curls with a cream, then lift and secure the top half with discreet pins for lasting height and glossy contrast.
You’ve seen how texture can steal the spotlight — from twisted crowns to micro braids — and now it’s your turn to play stylist. Try mixing a few techniques: a loose half-pinned ringlet with a tiny fishtail or a vintage roll softened by face-framing curls.
Want proof that effortless glamour lives in simple moves? Keep experimenting, trust your curl pattern, and don’t be afraid to let volume and shape lead the look — you’ll love the results.


