
I craft bun updos that flatter Black hair by matching shape and placement to your face and texture. I assess density, length and curl to choose high sleek, low wrapped, or textured top-knot options, often building a braided base for secure shape and polished edges.
I use twists, halo braids or scarves to sculpt balance and add soft tendrils for movement. Keep scrolling and you’ll find stepwise techniques, accessory ideas and protective tips to try.
Choosing the Right Bun Shape for Your Face and Hair Texture
Because face shape and hair texture affect how a bun sits and frames you, I start by evaluating both before I style—round faces usually benefit from higher, elongating buns, while long faces work well with low or side buns that add width.
I assess density, curl pattern, and length, then choose volume, placement, and tension to flatter features while ensuring comfort and longevity.
I often begin with simple braided bases like a crown or halo braid to create sculpted balance and secure volume before forming the bun.
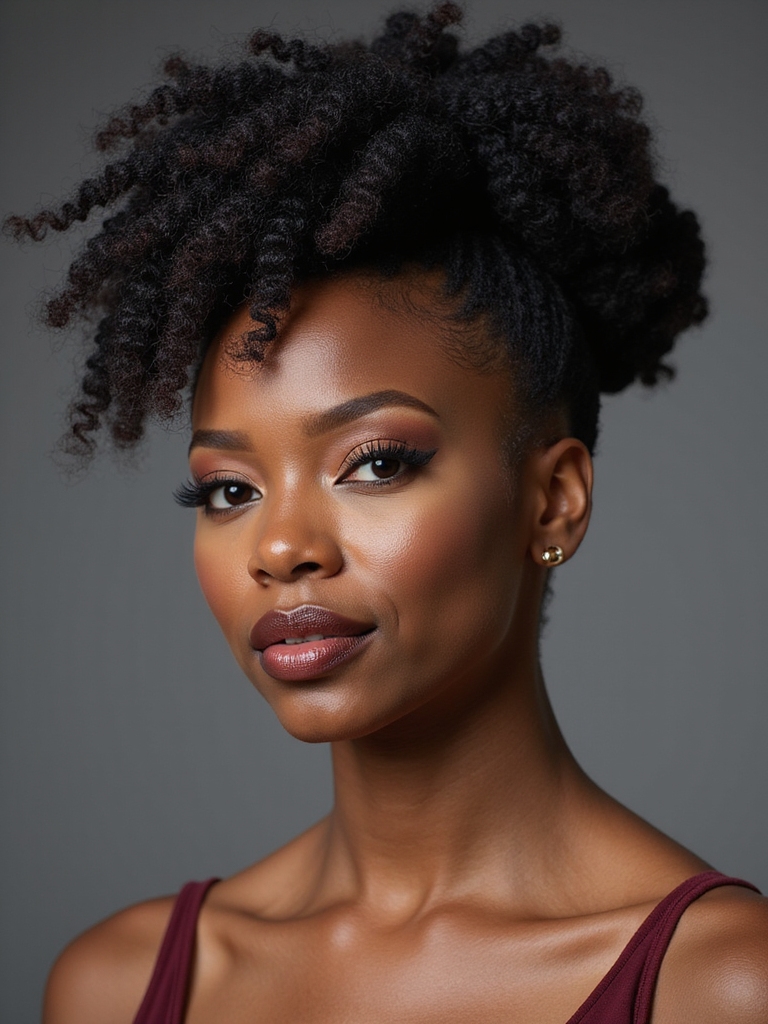
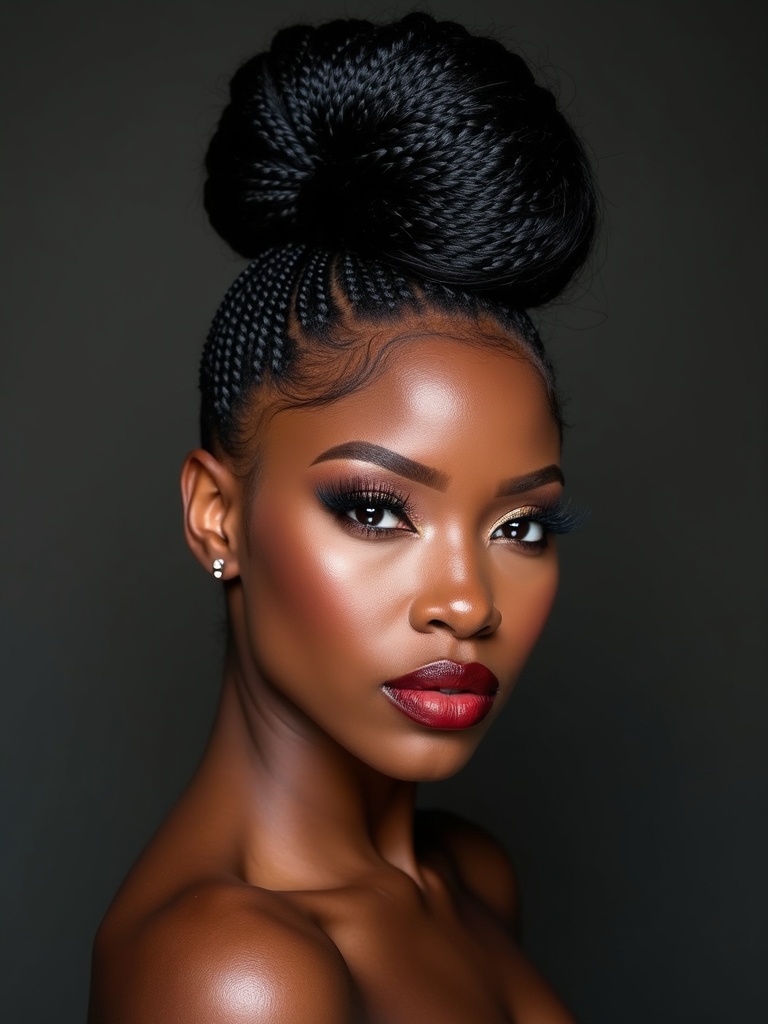
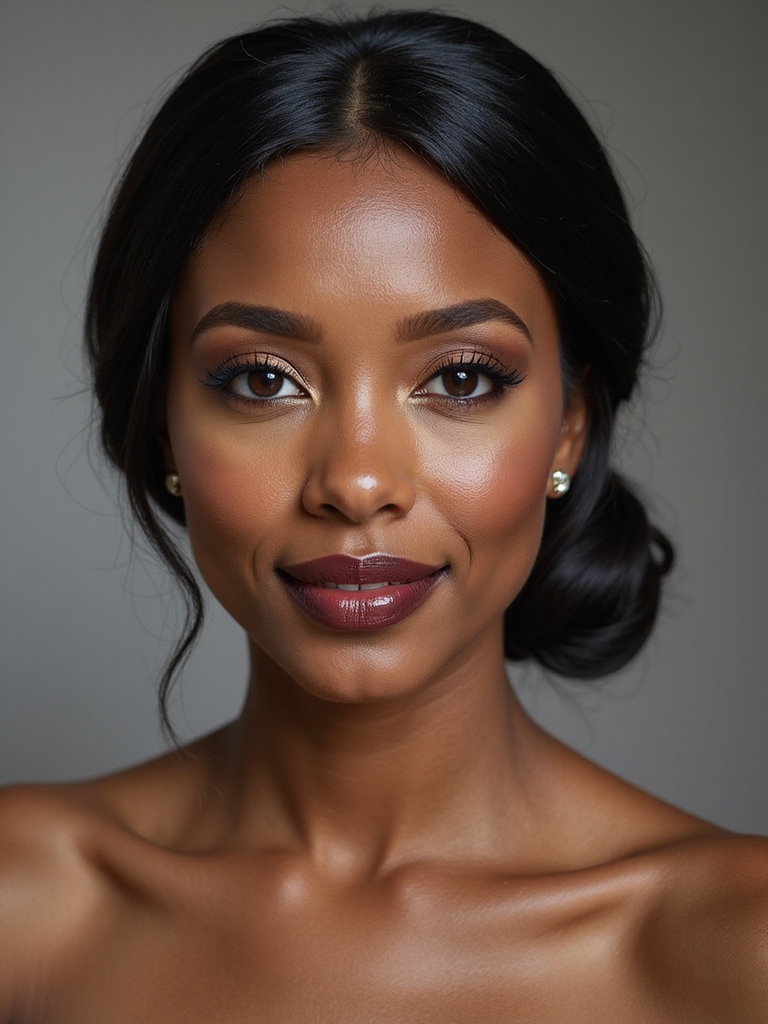
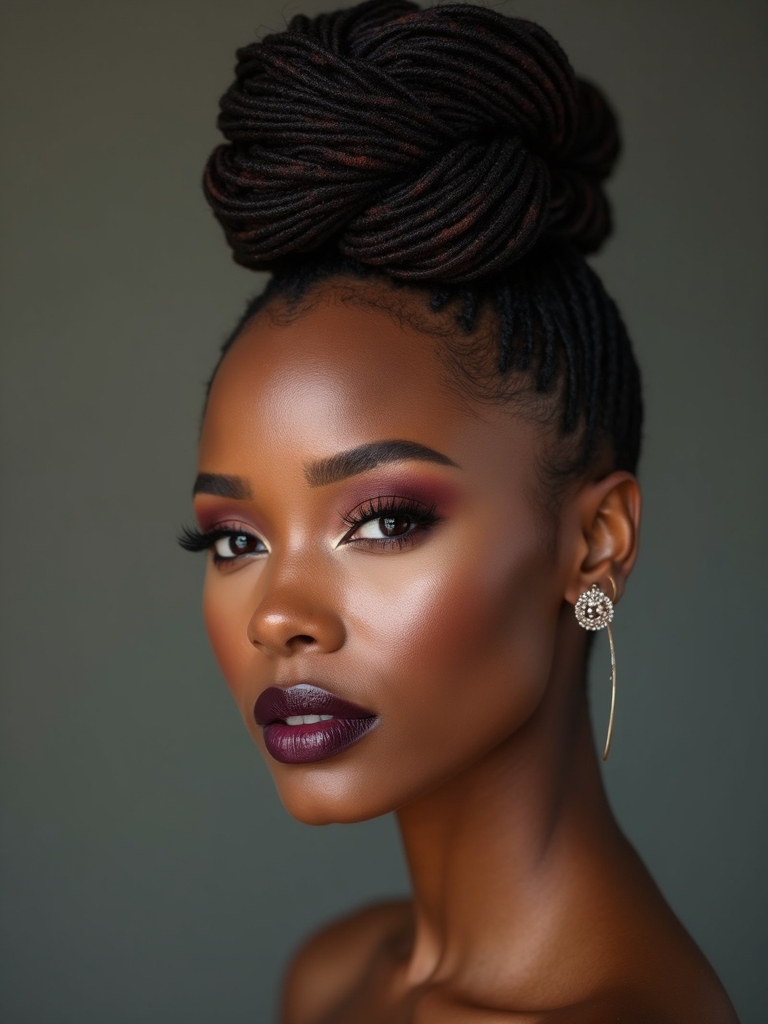
High Sleek Bun With Defined Edges
I love how a high sleek bun flatters the face while keeping hair polished and off the neck.
I’ll show you my go-to edge control techniques and the shine-and-hold products that keep baby hairs crisp without stiffness.
Placing the bun high also adds elongation and drama, so I’ll guide you on securing lift that lasts.
I also incorporate braided cornrow foundations for added structure and a sharp finish.
Edge Control Techniques
Mastering edge control is the difference between a casual bun and a show-stopping high sleek updo, so I’ll walk you through the techniques that give you smooth, defined edges without damaging your hair.
I use gentle products, precise tools, and protective steps:
- Light edge gel and a small brush for targeted smoothing.
- Finger-smoothing and low tension while styling.
- Seal with a silk scarf for ten minutes.
Elegant Frontal Updos often emphasize a clean hairline and balanced proportions, making them ideal for everyday wear and special occasions, especially when you use frontal updo techniques.
High Placement Benefits
After smoothing your edges and securing them with a silk scarf, placing the bun high on your crown instantly lifts your face and adds polished drama to the look.
I choose high placement because it elongates my profile, balances strong cheekbones, and emphasizes a sleek hairline. It feels versatile — elegant for events, sharp for everyday — and always gives me confident, sculpted presence.
High sleek buns also pair beautifully with sleek black hair for a refined, clean finish.
Shine and Hold Products
Choose products that give both glossy finish and long-lasting hold so your high sleek bun stays smooth without looking stiff. I pick lightweight gel, a nourishing serum, and a flexible hairspray to sculpt edges and add mirror shine.
My routine:
- Lightweight gel for control
- Serum for gloss and hydration
- Flexible hairspray for hold without crunch
For a timeless look, consider pairing the high sleek bun with an elegant low bun option to create sculpted balance and visual harmony.
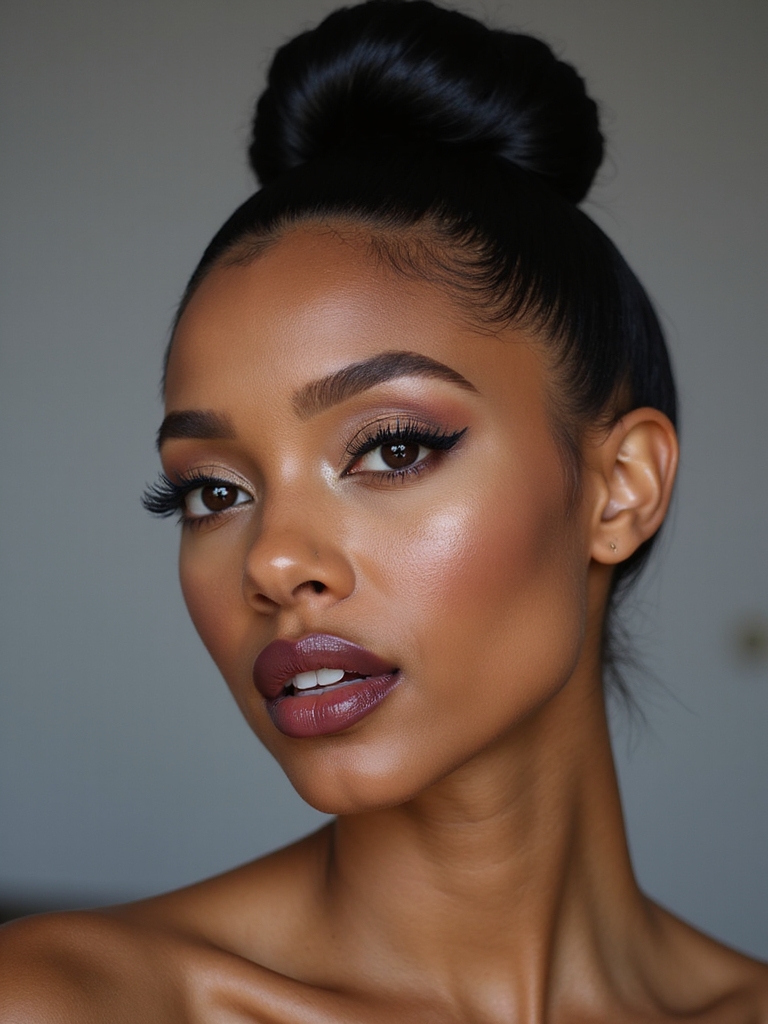
Low Wrapped Bun for Soft Elegance
With a low wrapped bun, I aim for soft elegance that feels effortless yet intentional; I gather the hair at the nape, smooth the sides, and wrap a sleek or textured strand around the base to hide pins and add polish.
I keep edges neat, secure with discreet pins, and let a few face-framing tendrils soften the look for daytime or evening ease.
This style often draws on sculpted cornrow techniques to create a balanced, structured foundation for the bun.
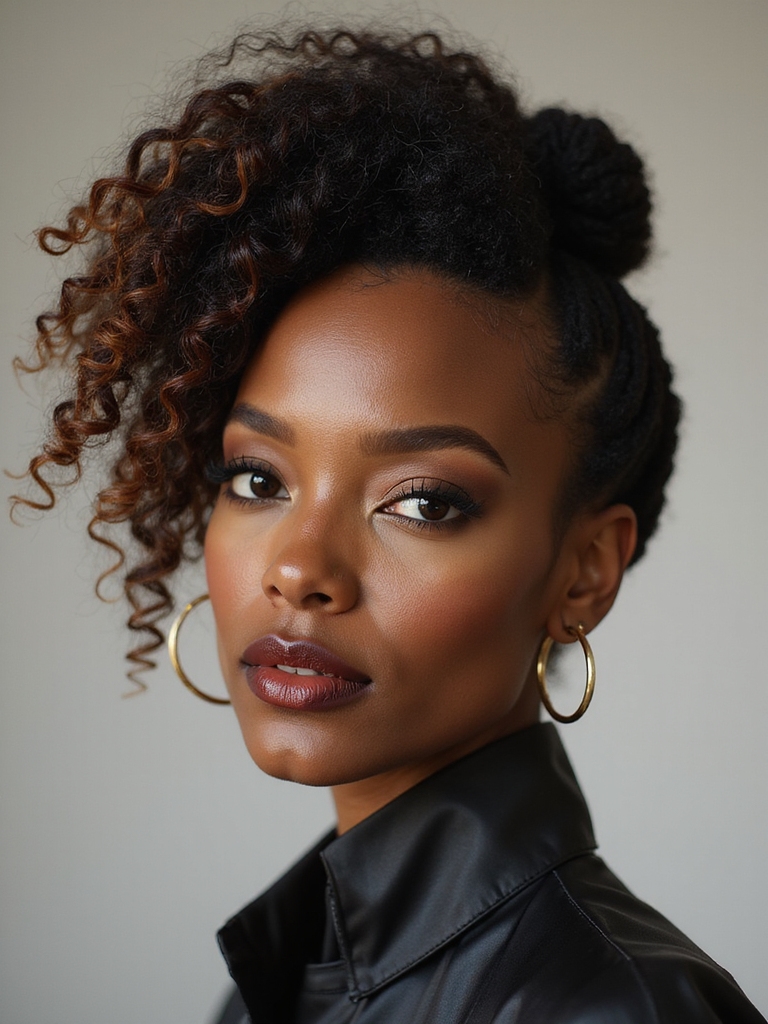
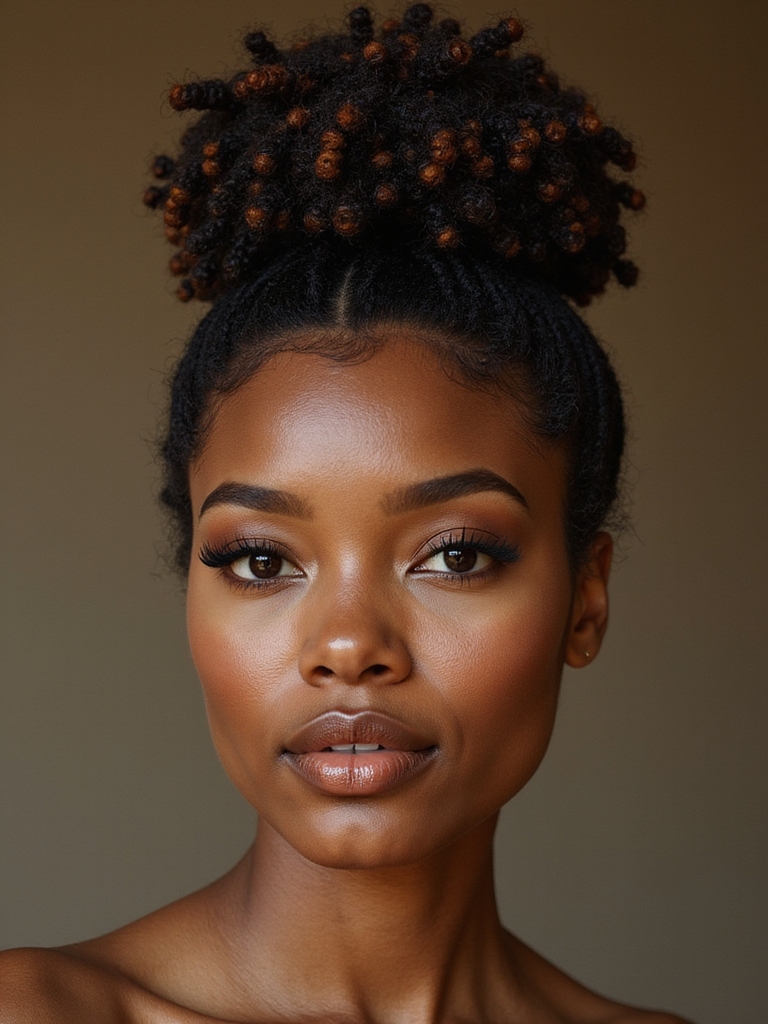
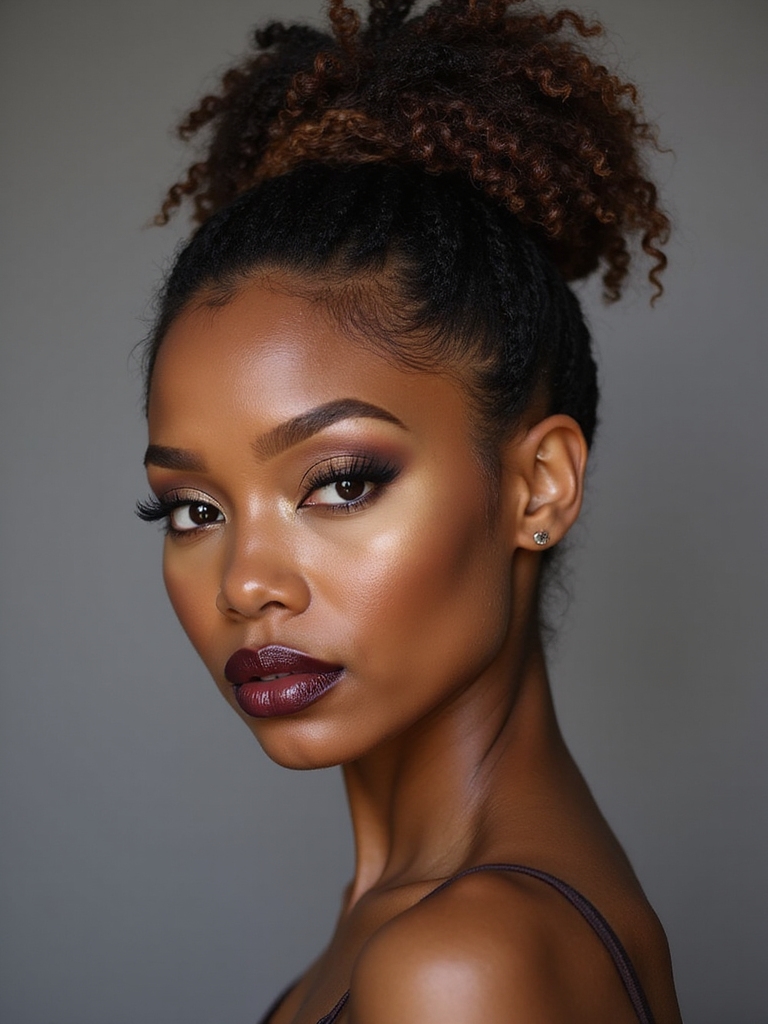
Textured Top Knot With Sculpted Volume
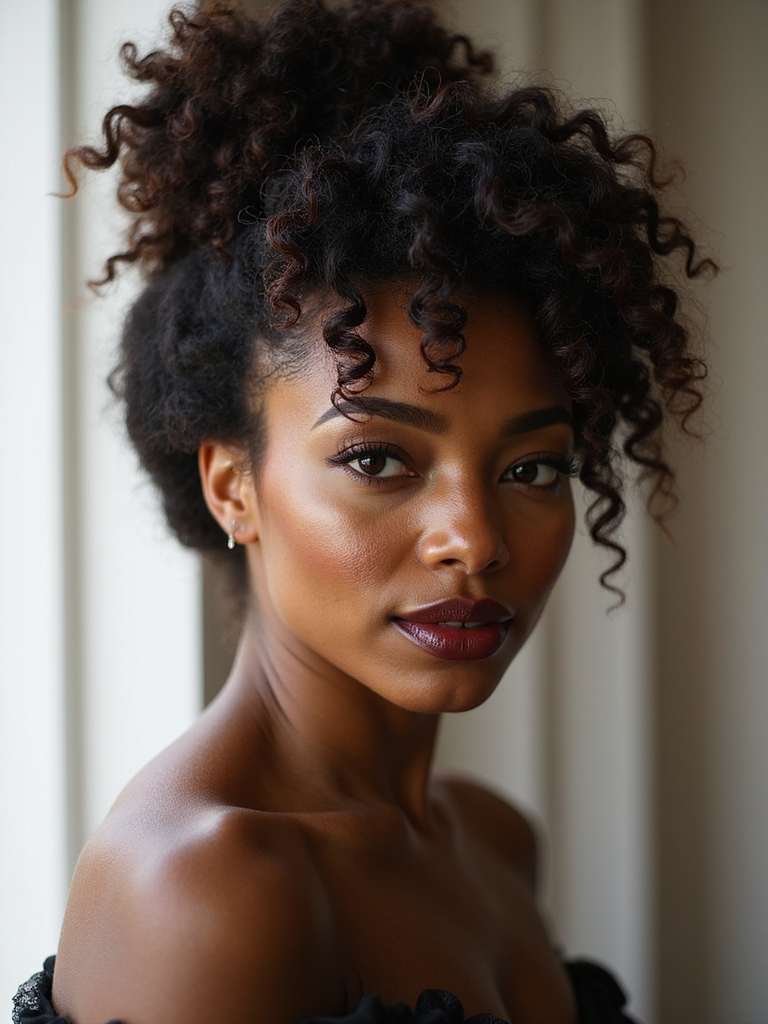
Balancing boldness and polish, I build a textured top knot by teasing the crown for sculpted volume, then gathering hair high and twisting it into a loose, tactile knot that reads effortless but deliberate.
I finish with edges smoothed and a soft hold spray. Try these steps:
- Tease crown.
- Gather high.
- Twist loosely and secure.
This creates a polished look while retaining a soft curly natural finish that complements textured hair.
Twisted Halo Bun for Romantic Balance

When I want a look that’s both soft and structured, I create a twisted halo bun that frames the face while keeping hair neatly tucked away; it reads romantic without feeling fussy.
I twist sections around the crown, securing each turn to sculpt balanced volume.
The result is elegant and wearable—perfect for dates or events when you want polished softness that lasts without constant fuss.
This style is an easy addition to any collection of effortless curly updos for black women, as it enhances natural texture while maintaining sculpted balance.
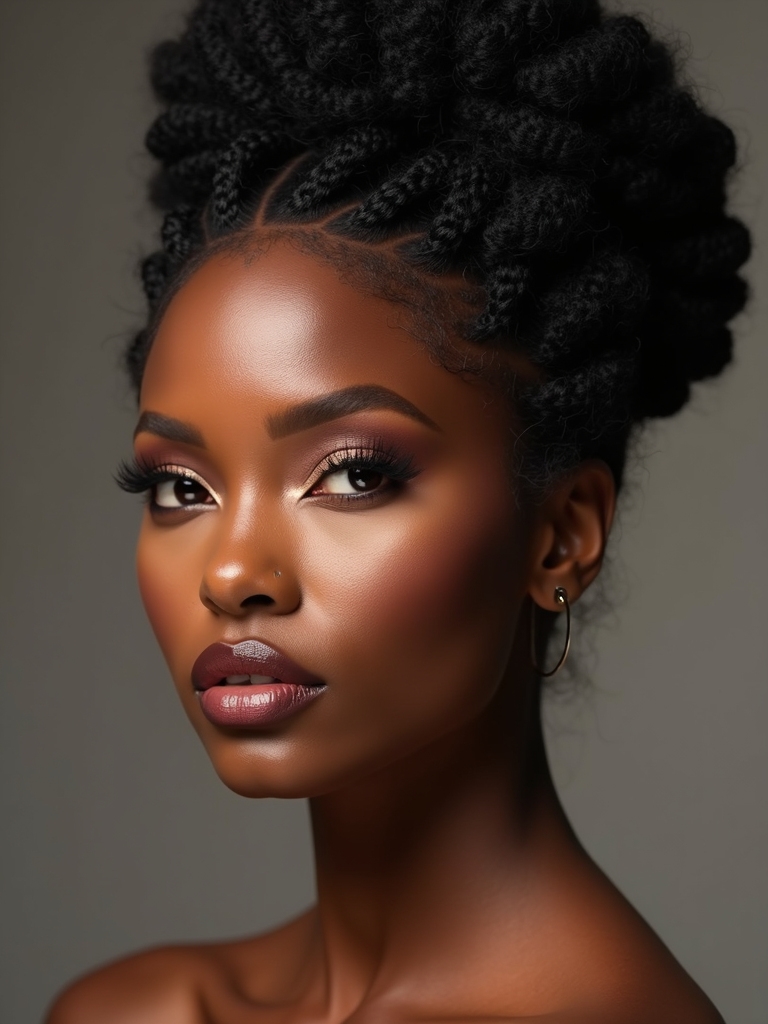
Braided Base Bun for Added Hold and Detail
I like starting with a braided base because it gives the bun reliable hold throughout the day.
I’ll show how a tight, secure foundation keeps your shape while smaller decorative braids add texture and polish.
You’ll get tips for creating both strength and style without extra bulk.
Sculpted texture techniques like defined twists and controlled volume create a polished finish and emphasize sculpted texture.
Secure Braided Foundation
Start by creating a tight braided base to give your bun structure and long-lasting hold. I braid close to the scalp, smoothing edges and anchoring the pattern.
Then I:
- Secure ends tightly with an elastic.
- Pin the braid flat to form a stable foundation.
- Wrap remaining hair into a neat bun, reinforcing with sturdy pins for lasting wear.
Bold Cornrow Updos command attention with sculpted lines and texture that enhance the bun’s silhouette, often featuring sculpted balance to create striking symmetry.
Decorative Braid Detailing
After pinning the braided foundation, I’ll add decorative braid detailing to boost both hold and visual interest.
I weave small accent braids around the bun, tucking ends neatly and securing with discreet pins. These accents reinforce structure, prevent slippage, and create rhythm.
I vary braid thickness and direction for sculpted balance, finishing with light sheen for polish without stiffness.
Faux-Lock Bun Using Extensions
You’ll see how a faux-lock bun using extensions gives the look of traditional locs without the long-term commitment—I’ve used it when I wanted that textured, sculpted finish but needed flexibility.
I create a secure base, wrap pre-formed faux locs, then sculpt volume for balance.
- Prep: moisturize, braid base
- Wrap: attach faux locs
- Shape: pin and refine
Side-Swept Bun With Face-Framing Tendrils
I love how a side-swept bun with soft face-framing tendrils balances polish and ease.
I’ll show you how to shape delicate tendrils around your face while keeping the bun securely tucked low and to the side.
With a few styling tips you’ll get a look that stays put and flatters your features.
Soft Face-Framing Tendrils
When I sweep my bun to the side and let a few soft tendrils fall, the whole look instantly becomes softer and more romantic.
I shape them with gentle tension so they frame my face without hiding bone structure.
- Use lightweight gel for hold
- Curl ends for movement
- Tuck stray hairs with pins for polish
Secure Low-Side Bun
Sweep my hair to one side and secure a low-side bun that feels both effortless and polished; I love how the side-swept placement gives a flattering asymmetry while keeping the look refined.
I pull a few face-framing tendrils loose, smooth edges with gel, and anchor the bun with pins.
It’s understated, secure, and perfect for day-to-night confidence.
Accessorized Bun With Scarves and Pins
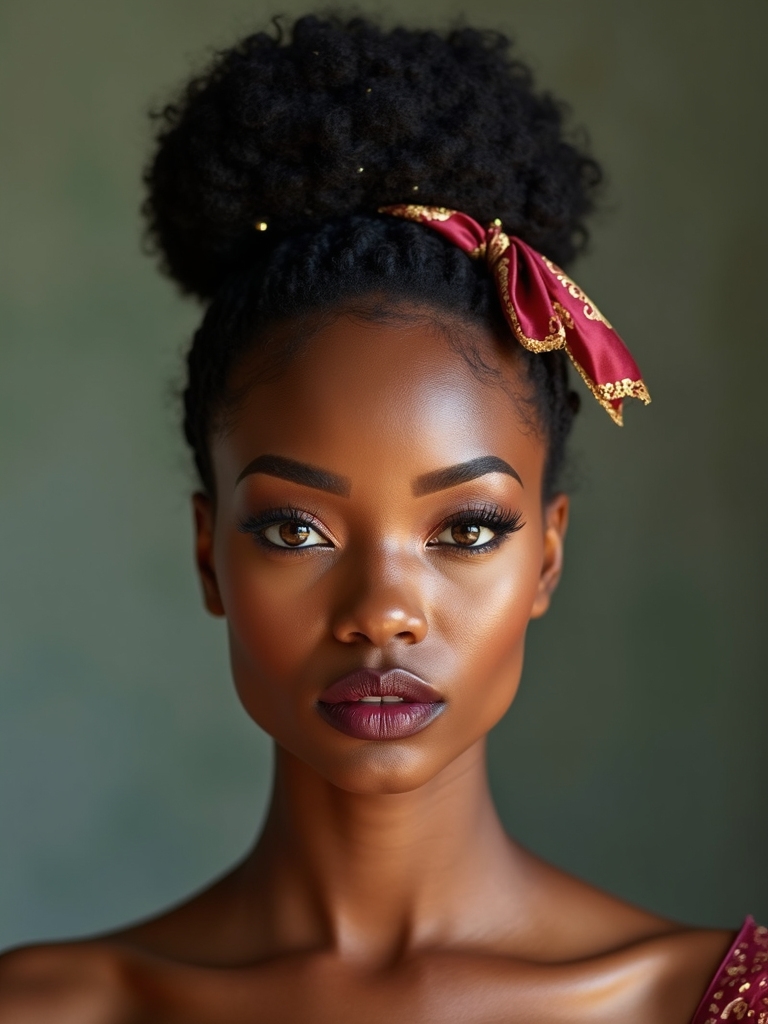
With a few well-chosen scarves and decorative pins, I can turn a simple bun into a statement that’s both polished and playful.
I choose scarves for color and texture, pins for sparkle and hold. Try these ideas:
- Wrap a silk scarf around the base for contrast.
- Tuck gold pins asymmetrically for balance.
- Add a patterned band for personality.
Sleek Mid-Placement Bun for Professional Looks
After finishing a playful, accessorized bun, I often reach for a sleek mid-placement bun when I need a more professional, put-together look.
I smooth edges with gel, create a clean part if desired, and secure hair low on the crown for balanced proportions.
This style reads polished, tames flyaways, and projects confidence in meetings without sacrificing my natural texture or personal style.
Voluminous Pineapple-Inspired Bun
When I want maximum volume and a playful silhouette that still feels effortless, I reach for a voluminous pineapple-inspired bun that lifts my curls up and away from my face.
I secure texture, shape, and movement with simple steps:
- Loosely gather high at the crown.
- Pin strategically for balance.
- Tuck ends to create a rounded, airy finish.
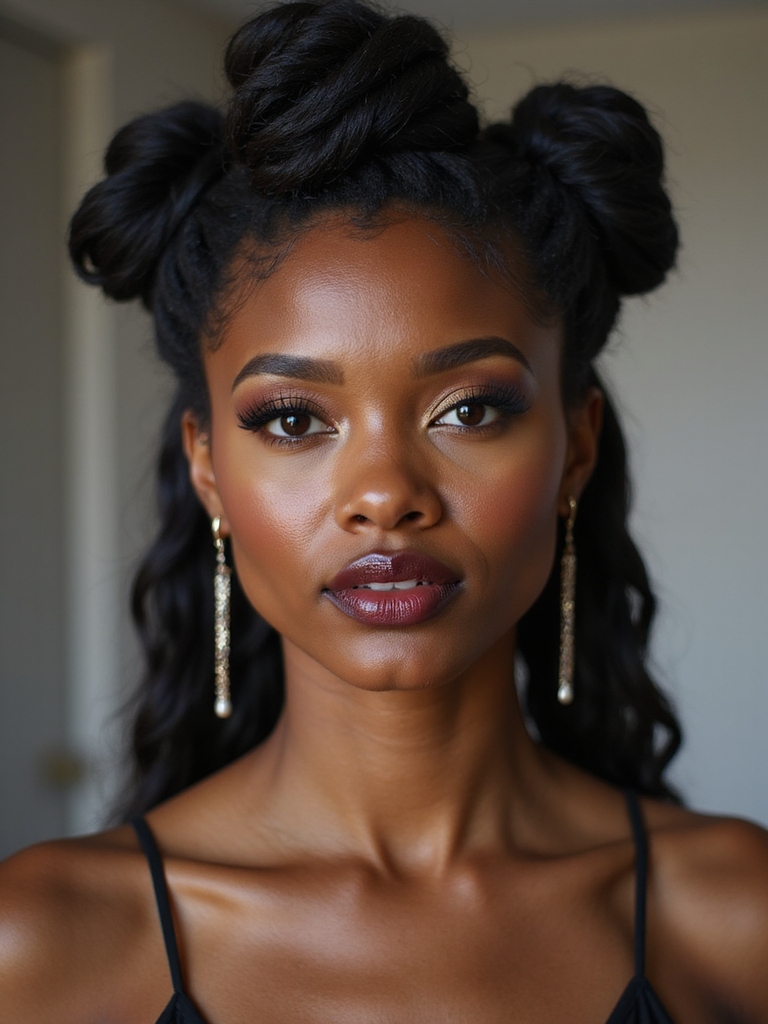
Double-Bun Duo for Playful Symmetry
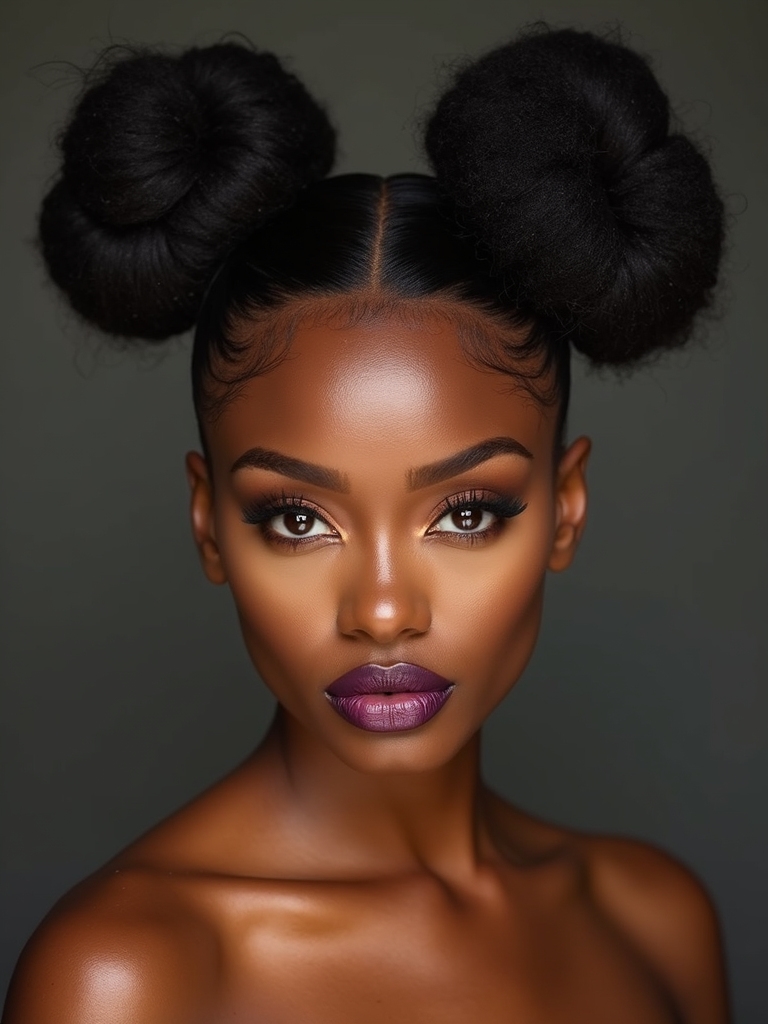
If I want a look that’s playful but still polished, I reach for a double-bun duo that frames the face with mirror-image balance.
I part my hair down the middle, smooth each side, and secure two neat buns high or low depending on mood.
It’s versatile, youthful, and structured—great for showcasing earrings or clean edges without sacrificing sophistication.
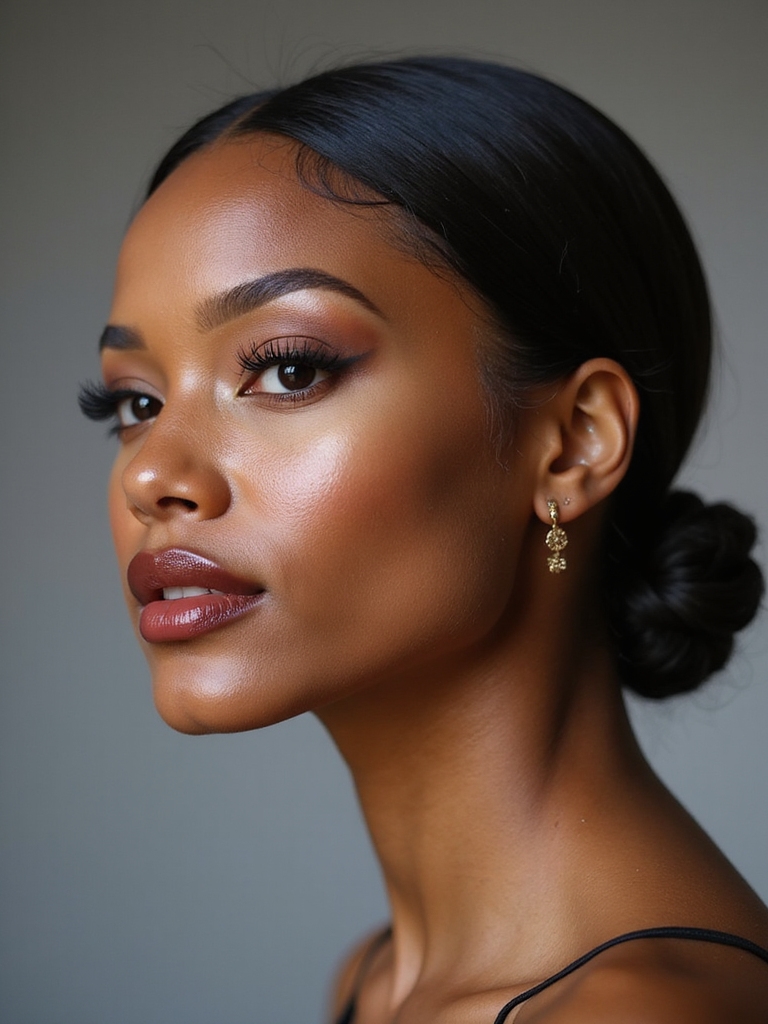
Chignon Bun With Sculpted Nape Detail
Because I love a look that’s both elegant and intentional, I turn to a chignon bun with a sculpted nape detail whenever I want polished structure with a touch of edge.
I shape the nape for contrast, secure a low chignon, and finish with shine. Try these steps:
- Define nape with gel.
- Smooth sides.
- Pin chignon precisely.
Protective Bun Styles for Natural Hair Health
I recommend bun styles that prioritize moisture retention—think leave-in creams, sealing oils, and satin-lined wraps—to keep your strands hydrated under an updo.
I also favor low-tension techniques like loose twists, bandless wraps, and softly pinned buns to prevent breakage at the edges. Together these approaches let you wear elegant buns while protecting your natural hair health.
Moisture Retention Techniques
Usually I start by locking in a solid moisture routine before I put my hair into a bun, because keeping natural hair hydrated is the single most important step for protective styling to actually protect.
I focus on balance and longevity:
- Pre-poo with a lightweight oil.
- Apply leave-in and seal with butter.
- Sleep with satin and refresh weekly.
Low-Tension Styling Methods
When I loosen my grip on tight styling, my hair thanks me with less breakage and healthier edges, so I prefer bun methods that minimize tension while still looking polished.
I use loose twists, flat twists into low buns, and soft scrunchies or fabric wraps to secure styles.
These approaches protect growth, reduce scalp stress, and let me wear elegant buns without sacrificing hair health.
Transition-Friendly Buns for Relaxed to Natural Textures
Even though I’m easing out of a relaxer, I still want buns that look intentional and protect my growing natural texture; shifting doesn’t mean giving up style.
I choose techniques that blend textures and minimize tension, celebrating both roots and length.
- Twist-and-pin to camouflage new growth.
- Low buns with edge control for sleek edges.
- Satin scarf wrap for protection overnight.
I hope this guide helps you crown each day with intention — whether you want sculpted polish or lived-in ease.
Think of buns as small sculptures that honor your face, texture and lifestyle; tending them is self-care, not just style.
Try a few shapes, tweak edges, and let balance be your compass. With practice, each updo will feel effortless and fierce, a calm statement that reflects who you are.


