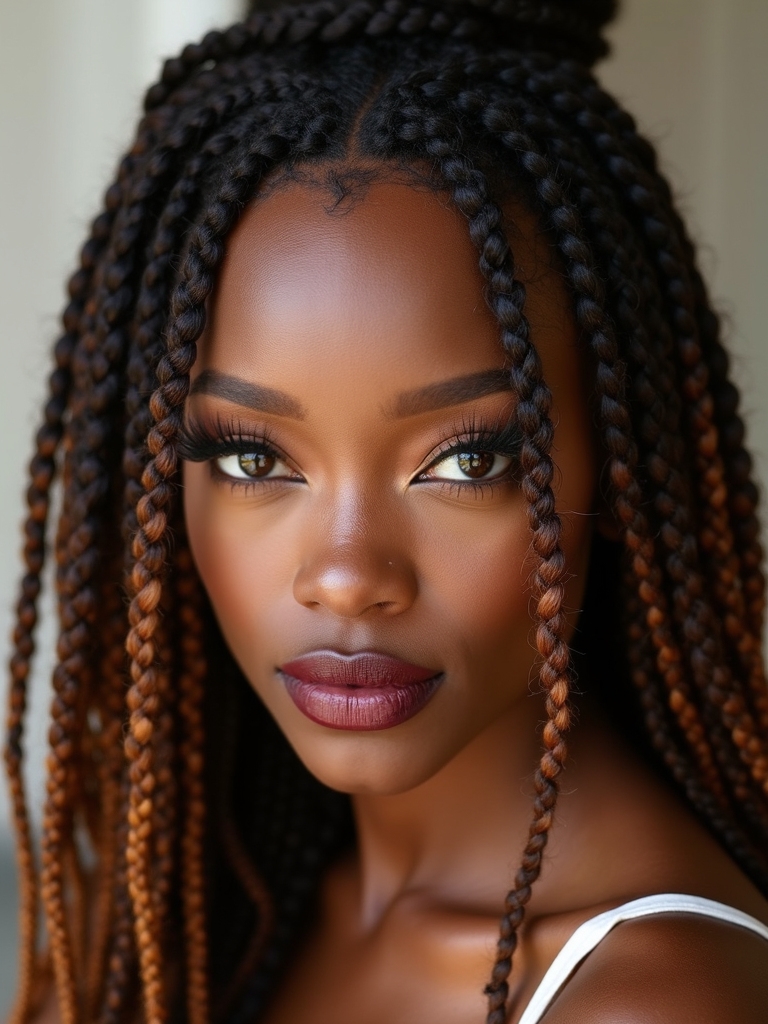


I love how straight-back feed-in braids give a polished, camera-ready vibe while staying gentle on your edges, and I’m excited to walk you through the simple choices and techniques that make them pop.
You’ll learn how to prep, part, and feed in extensions for a seamless, low-tension finish, plus tricks for accessories and upkeep that keep the look crisp — so if you want a sleek style that turns heads and actually lasts, keep going.
What Are Straight-Back Feed-In Braids and Why They Work

When I first tried straight-back feed-in braids, I was hooked—because they give you that sleek, natural look without the bulk or tugging you get from traditional box braids.
I love how they start small at the scalp, adding hair gradually so the braid lies flat and feels light.
They protect my edges, last longer, and look effortlessly polished for any occasion.
Beads can add personality and texture to braids when you want a decorative finish, especially on braids with beads.
Choosing the Right Parting Pattern for Your Face Shape

I like to start by matching the parting pattern to your face shape so the braids highlight your best angles.
For round faces I’ll choose a deep side part to add length, while square or angular faces benefit from softer, off-center parts to balance hard lines. Tell me your face type and we’ll pick a parting that complements your features.
Cornrows can be styled in many ways to elevate your look, including straight-back feed-in braids that create a sleek, natural finish.
Match Parting to Face
Since your face shape guides the whole look, I like to start parting with that in mind so the braids flatter your features instead of hiding them.
For round faces I create a slightly off-center part to elongate, for oval I keep it flexible, and for square I soften angles with a gentle side sweep.
Together we’ll pick the part that feels right.
For a polished finish, consider pairing the look with chic side bangs to frame the face and complement medium-length styles.
Balance Features With Angles
Although face shape gives us the roadmap, I use angled parting patterns to fine-tune the look so your features read their best; diagonal, zigzag, or curved parts can soften harsh lines, add width where needed, or draw the eye upward to lengthen the face.
I pick angles that balance brows, cheekbones, and jawline, creating flattering symmetry without forcing a shape that isn’t you.
Chic braid variations like braid hair styles can further enhance those parting choices by adding texture and visual interest.
How to Prep Natural Hair for a Sleek Feed-In Installation

Before we start braiding, I always cleanse and clarify my scalp so buildup won’t interfere with the feed-ins.
Then I stretch and gently detangle each section to get smooth, manageable strands.
Finally, I lock in hydration with a moisturizer and sealant so my hair stays sleek and frizz-free throughout the installation.
Straight back braids are an effortless style that creates a sleek everyday look and lays flat against the scalp, making your feed pop.
Cleanse and Clarify
When I prep my natural hair for a sleek feed-in installation, I start with a deep cleanse and clarify to give the braids a smooth, lasting foundation.
I shampoo twice, clarify buildup, and balance moisture so styles sit neat. Here’s my quick routine:
- Sulfate-free clarifying shampoo
- Scalp massage for circulation
- Rinse thoroughly, cool water
- Light leave-in for slip
I also recommend mastering feed-in braids to ensure consistent tension and a polished finish.
Stretch and Detangle
Stretching and detangling are the real game-changers for a sleek feed-in install, so I gently smooth damp hair into sections and work from ends to roots with a wide-tooth comb and my fingers.
I stretch strands lightly—banding or blow-dry on low helps—removing knots, aligning cuticles, and creating smooth tension.
This prep makes braids lie flat and last longer, believe me.
Medium knotless braids offer a low-tension option that still gives a polished finish and reduces scalp pulling when installed with proper technique like feed-in braiding and knotless method integration.
Moisture and Seal
Now that the hair’s detangled and elongated, I focus on locking in moisture so the feed-in braids look shiny and stay smooth. I use lightweight leave-in, seal with oil, and set with a cream for hold. Simple steps, big payoff:
- Spray leave-in
- Apply cream to ends
- Seal with oil
- Smooth and part before braiding
Straight-back feed-in braids are one of many unique braided hairstyles that elevate your look.
Step-by-Step Feed-In Technique for Long-Lasting Hold

Although it looks intricate, I’ll walk you through a simple feed-in method that keeps braids neat and secure for weeks; follow my steps and you’ll get consistent, long-lasting hold without extra tension.
Start with clean, detangled sections, clip and tension lightly. Add small pieces of hair gradually, crossing over flatly.
Maintain even pressure, tuck ends, and finish with a neat seal for durable results.
Cornrow braids can be adapted into many elegant styles to suit different face shapes and occasions.
Best Extension Types and Textures to Match Your Hair

I always start by matching the extension texture to my natural hair — kinky, coily, wavy, or straight — so the feed-in blends seamlessly.
For me, synthetic braiding hair, human Remy, or pre-stretched options each have pros depending on hold, heat-styling needs, and budget. I’ll also share simple blend and color tips so your extensions look like they grew right out of your scalp.
Knotless braids offer a sleek, comfortable alternative that reduces tension and protects the hairline.
Match Your Texture
Texture matters—trust me, getting the right match between your natural hair and feed-in braids makes the whole style look seamless and last longer.
I always pick textures that blend, so edges stay natural and braids lie flat.
Quick tips I use:
- Match curl pattern.
- Consider density.
- Blend lengths subtly.
- Test a small section first.
Best Extension Types
Now that you know how matching curl pattern and density makes feed-in braids look seamless, let me walk you through the best extension types for getting that perfect match.
I favor human hair for realism, synthetic blends for budget-friendly hold, and kinky or water-wave textures to mirror natural coils.
Choose length and weight that won’t stress your edges, and test a small swatch before committing.
Blend and Color Tips
Curious how to make extensions disappear into your natural hair? I love matching texture and tone—here’s what I use to blend seamlessly:
- Choose extensions with your hair’s exact curl pattern.
- Pick two close shades, melt the darker at the roots.
- Trim and texturize ends for softness.
- Use heat or steam to relax fibers and blend movement naturally.
Styling Variations: Thin vs. Thick Braids and Their Impact

I’ll jump right in: choosing thin or thick feed-in braids changes more than just the look — it shifts how your hair moves, how long the style lasts, and how much daily upkeep you’ll need.
I prefer thin for delicate, flexible movement and subtle texture; thick gives bold definition and longer wear but needs more moisture and edge care. Pick based on lifestyle and desired drama.
Placement Tricks to Highlight Your Hairline and Brow Shape

Because your hairline frames your face, I like placing feed-in braids to either soften or sharpen it—depending on the brow shape you want to emphasize.
I’ll show quick placement tricks that lift, balance, or frame brows with intent.
- Soft V near temples to soften angular brows.
- Straight back for bold, arched brows.
- Diagonal sweep to lift droopy brows.
- Baby-braid accents to frame and define.
Adding Shine: Products That Keep Braids Glossy Without Buildup

You’ve seen how braid placement can shape the face; now let’s make those lines pop with a mirror-like sheen without weighing them down.
I reach for lightweight shine sprays, serum drops diluted with water, and silicone-free gloss mists to banish frizz and boost luster. Apply sparingly to lengths, avoid roots, and refresh midweek. Your feeds look sleek, not greasy—guaranteed.
Protective Nighttime Routine to Preserve Your Feed-In Style

Usually I sleep with a silk scarf wrapped around my feed-in braids to lock in shape and cut down on frizz, and it’s the simplest step that keeps my style fresh for days.
I also:
- Pineapple lightly at the crown to protect edges.
- Apply a tiny oil to scalp for overnight hydration.
- Use a satin pillowcase under the scarf.
- Refresh braids with water mist in the morning.
Quick Updos and Half-Up Looks for Straight-Back Braids

Keeping my braids fresh overnight sets me up for effortless styling the next day, and straight-back feed-ins are perfect for quick updos and half-up looks that take minutes but look polished.
I twist a neat topknot, secure with a satin scrunchie, or pull a sleek half-up pony for instant lift. These moves keep edges tidy and vibe elevated without fuss.
How to Incorporate Curly or Wavy Ends for Dimension

I like to mix in curly or wavy ends with my straight-back feed-ins because they add instant dimension and movement without much effort.
I’ll blend textures by leaving tips out, using a curling wand, or finger-twisting damp ends for soft waves.
Try these simple tweaks:
- Leave 2–3 inches out
- Use a small wand for defined curls
- Finger-twist damp hair
- Light-hold spray for bounce
Creative Accessories to Elevate a Simple Feed-In Design

After playing with curly or wavy ends, I love to boost the look with accessories that make a plain feed-in pop. I’ll add gold cuffs, pearl pins, colorful thread wraps, or tiny seashell charms for a beachy vibe.
A silk scarf tied around a low bun or jeweled bobby pins instantly elevates the style—simple, fun, and totally wearable for any occasion.
Transitioning Out of Feed-In Braids Without Damage

When you’re ready to take out feed-in braids, I treat it like a mini detox for my hair—gentle, deliberate, and a little ritualistic so nothing gets pulled or snapped.
I go slow, detangle, and nourish the scalp. Here’s my simple routine:
- Spray detangler.
- Unravel from ends.
- Deep-condition.
- Scalp massage and rest.
Troubleshooting Common Issues: Frizz, Slippage, and Scalp Irritation

Because feed-in braids are low-maintenance but not infallible, I tackle frizz, slippage, and scalp irritation with quick, targeted fixes so a small problem doesn’t become a full-blown mess.
I smooth flyaways with a lightweight serum, tighten loose sections gently with edge control, and soothe tenderness using tea-tree diluted in carrier oil.
Quick checks and gentle care keep my scalp happy and braids fresh.
Inspiring Celeb and Street-Style Looks to Recreate

I love pulling style cues from celebrities and street-style stars to spark new feed-in braid looks you can actually wear.
From red carpet glam to casual everyday vibes, I’ll show which details to copy and how to tweak them for your hair.
Stick around for quick styling tips and tricks that make each look doable and long-lasting.
Red Carpet Inspirations
Red carpet moments teach me the best rules for translating feed-in braids from glam to everyday — see how celebs balance sleekness with eye-catching detail and you’ll know what to steal.
I love how minimal jewels or sharp parting read luxe.
- Glossy finish for instant polish
- Subtle jewels at the base
- Precise edges, no frizz
- Statement center part
Everyday Street Vibes
Often I spot street-style twists that make feed-in braids feel effortless and cool, and I can’t wait to show you how to recreate them.
I love how celebs mix low-key leather jackets, chunky sneakers, and tiny barrettes with sleek straight-back braids.
These looks are wearable, punchy, and totally personal—perfect for errands, coffee dates, or turning heads on the commute.
Styling Tips & Tricks
1 quick trick I always reach for is balancing a sleek feed-in braid with one standout accessory—think a tiny barrette, a bold hoop, or a leather headband—to make the look feel curated not contrived.
I love mixing celeb polish with street grit; simple swaps change the vibe instantly:
- Glossy finish
- Statement clip
- Edgy sunglasses
- Casual tee + blazer combo
I hope you’re excited to try straight-back feed-in braids—they’re chic, protective, and surprisingly easy once you get the rhythm. Keep your prep simple, choose extensions that match, and braid with gentle consistency to protect your edges.
Add beads or cuffs for personality and sleep on satin to extend wear. When you’re ready to take them down, detangle patiently and nourish your hair. You’ve got this—slay safely and confidently.