I’ve got three-minute spring looks for long hair that feel polished but effortless. I start by detangling, misting a lightweight leave-in at the ends and adding texturizer at the roots for grip.
My go-tos are a sleek low knot, a textured high pony with a wrapped tie, and a quick fishtail half-braid—each finished with a pea-sized serum and flexible-hold spray. They stay soft, touchable, and photo-ready; keep going and I’ll show exact steps and product tips.
Top 3 Spring Hairstyles for Long Hair (Under 3 Minutes)

When I need a quick, polished look for spring, I reach for three go-to styles you can do in under three minutes: a sleek low knot, a loose twisted half-up, and a textured pony with a wrapped base.
I’ll walk you through tidy steps, timing cues, and tiny finishing touches—soft face-framing, discreet pins, and a light mist—to keep each look chic and long-lasting.
These styles are perfect for freshening up your routine with effortless spring hairstyles you’ll love, including tips on maintaining textured pony for a day of wear.
Prep Long Hair: Detangle, Products, and Grip

Start by removing tangles gently with a wide-tooth comb or detangling brush so your styling goes smooth and your hair looks lit from the first stroke.
I then mist lightweight leave-in, focusing on ends, and apply a tiny bit of texturizing cream at the roots for grip.
Work products through with fingers, section hair, and you’re ready to create polished, long-lasting spring styles.
Try a Curtain Bangs Ponytail for an easy, on-trend look that frames the face with effortless curtain bangs.
Tools You Need (No-Fuss Essentials)

Because a simple kit keeps mornings chic, I stick to a few no-fuss essentials that actually get the job done: a wide-tooth comb and a fine-tooth tail comb for precise parting, a detangling brush for gentle smoothing, a medium-barrel round brush for blowouts, a couple of good-quality elastics and snag-free clips for sectioning, a lightweight flat iron with temperature control, and a compact can of dry shampoo or texturizing spray to revive texture and hold.
I also keep a mini mirror and a silk scrunchie for polished touch-ups on the go.
Long layered styles work especially well for creating movement and reducing bulk, making them ideal for many of these quick spring looks like beachy waves or face-framing layers with long layered hair enhancing natural texture.
Easy Half-Up Twist for Long Hair
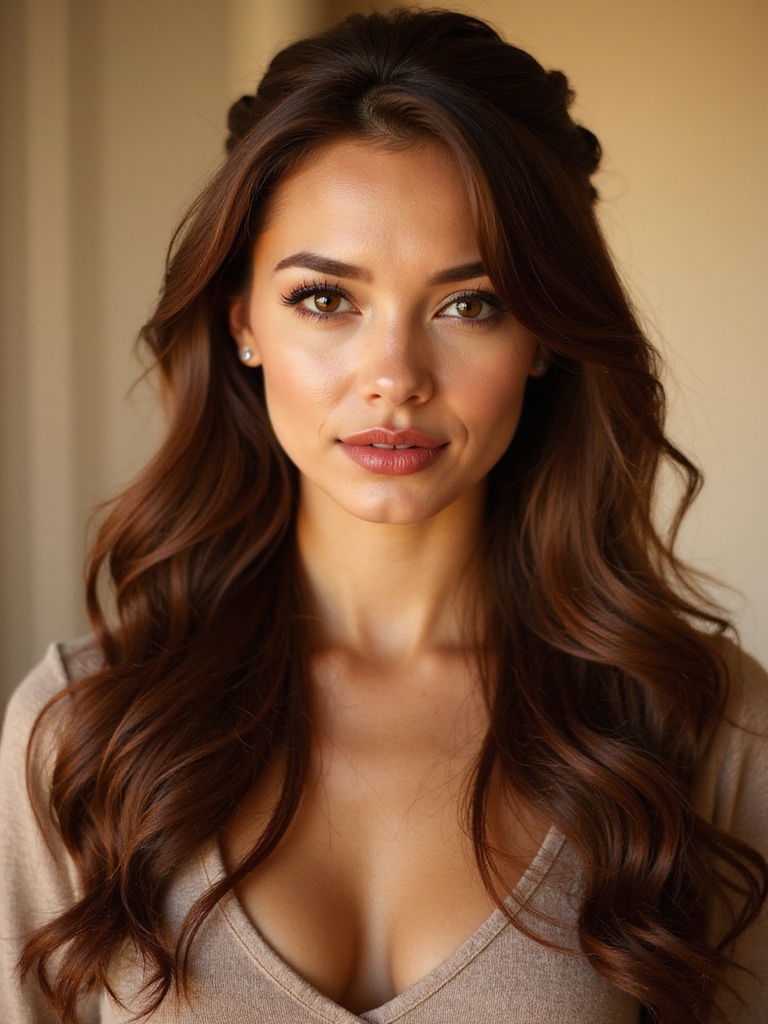
If you want an easy, polished look that still feels effortlessly chic, I reach for the half-up twist every time because it flatters long hair and works for both casual days and dressier nights.
I sweep side sections, twist toward the nape, secure with a small elastic, then hide it with a hairpin.
Finish with light hairspray for shine and hold.
This simple technique creates volume and keeps hair out of your face for an effortless half updo.
Fast Fishtail Half-Braid for Long Hair
I like to keep the half-up twist in my rotation, but when I want something with more texture and a bit of edge, I go for a fast fishtail half-braid that elevates long hair instantly.
I section top hair, fishtail two thin strands twice, loosen for fullness, and secure with a clear elastic.
Finish with light shine spray for polished glam.
For added movement and dimension, try incorporating long layered hair to enhance the look.
Low Bun in Five Minutes (No Backcombing)

Often I reach for a low bun when I want a polished look without the fuss, and this five-minute version gives sleek, salon-ready results with zero backcombing.
I smooth hair with lightweight serum, gather at the nape, twist into a loose coil and secure with pins.
Tug face-framing pieces for softness and mist with flexible-hold spray for lasting, touchable glam.
This technique is one of several classic bun updos that create effortless, chic everyday style.
Sleek Low Ponytail With Wrapped Tie

A low bun is great for evening, but when I want something sleeker and a bit more modern, I pull everything into a low ponytail and wrap the base with a length of hair for instant polish.
I smooth with lightweight serum, secure with an elastic, then wrap and pin the tail. It reads chic, stays neat all day, and takes under five minutes.
For a slightly more elevated look, try a polished half-up ponytail with a wrapped tie for effortless chic.
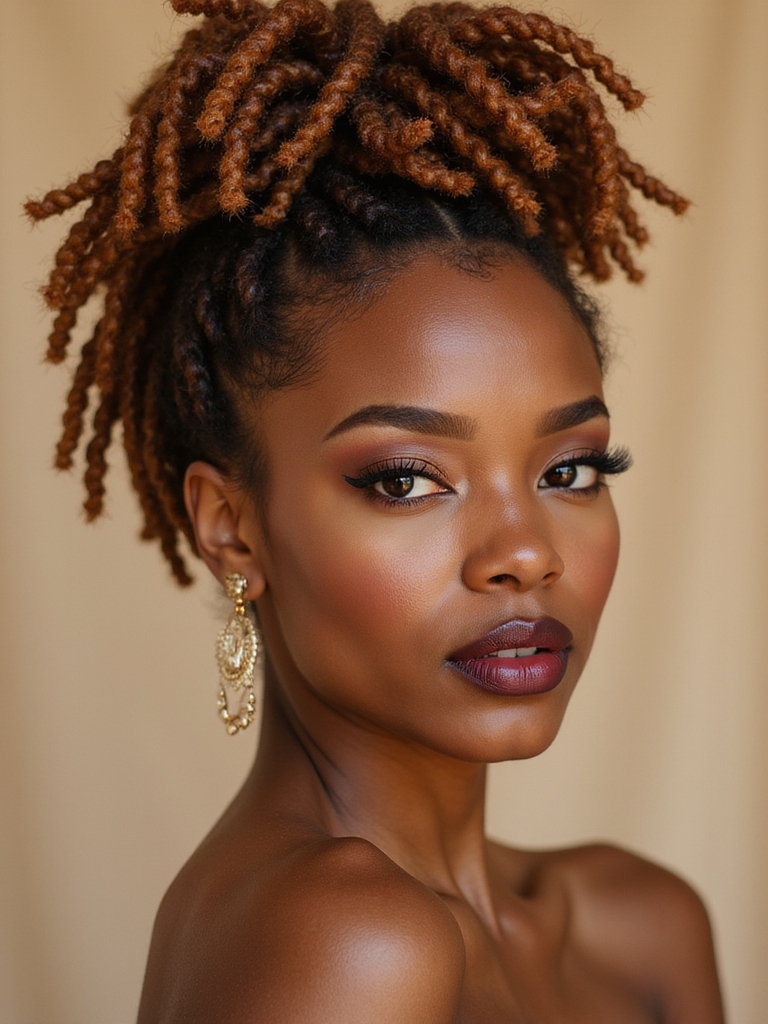
Messy High Pony With Quick Volume

For an easy, lived-in look that still reads polished, I pull my hair into a high pony and rough up the crown for instant volume—no teasing marathon required.
I leave face-framing pieces, mist with lightweight texturizer, then secure with an elastic and wrap a small strand around it for polish.
Tug gently at the pony to loosen and sculpt soft, bouncy height.
Sleek ponytails can also be styled for a modern finish by smoothing the hair with a serum and securing flyaways for a sleek finish.
Braided Halo: Simple Steps for Long Hair

I’ll walk you through a polished braided halo that starts with clean prep and a precise center part to keep everything sleek.
I’ll show how simple Dutch braids along each side create the structure, then we’ll pin them across the crown for that elegant, tucked finish.
Finally, I’ll share quick tips for securing and softening the look so it lasts all day without feeling stiff.
Prep And Parting
Since your hair sets the whole look, I start by detangling and smoothing with a lightweight leave-in—this gives me shine without weight and makes the braids lay neatly against the scalp.
Then I create a clean center part using a tail comb, clipping sections to keep them separated.
Light texturizer at the roots adds grip so the halo holds all day without stiffness.
Simple Dutch Braids
With the part set and the roots prepped, I start the halo by creating two Dutch braids—one on each side—so the style frames the face and sits neatly against the scalp.
I braid tightly for grip, adding hair evenly as I move toward the nape. Keep tension consistent, smooth stray hairs, and stop braiding before the ends to maintain a sleek, wearable halo.
Pin And Finish
Now I secure the braids into a halo by bringing each plait up and across the crown, tucking the ends under as neatly as possible.
I pin with discreet bobby pins, crisscrossing for hold, then smooth flyaways with a light serum.
I mist with flexible-hold spray so the halo feels soft but stays put, checking balance and symmetry before I call it finished.
Loose Rope Braid That Works on Any Texture

I love how a loose rope braid reads effortlessly chic, and I’ll show you the simple prep for hold so it lasts all day.
I’ll walk you through a clean step-by-step weave that’s easy to follow, then share texture-friendly tips so it works on silky, wavy, or coily hair.
Stick with me and you’ll have a soft, polished braid that feels tailored to your hair’s natural movement.
Prep For Hold
Before I braid, I prep the hair to hold that soft, undone rope braid all day without feeling crunchy or stiff. I work products and texture into sections, focusing on grip and movement so the braid reads luxe and effortless.
- Dampening with a lightweight mist
- Applying a texturizing cream sparingly
- Using a bit of sea salt spray
- Blotting excess moisture
- Finger-combing for separation
Step-By-Step Weave
Start by dividing the hair into two equal sections and twisting each one away from your face to set the rope’s direction.
I cross the twists over each other, adding small outer pieces as I go for a loose, undone rope braid.
I secure the end with a clear elastic, tug gently for volume, and smooth flyaways with serum for a polished, wearable finish.
Texture-Friendly Tips
If you’ve loved the loose rope braid, you’ll find it’s surprisingly forgiving across textures once you tweak a few things to work with your hair’s natural pattern.
I’ll show simple adjustments that keep it sleek yet effortless, whether your strands are straight, wavy, curly, or coily.
- Add lightweight oil for shine
- Use texturizing spray for grip
- Twist with tension, not force
- Loosen for volume at the end
- Secure with clear elastic and pins
Twisted Side Bun for Brunch or Work
I love twisting my hair into a side bun when I need something that’s equal parts polished and effortless; it’s perfect for brunch dates or a day at the office.
I gather hair to one side, twist tightly from roots to ends, then coil into a low bun and secure with pins. Pull a few face-framing strands, mist with shine spray, and go.
Heatless Beach Waves for Spring Texture
After a neat side bun, I sometimes crave something softer and more undone—enter heatless beach waves, which give long hair that lived-in, spring-ready texture without risking damage.
I’ll show a simple, chic method you can do overnight for effortless bounce.
- Start with damp hair and a sea-spray mist
- Twist sections into loose buns
- Secure with soft ties
- Sleep, then gently unravel
- Finish with light hairspray
Braided Ponytail That Stays Put for Active Days
I’ll show you a sleek braided ponytail that actually stays put on active days, starting with the right prep for strong hold so your style lasts.
I anchor the look with a quick two-strand braid at the nape to lock the sections together before wrapping everything into a high pony.
I finish with a flexible hairspray so movement looks effortless but the style doesn’t budge.
Prep For Strong Hold
Though it takes a few extra minutes, I always prep my hair for a braided ponytail so it stays put through workouts, errands, and weekend adventures.
I focus on texture, grip, and lightweight hold to keep things sleek and secure without stiffness.
- Dry shampoo at roots for grip
- Light mousse through lengths
- Rough-dry for texture
- Elastic near scalp, reinforced with bobby pins
- Finish with flexible-hold spray
Two-Strand Anchor Braid
Once my hair has that gritty, lightweight hold, I start the Two-Strand Anchor Braid to lock a ponytail in place for anything from HIIT to grocery runs.
I split a small section above the elastic, twist two strands tightly while wrapping them under the pony, and secure with an elastic. It’s sleek, secure, and keeps flyaways smoothed into a polished, active-ready look.
Finish With Flexible Hairspray
After I smooth the Two‑Strand Anchor Braid into place, I mist a lightweight flexible hairspray over the ponytail to lock everything without that crunchy, helmet feel.
I tug gently at the braid for soft volume, then spot-treat flyaways for a polished finish that’s ready for movement.
- Choose flexible hold
- Spray 8–10 inches away
- Layer lightly
- Target roots and ends
- Refresh mid-day
3 Quick Accessory Upgrades for Spring Looks
While a few well-chosen pieces can completely refresh your spring look, I focus on accessories that feel effortless and luxe—think pearl barrettes, silk scarves, and delicate gold pins that slip into a loose braid or half-up knot.
I’ll show quick placement: clip pearls near the temple, tie a scarf as a low pony wrap, and tuck gold pins through twists for instant polish.
Fixes & Timing: Frizz, Flyaways, and How Long Styles Last
I’ll show you quick fixes to banish frizz and smooth flyaway strands so your look stays polished all day.
With a few products and timing tweaks, you can refresh styles without starting over.
Let’s cover targeted tricks to tame hair and extend wear time so your spring styles stay glam from morning to night.
Combat Frizz Fast
Let’s tackle frizz head-on so your spring styles look sleek from morning coffee to evening plans.
I smooth with lightweight serum, micro-mist hairspray, and a silk scarf finish to lock shine.
Quick, chic steps keep texture controlled without weighing hair.
- Apply pea-sized serum to ends
- Use anti-humidity spray
- Blow-dry with a nozzle
- Wrap with silk for five minutes
- Touch up with a toothbrush and hairspray
Tame Flyaway Strands
Often a few strategic moves are all you need to tame those rebellious flyaways and keep a style looking polished all day.
I smooth a pea-sized dab of lightweight styling cream along hairline, then press stray strands with a fine-tooth comb. A tiny clear gel or hairspray on a clean toothbrush fixes baby hairs. Quick, precise, and glam—no heavy product buildup.
Make Styles Last
Because weather and time both work against a fresh look, I plan my styling and quick fixes so a braid, bun, or loose waves stay sleek from morning coffee to evening plans.
I use targeted products and tiny tactics to banish frizz, secure shape, and refresh texture without redoing everything.
- Micro hairspray bursts
- Satin scarf sleep ties
- Dry-shampoo roots
- Bobby-pin reinforcement
- Anti-frizz serum
I hope these quick, glam looks make your mornings feel as effortless as a vintage postcard come to life.
Try the prep tips and three-minute styles a few times, and you’ll find favorites that hold through errands, workouts, or date night.
Mix in a sparkling barrette or silk scarf to elevate simple braids and waves. Keep product touch-ups handy for flyaways, and enjoy spring-ready hair that looks polished without the panic.