


I love how curly scene styles mix gritty, lived‑in texture with playful, vintage shapes, and I’ll show you how to get that look without turning your hair into a helmet.
Think choppy layers, swoopy bangs, mullet volume and a few bold color accents—easy tricks for lift, definition and that perfect messy polish. Stick around and I’ll walk you through cuts, products and styling moves that actually work.
Choppy Layered Curls With Swoopy Side Bangs

A few bold layers can transform limp curls into a scene-ready statement, and I’ll show you how choppy cuts plus swoopy side bangs do it without looking overworked.
I’ll walk you through sectioning, point-cutting for texture, and sculpting bangs to frame one eye.
Use curl cream, diffuse gently, and trim every six to eight weeks to keep that edgy bounce without bulk.
Shoulder-length curly styles often benefit from strategic layering to avoid weight at the ends and enhance movement, especially when paired with choppy layered curls.
Asymmetric Bob With Defined Ringlets

When I cut an asymmetric bob for curly hair, I keep one side deliberately longer so those defined ringlets can cascade with personality instead of sitting lumped at the jawline.
I tell clients to welcome shape: gel for hold, diffuse gently, and trim every 6–8 weeks to prevent weight flattening. It’s edgy but manageable—playful asymmetry that reads intentional, not accidental.
Short curly bobs often deliver an effortless, chic look when layered for bounce and shape, and embracing short curly bob techniques helps maintain that style.
Voluminous Mullet for Curly Hair

I love how a voluminous mullet lets you play with cutting and shaping to balance short, sculpted layers up front with long, bouncy length in back.
I’ll walk you through the key snips and sectioning tricks so your curls keep their spring without turning into a triangle.
Then we’ll cover quick styling moves—root-clipping, diffuse direction, and the right products—to build lift that lasts.
Short shags are a great reference for layering techniques that add movement and texture, especially when adapting the cut for curls with varied shrinkage and density; see short shag for styling ideas.
Cutting and Shaping
Let’s plunge into cutting and shaping a voluminous mullet for curly hair—I’ll walk you through how to keep the silhouette bold up top and soft at the nape without losing your natural curl pattern.
I trim dry to assess curl spring, remove bulk with small-section thinning, carve shorter layers on crown, and softly taper the neck.
I check balance and curl direction frequently.
The Long Wolf Cut has inspired modern takes on length and volume, and its emphasis on a strong crown and tapered nape makes it a natural fit for curly mullets with bold silhouette.
Styling for Volume
Pump up the drama without flattening the curls: I focus on lifting at the crown, defining layers, and keeping the nape light so the mullet reads voluminous from every angle.
I scrunch with a lightweight cream, diffuse upside down for lift, and clip roots while drying to lock shape.
A touch of salt spray and careful finger-teasing keeps movement without crunch or weight.
Shag styles often embrace textured layers and effortless movement, making them a perfect match for curly mullets and voluminous layering.
Face-Framing Curtain Curls

I love how soft curtain curls can gently shape your face without stealing the show, giving a polished but effortless finish.
I’ll show how strategic layering creates that signature face-framing movement so your curls fall in flattering, playful sections.
Stick with me and we’ll make those layers work—no heavy styling required.
Soft Curtain Curl Shaping
Shaping soft curtain curls is my go-to for easing sharp scene edges and giving your face a flattering, lived-in frame.
I gently define the outermost curls, clip roots for lift, and twist ends around a finger for polished separation. It’s quick, forgiving, and perfect when you want nostalgia without heaviness.
Little tweaks, big vibe—no drama, just flattering movement.
Layered Face-Framing Movement
When you want movement that flatters every angle, I carve layered face-framing curtain curls to lift the eyes and soften the jawline.
I shape pieces to bounce, frame, and behave—easy to tousle, easier to live with.
- Section small layers
- Snip into curl pattern
- Diffuse gently
- Finger‑style for finish
Chunky Color Streaks on Tight Coils

Let’s talk about chunky color streaks on tight coils — I love how a bold, single-width streak can pop against dense curls without overwhelming the texture.
I recommend placing streaks near the face or crown for instant impact, using semi-permanent dye to protect curl integrity.
You’ll want a skilled colorist who respects shrinkage and contrast so the streak reads crisp, not patchy.
Messy Shag With Curly Texture

I love how a messy shag pumps up layered volume so your curls read big without looking heavy.
I’ll show you how to shape a tousled fringe that frames the face and survives a wild night out.
Stick with me and we’ll keep the cut low-maintenance and full of playful texture.
Layered Volume Play
Picture a shag that actually works with your curls instead of fighting them — that’s what I mean by layered volume play. I shape bounce and grit into a messy shag that feels effortless.
Try this routine:
- Dry with diffuser for lift.
- Cut in graduated layers.
- Scrunch with light cream.
- Finger-style for separation.
It’s nostalgic, practical, and totally wearable.
Tousled Fringe Focus
If the layered volume approach gives your curls a confident backbone, I lean into a tousled fringe to inject personality and motion right at the front.
I’ll trim bangs soft and uneven, encourage loose coils with diffuser and salt spray, and teach you quick touch-ups.
It reads effortless yet deliberate — a messy shag that frames your face and keeps nostalgia cheeky, not fussy.
Short Pixie With Curly Fringe
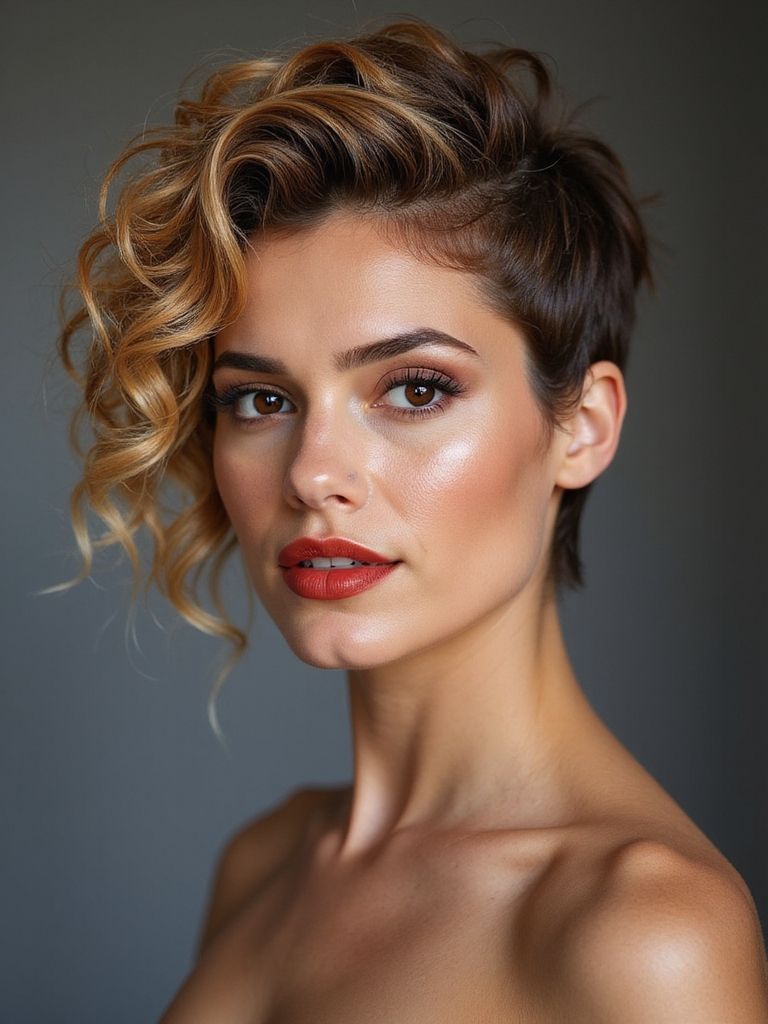
A short pixie with a curly fringe feels like a stylish secret you get to wear every day; I love how it’s bold without being fussy.
I’ll keep it simple and useful:
- Chop keeps mornings quick.
- Fringe frames eyes, adds mischief.
- Use light gel for hold.
- Trim often to keep shape and attitude.
Long Layers With Pieces and Bounce

Now that we’ve covered the pixie, I’m ready to talk about long layers that actually move—where to place face-framing pieces, how to cut for bounce, and which products make curls sing.
I’ll show you simple placement tips so those pieces highlight your features, layering techniques that boost spring without adding weight, and the handful of gels, creams, or mousses that’ll keep everything lively.
Stick with me and you’ll get a manageable routine that looks intentional, not like you rolled out of bed.
Face-Framing Piece Placement
When I’m placing face-framing pieces in long, layered curls, I think like a sculptor—strategic, not random—so each piece enhances bounce and movement without weighing the shape down.
- Start small, test fall.
- Angle pieces toward cheekbones.
- Keep lengths varied for softness.
- Blend into layers for natural swing.
I coach clients live, adjusting until the silhouette sings.
Layered Bounce Techniques
Sculpting long layers for real bounce means thinking in arcs, not just lengths—I watch how each piece springs back and tweak cuts so movement reads as effortless.
I trim with intention, carving shorter face pieces and long, graduated layers that lift without volume overload.
You’ll get controlled spring, defined separation, and easy shape—no limp ends, just nostalgic, buoyant motion.
Styling Product Choices
Because long layers need lift but also soft, defined pieces, I pick products that balance hold with slip so curls can spring without getting crunchy.
I’ll guide you fast:
- Lightweight mousse for root lift.
- Creamy defining custard for mid-lengths.
- Flexible gel for patchy hold.
- Dry oil to tame frizz and add sheen.
Use sparingly; scrunch, diffuse, admire.
Curly Undercut With Bold Part

I love how a curly undercut with a bold part instantly gives my hair attitude without wasting time—shave the sides, leave the curls long on top, and carve a clean part that frames my face and personality.
I keep styling simple: define curls with a light cream, fluff the top for volume, and trim the part every few weeks so it stays sharp and rebellious.
Twisted Half-Up Scene Pony

Twist the top sections, pull them back, and secure them into a half-up pony that keeps my curls out of my face while still showing off their bounce. I love this scene-ready look — messy, controlled, and quick.
- Twist small sections
- Secure loosely
- Tease the crown
- Add a pin for grip
It’s playful, practical, and totally me.
Tousled Spiral Curls With Choppy Ends

I’m all about letting my spirals fall into place while keeping the edges intentionally jagged—tousled spiral curls with choppy ends give me that lived-in, scene-ready vibe without the fuss.
I shake in curl cream, scrunch, and diffuse for imperfect bounce. A blunt trim every few months maintains that choppy finish, and quick texturizing at the roots revives separation between washes.
Braided Accent With Loose Curls

Often I throw a tiny braid into my part or along the temple to punch up loose curls without overworking them. I tell you, it’s easy and chic:
- Pick a small section.
- Braid loosely.
- Pin discreetly.
- Tug gently for texture.
It keeps shape, frames my face, and feels undone-not-mussed—exactly the nostalgic vibe I want.
Retro-Flip Curls With Modern Edge

Flip the script on vintage glam by blending those swoopy, 60s-style curls with a few sharp, contemporary touches—I love how the retro flip reads polished without feeling costume-y.
I’ll show you quick heat techniques, where to add a textured crown, and how tiny pieces around the face modernize the look.
It’s wearable, photo-ready, and surprisingly low-maintenance once you master the flip.
Deep Side Part With Dramatic Volume
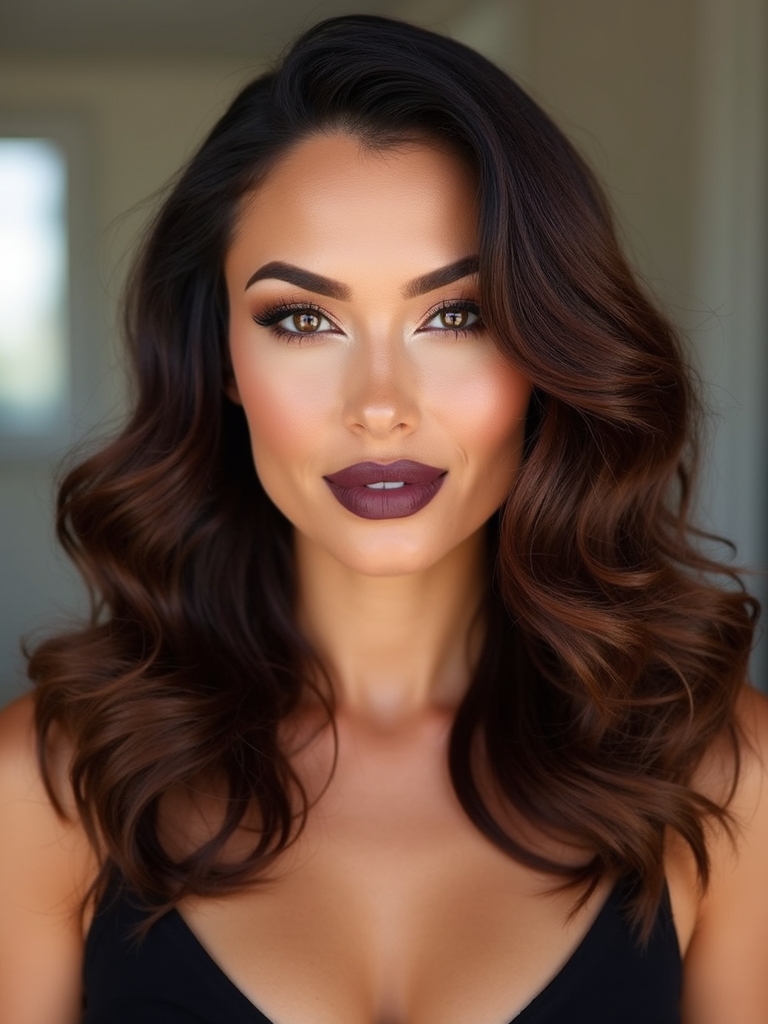
Creating a deep side part instantly makes your curls feel cinematic and purposely styled without extra fuss; I’ll show you how to carve that part, backcomb for lift, and coax every curl to sit where it flatters your face.
I keep it bold but simple:
- Section and define
- Backcomb roots
- Diffuse for body
- Pin and set
You’ll get drama without drama.
Two-Tone Curly Lob With Jagged Layers

I love how a two-tone curly lob with jagged layers plays with expectations—lighter ends or face-framing highlights give movement while the choppy layers keep your curls springy and modern.
I recommend trimming every 6–8 weeks to maintain the lob’s shape, using a curl cream to define layers, and welcoming a slightly undone finish for that nostalgic, effortless scene vibe.
I’ve loved walking you through these nostalgic curly scene looks—each one’s a playful mix of lived-in texture and modern shape you can actually wear. Try a swoopy bang or chunky streak, or wake up a mullet with a diffuser and a wink.
Keep point‑cut layers and scrunch cream handy; they’re your secret weapons. Go ahead, experiment, and don’t fear imperfection—those undone edges are what make the vibe interesting and totally yours.


