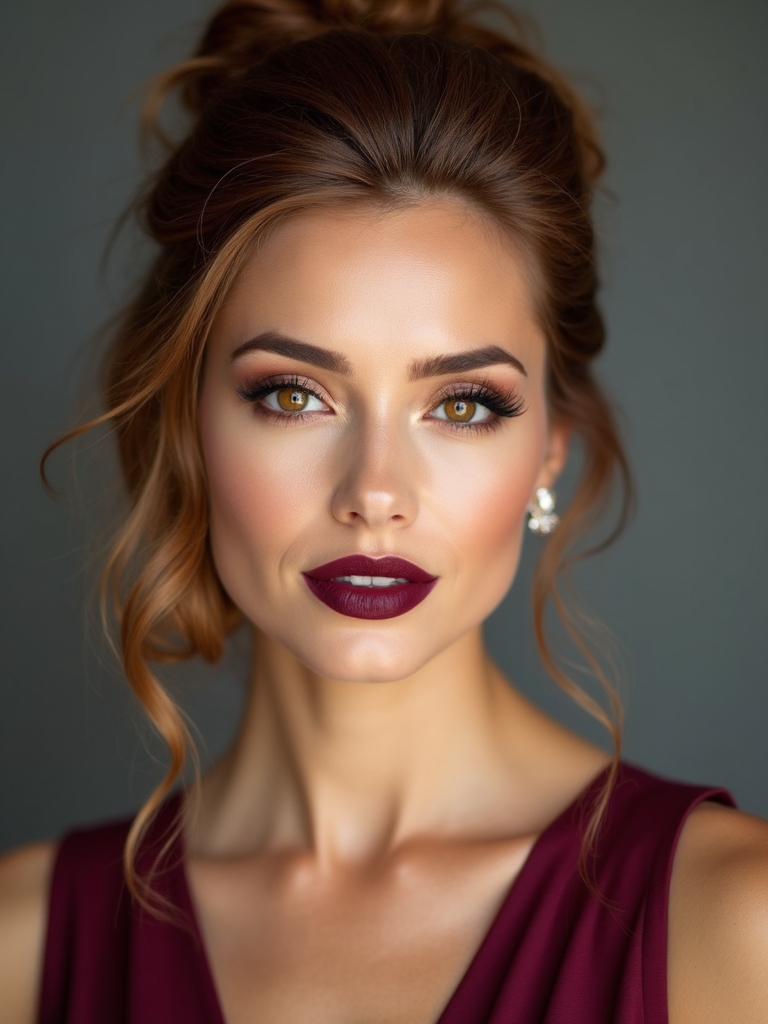

I love showing you quick updos that make long hair look effortlessly chic, and I promise none take forever or need a stylist. I’ll walk you through twists, braids, messy knots, and sleek wrapped ponytails that feel polished but lived-in.
These looks suit messy weekends, weddings, or work calls, and I’ll share little tricks—teasing, texture spray, face-framing pieces—that make them last. Stick around and I’ll show you how to pull them off.
Classic Low Bun With a Twist

I love how the classic low bun can feel both polished and effortless, and adding a small twist makes it instantly more interesting without extra fuss.
I like to weave a thin braid or loop a ribbon through the base, then secure with hidden pins.
It looks intentional but quick, lifts your face, and holds all day — simple, chic, and totally doable.
A low bun is a timeless choice for weddings that can be varied with elegant low bun details to suit different bridal styles.
Messy Top Knot

If you like the low bun’s polished-but-easy vibe, the messy top knot gives that same effortlessness with more personality and edge. I throw my hair up, tug pieces loose, and instantly feel playful yet put-together.
It’s forgiving, quick, and great for bad-hair days. Try variations to match mood and face shape.
- Confidence boost
- Casual chic
- Fast refresh
Messy updos also pair well with a range of styles and occasions, making them a versatile choice for every occasion.
Sleek High Ponytail Updo
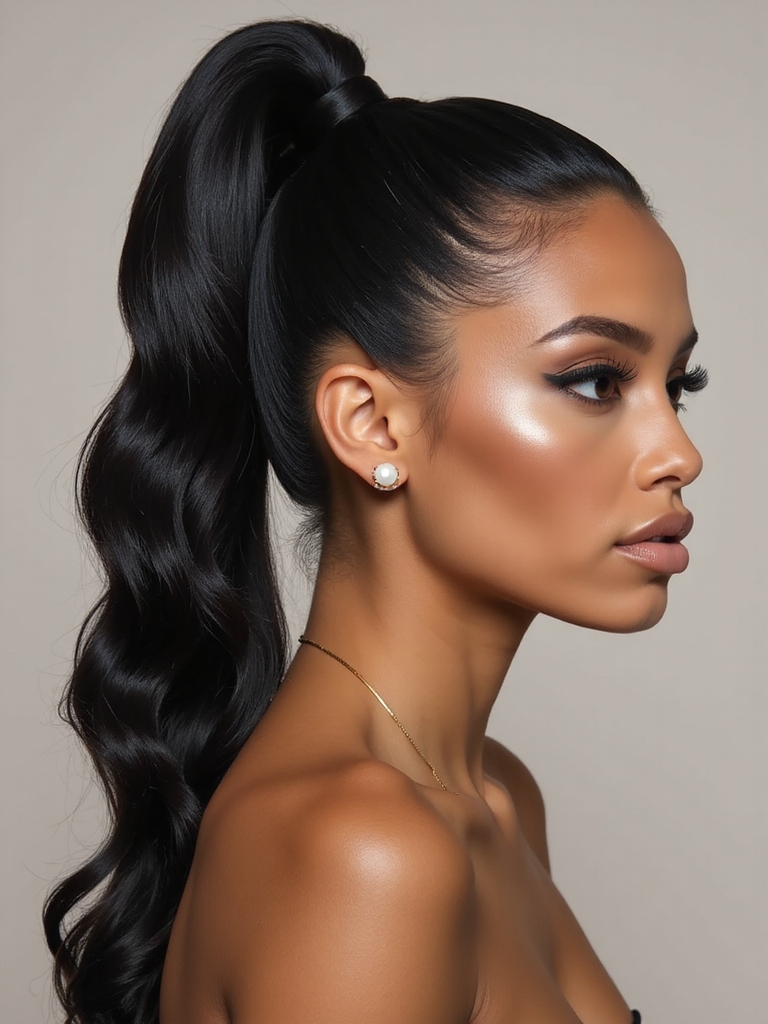
I love how a sleek high ponytail feels instantly polished, and I’ll show you the easy steps to get there. First we’ll prep a super-smooth base, then create a tight, sleek wrap around the ponytail holder, and finish with a polishing spray that keeps flyaways at bay.
Stick with me and you’ll have a chic, long-lasting updo in minutes. Sleek ponytail styles are timeless and versatile, offering a sophisticated finish that works for day or night.
Smooth Base Prep
Although a sleek high ponytail looks effortless, I’ll walk you through the smooth base prep so your pony actually lasts and gleams.
I gently detangle, mist with smoothing spray, and gather hair with steady hands.
Small tricks make a big difference—no frizz, no slip, just shine and hold.
- Detangle thoroughly
- Apply smoothing product
- Secure with steady tension
A polished look is easier to maintain when you start with a sleek high ponytail technique that emphasizes tension and shine.
Tight Sleek Wrap
Let’s wrap this sleek high ponytail so it looks like you stepped off a runway—tight, glossy, and totally put together.
I gather the tail, smooth it like silk, then take a small section to coil around the base, tucking the end neatly underneath.
I secure with discreet pins, press everything flat with my palm, and smile—clean, confident, done.
This look is a quick go-to for everyday polish and works well with bun updos for a chic finish.
Polished Finishing Spray
Usually I finish with a polished spray to lock that sleek high ponytail in place and keep flyaways from crashing the party.
I mist lightly, smoothing with my palm, and trust the shine to read as chic not crunchy.
It’s my secret for all-day confidence—light hold, mirror-ready, and friendly to touch.
- Hold: light, flexible
- Finish: glossy, natural
- Touch: no crunch
Braided Crown Chignon

I often reach for the braided crown chignon when I want something that feels elegant but won’t fall apart halfway through the day.
I braid along my hairline, tuck ends into a low, neat bun, and secure with pins. It stays put, flatters my face, and reads polished without fuss.
Believe me, it’s a reliable, pretty choice for long hair.
Twisted Half-Up Knot
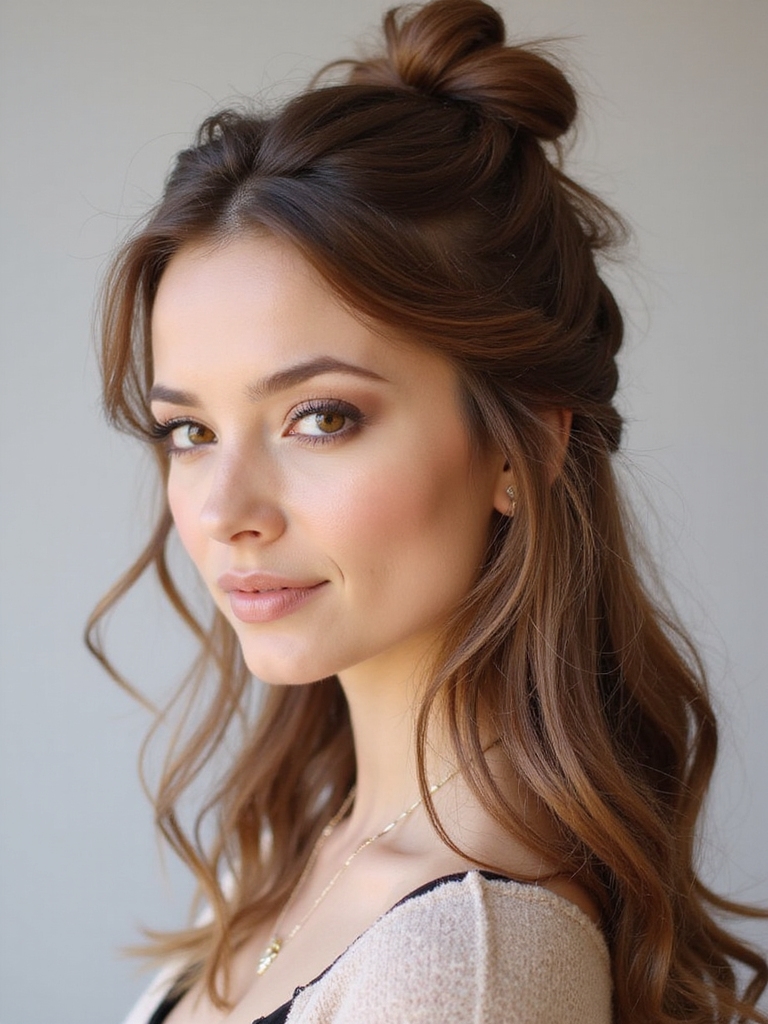
Often I grab the twisted half-up knot when I want something quick that still looks intentional — I twist two front sections, cross them at the back, and knot them once or twice before tucking the ends into a soft loop. It’s comfy, polished, and forgiving.
- Fast confidence
- Gentle hold
- Easy variations
Rope Braid Low Bun

With a twist and a little wrist action, I turn a simple rope braid into a low bun that’s equal parts neat and effortless.
I coil the braid at my nape, secure it with bobby pins, then tug a few face-framing strands for softness. It stays polished all day yet feels relaxed—perfect for work, dates, or when you want easy sophistication without fuss.
Voluminous Bubble Pony

Okay, let’s talk Voluminous Bubble Pony — I’ll walk you through how I prep and section the hair so each bubble looks full and even.
Then I’ll show you the styling steps and finishing touches that keep the shape all day without crunch or frizz.
It’s easier than it looks and I’ll keep it simple so you can recreate it fast.
Prep and Sectioning
Before we get into the bubbles, I like to prep your hair so the pony looks full and lasts all day. I gently detangle, add light texturizer, and section cleanly — small steps that make a big difference.
Follow this simple routine:
- Detangle from ends to roots.
- Apply mousse or texturizing spray sparingly.
- Create a centered high pony, then divide into three even sections.
Styling and Finishing
Now that the pony is set, I’ll show you how to turn those three sections into a full, bouncy bubble pony that lasts. I gently tug each bubble to loosen and round it, tease lightly at roots for lift, and smooth flyaways with a tiny dab of serum.
Finish with flexible-hold spray and check balance — playful, secure, and ready to go.
Dutch Braid Into a Bun

If you want a polished updo that still feels a bit undone, I love starting with a Dutch braid into a bun because it gives you control at the roots and texture through the length.
I braid toward the nape, wrap a messy bun, then tug pieces loose—instant chic.
- Grip: secure base firmly
- Texture: pancake braid slightly
- Finish: soft hairspray for hold
Side-Swept Romantic Updo

When I want something soft and effortlessly romantic, I sweep hair to one side and weave loose twists into a low, slightly messy chignon—it’s flattering, stays put, and still feels undone.
I tug face-framing tendrils, secure with discreet pins, and mist for hold. It’s forgiving, quick, and perfect for dates or casual weddings — you’ll look polished without trying too hard.
Double Braided Halo
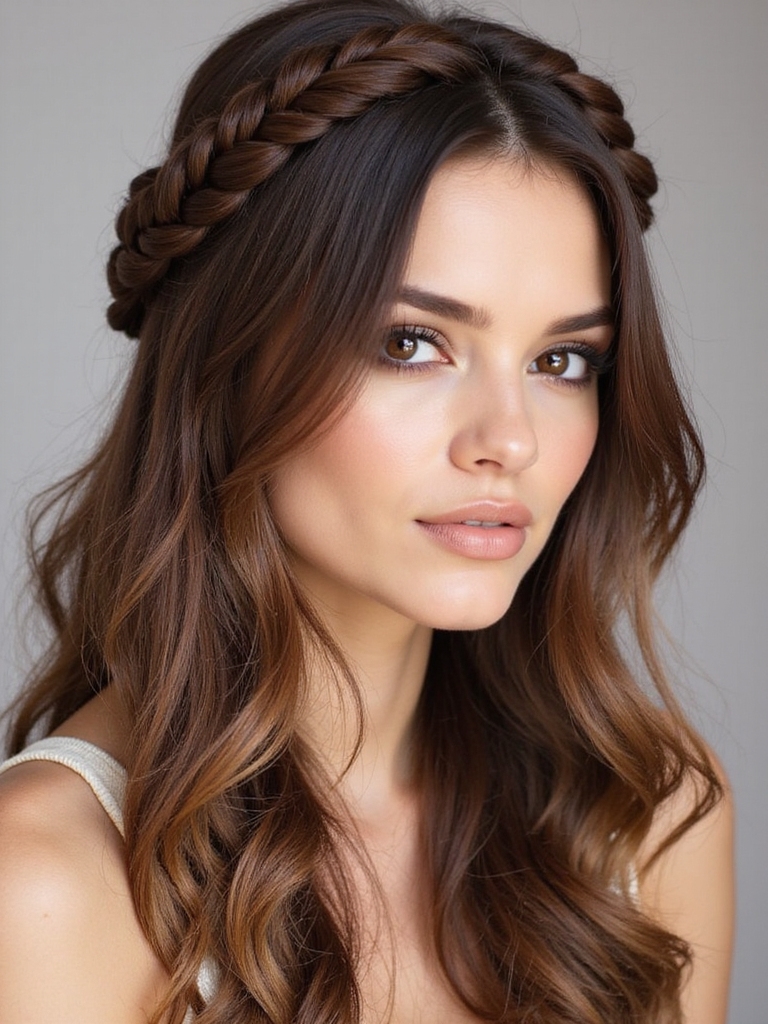
Okay, for a Double Braided Halo I’ll walk you through the simple braiding steps so your crowns sit neat and even.
I’ll show how to secure and finish the braids without pins sticking out and which products keep everything in place.
Then we’ll play with style variations and quick tips so you can make it soft and romantic or sleek and polished.
Braiding Technique Steps
Start by parting the hair down the middle and telling yourself you’ve got this — we’ll build two neat French braids that wrap into a halo. I guide you as we pick sections, add hair smoothly, and keep tension even so the braids lie flat and pretty.
- Section neatly.
- Braid with consistent tension.
- Tuck ends invisibly.
Securing and Finishing
Although it might look intricate, I’ll walk you through the simple steps to secure and finish your double braided halo so it stays neat all day.
I tuck ends beneath the opposing braid, pin with U-pins and small bobby pins, then smooth flyaways with a light mist or cream.
I check balance, add gentle tension, and voilà—secure, comfy, and pretty.
Style Variations and Tips
If you want to switch things up, you can make the double braided halo look completely different with just a few tweaks — I like to play with braid size, parting, and accessories to suit the mood.
I’ll share quick variations that keep it fresh and wearable.
- Looser braids for softness.
- Tight micro braids for edge.
- Pearl pins for romance.
French Twist for Long Hair

When I show you how to do a French twist for long hair, you’ll see it’s both elegant and surprisingly doable with a few simple moves; I’ll walk you through each step so you feel confident rather than intimidated.
I’ll guide you on sectioning, smoothing, rolling hair upward, securing with pins, and finishing with hairspray so the style stays chic and comfy all day.
Textured Low Knot With Face-Framing Pieces

Let’s loosen up your look with a Textured Low Knot that feels undone but put-together—I’ll show you how to leave soft face-framing pieces that soften the look and flatter your features.
I’ll guide you through a relaxed knot, effortless texture, and keeping those strands airy so you feel chic and casual.
- Prep with sea salt spray.
- Tease gently at roots.
- Tug pieces loose.
Fishtail Braid Bun
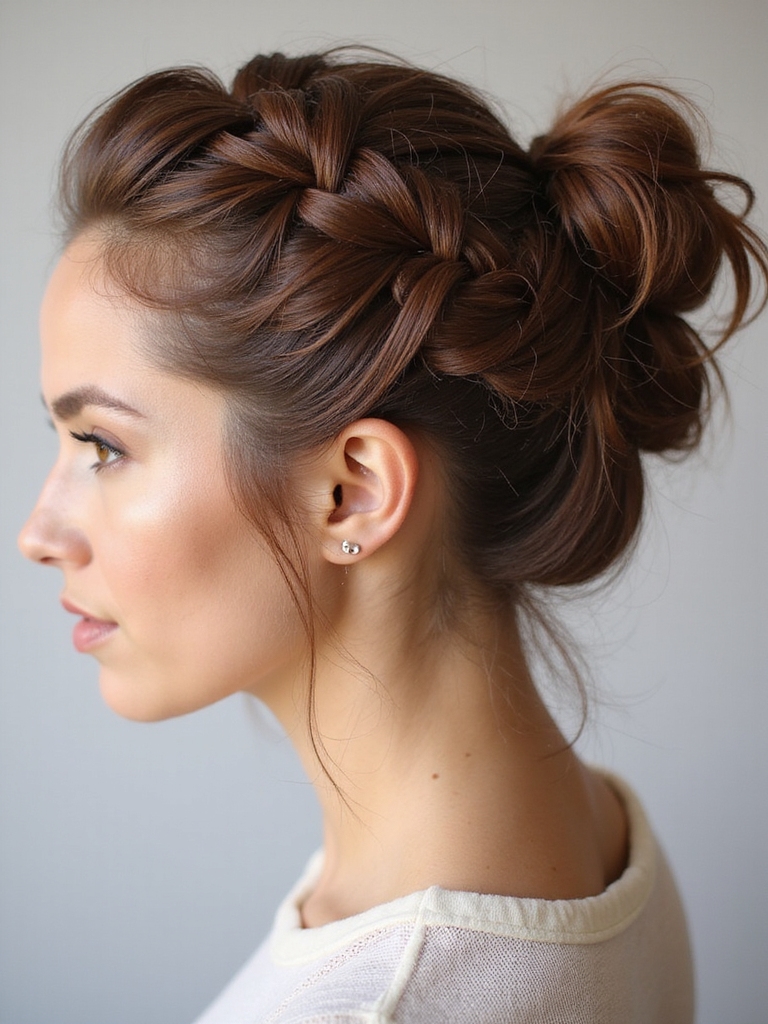
I’ll show you how to prep and section your hair so the fishtail starts smooth and holds all day.
Then we’ll braid each side into that tight, pretty fishtail and wrap it into a secure bun.
Don’t worry — I’ll share simple tips to keep it neat without looking stiff.
Prep and Sectioning
Although it sounds fancy, prepping for a fishtail braid bun is really simple, and I’ll walk you through it so you don’t feel intimidated.
I detangle, add texture spray, and decide placement. Sections should be clean but relaxed — nothing perfect.
Follow these quick steps:
- Brush and mist for grip.
- Split into neat top and bottom.
- Clip sections where you’ll braid.
Braiding Into a Bun
Now we’re ready to braid the top section into the fishtail that’ll become our bun — it’s easier than it looks, promise.
I split the section into two, take thin strands alternately, and keep tension steady.
I secure the braid, twist it into a low bun, and pin close to the head.
A few face-framing pieces loosen the look; hairspray finishes it.
Sleek Wrapped Ponytail

Envision this: I pull your long hair into a high, smooth ponytail, then wrap a glossy strand around the base so it looks effortlessly polished.
I chat while I secure it, keeping things sleek but playful. You’ll leave feeling chic and confident—quick, tidy, and totally wearable.
- Sleekness for polish
- Wrap for detail
- Fast for busy days
Boho Braided Messy Bun
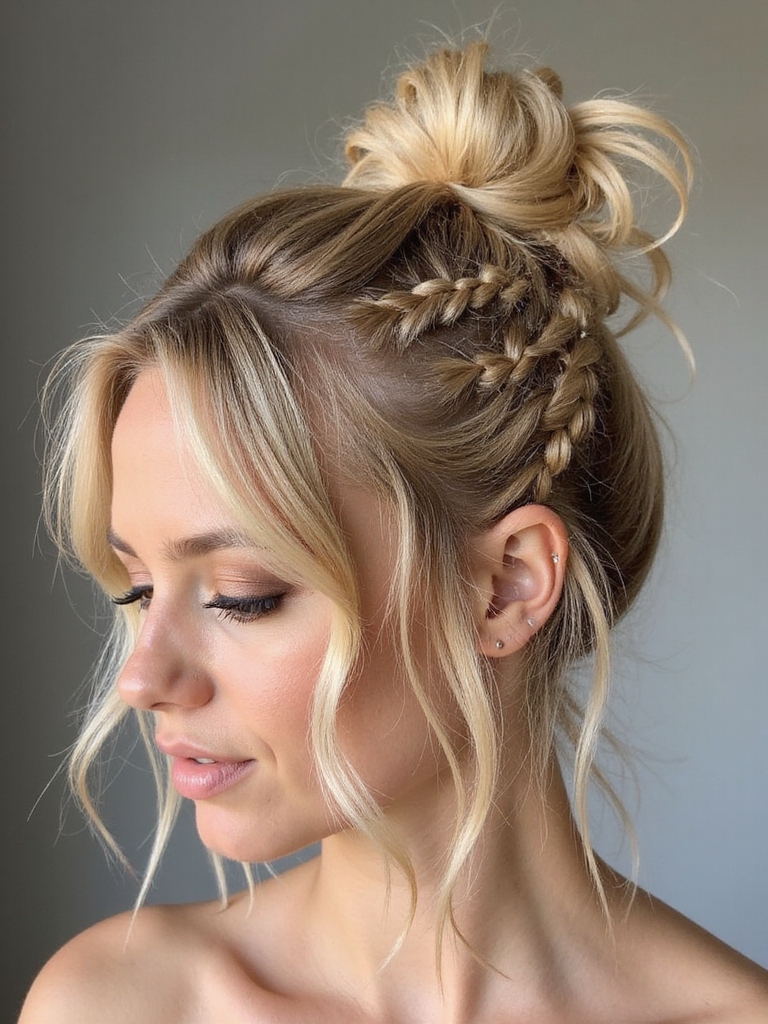
If you liked the sleek ponytail for polished days, let me show you something more relaxed: a boho braided messy bun that feels like a weekend escape.
I braid a loose section, tease a few face-framing pieces, twist everything into a soft, undone bun and secure with pins. It’s forgiving, romantic, and quick — perfect when you want chic without trying too hard.
You’ve got so many easy, chic options for your long hair—whether you want sleek polish or carefree texture. Try a low twisted bun for weddings, a messy topknot for weekends, or a braided chignon when you want something romantic.
Keep a texturizer and a few pins handy, pull a few face‑framing pieces, and you’ll be amazed how quickly you look put together. Play, experiment, and wear whatever makes you feel confident and effortless.